Established 1984
The North 80 Foot Repeater Tower
Cranking the tower down & taking it all apart for repairs...
August - 2010
Either safely & gracefully, or in a pile of twisted wreckage...
...The tower is coming down today!
This group of photos were taken in on Saturday August 14th 2010 @ 10:00 AM as my father and I prepared to lowered the repeater tower down to the ground so we could replace the rusted out mounts and upgrade all the antennas.
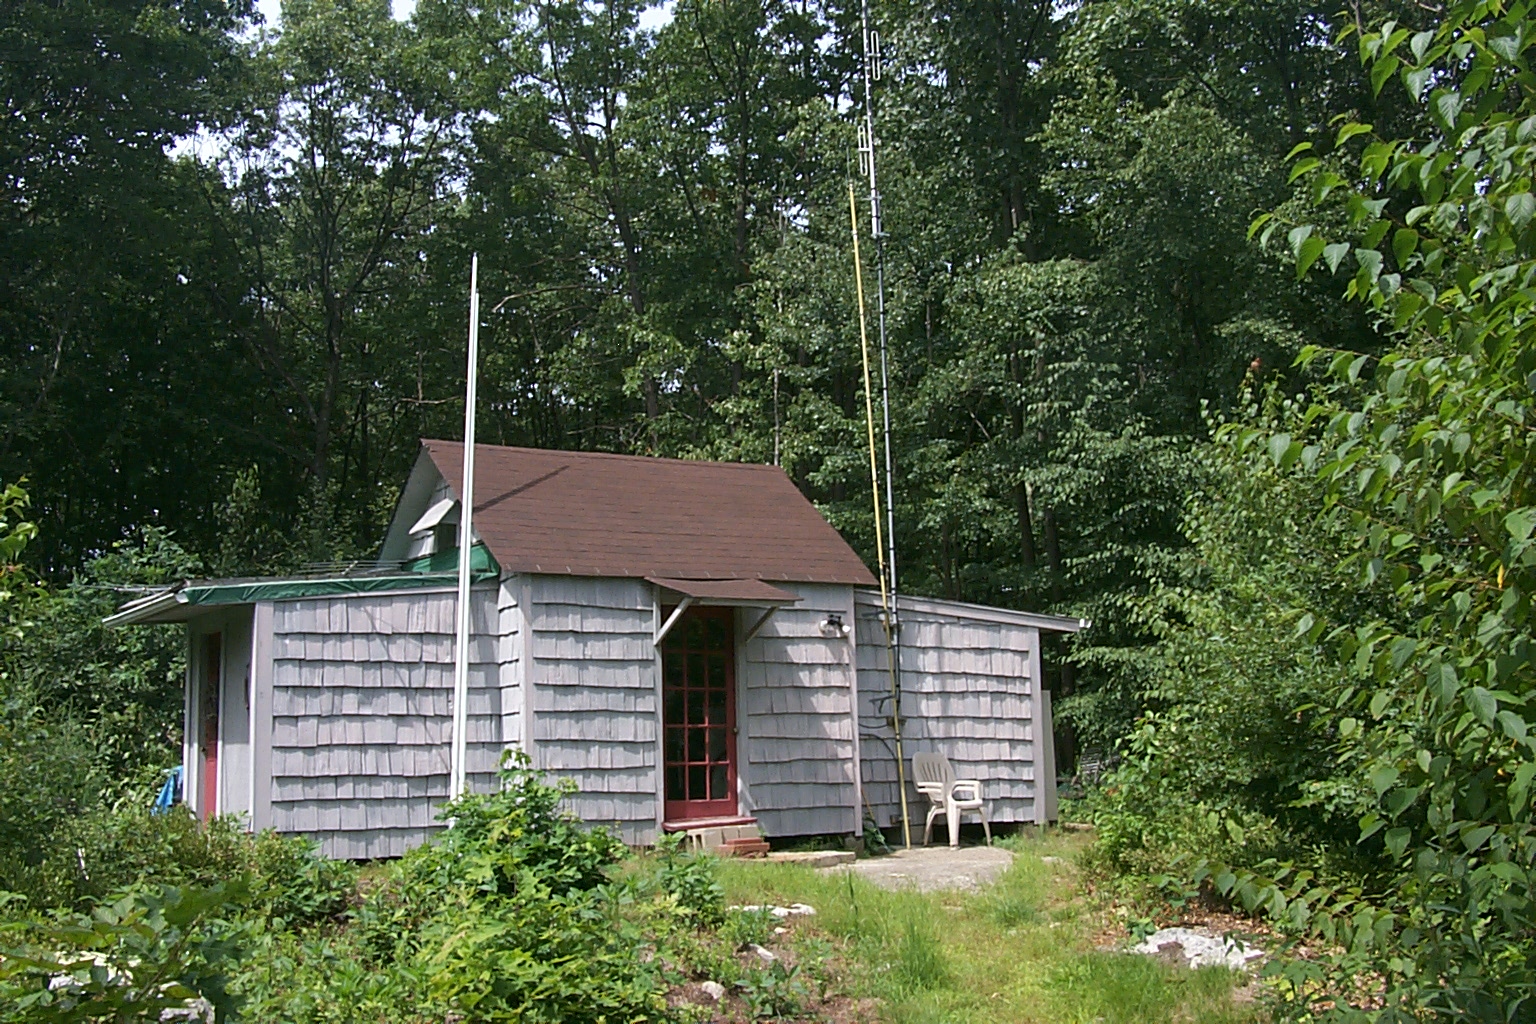
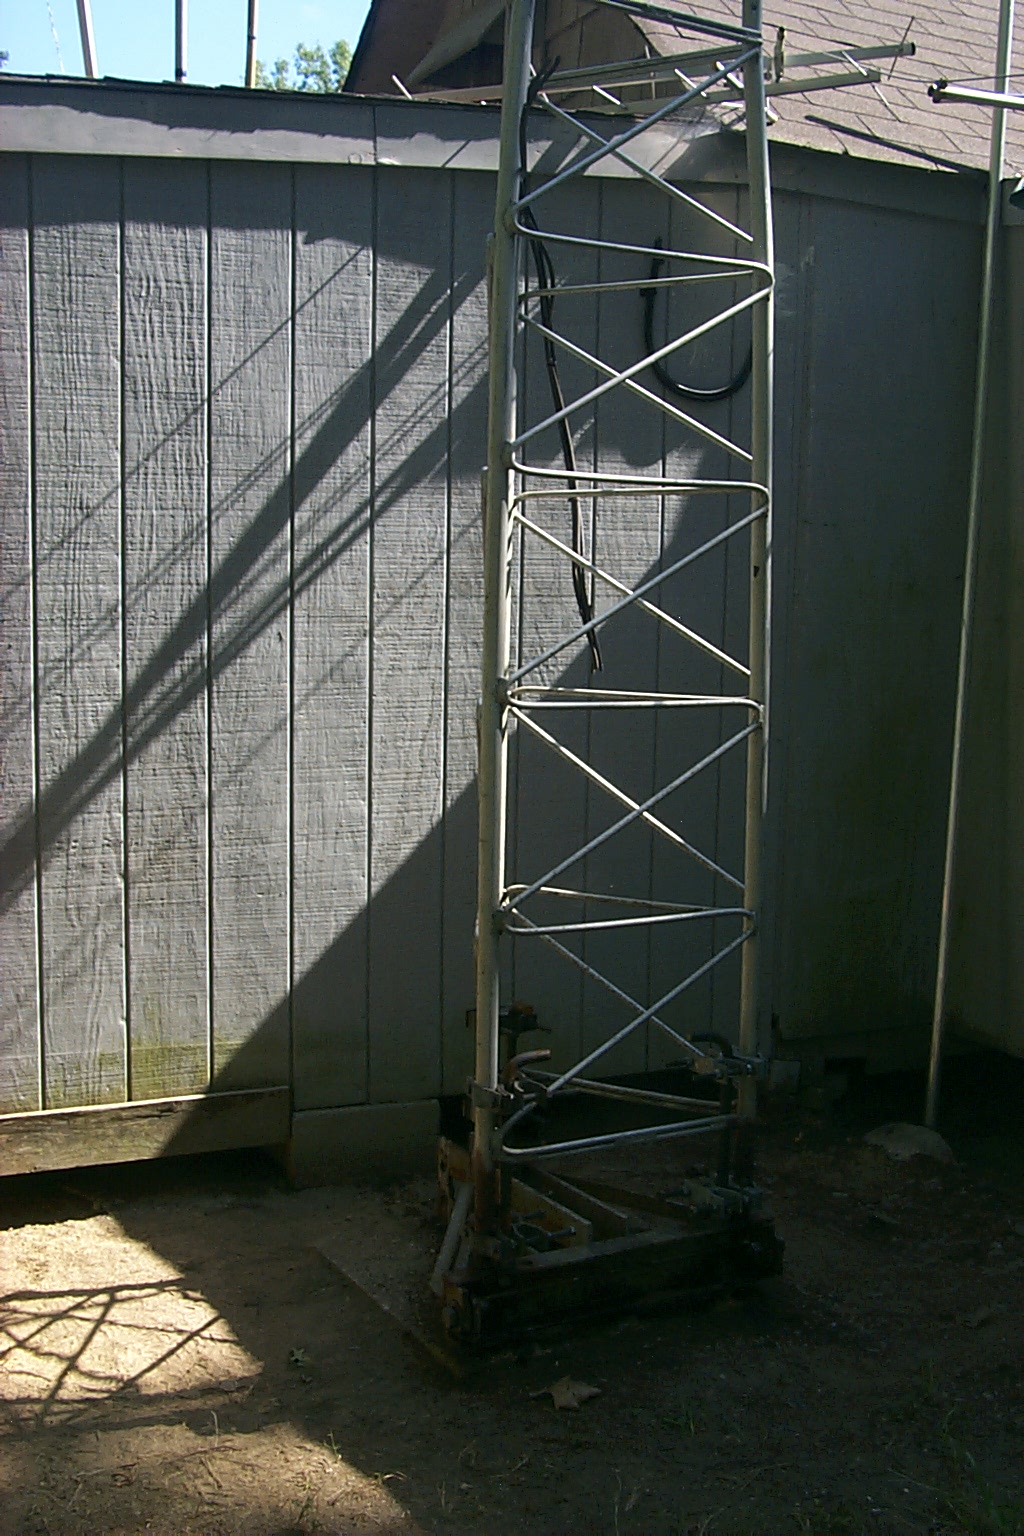
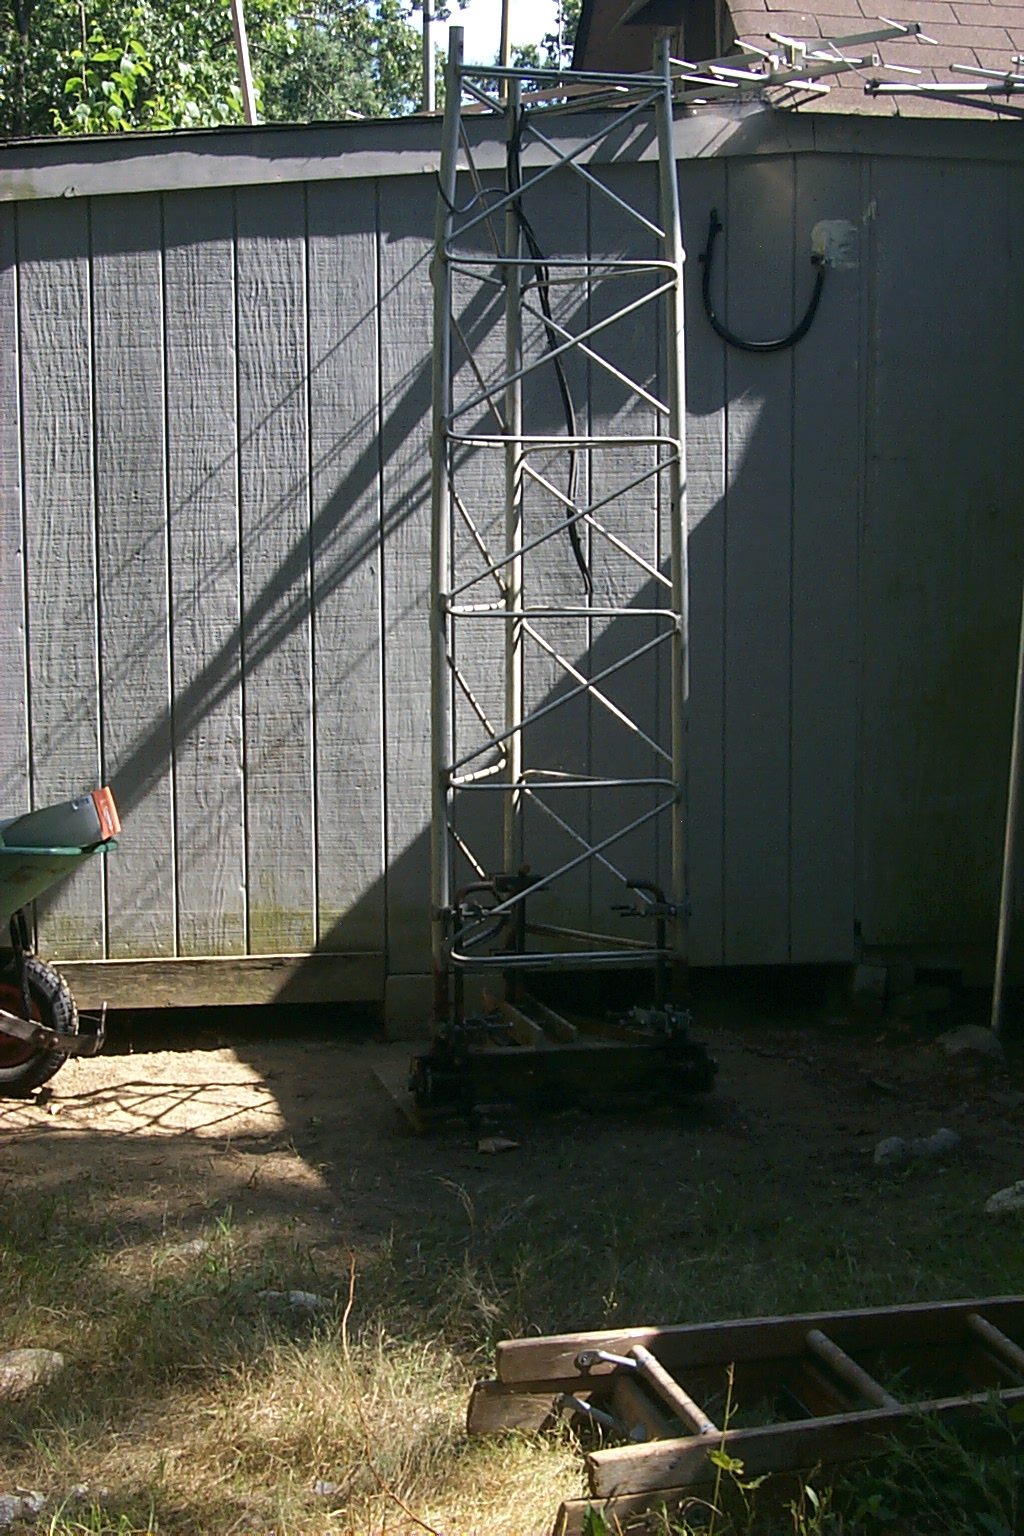
One last look at the tower standing upright as it has been for the past 17 years...

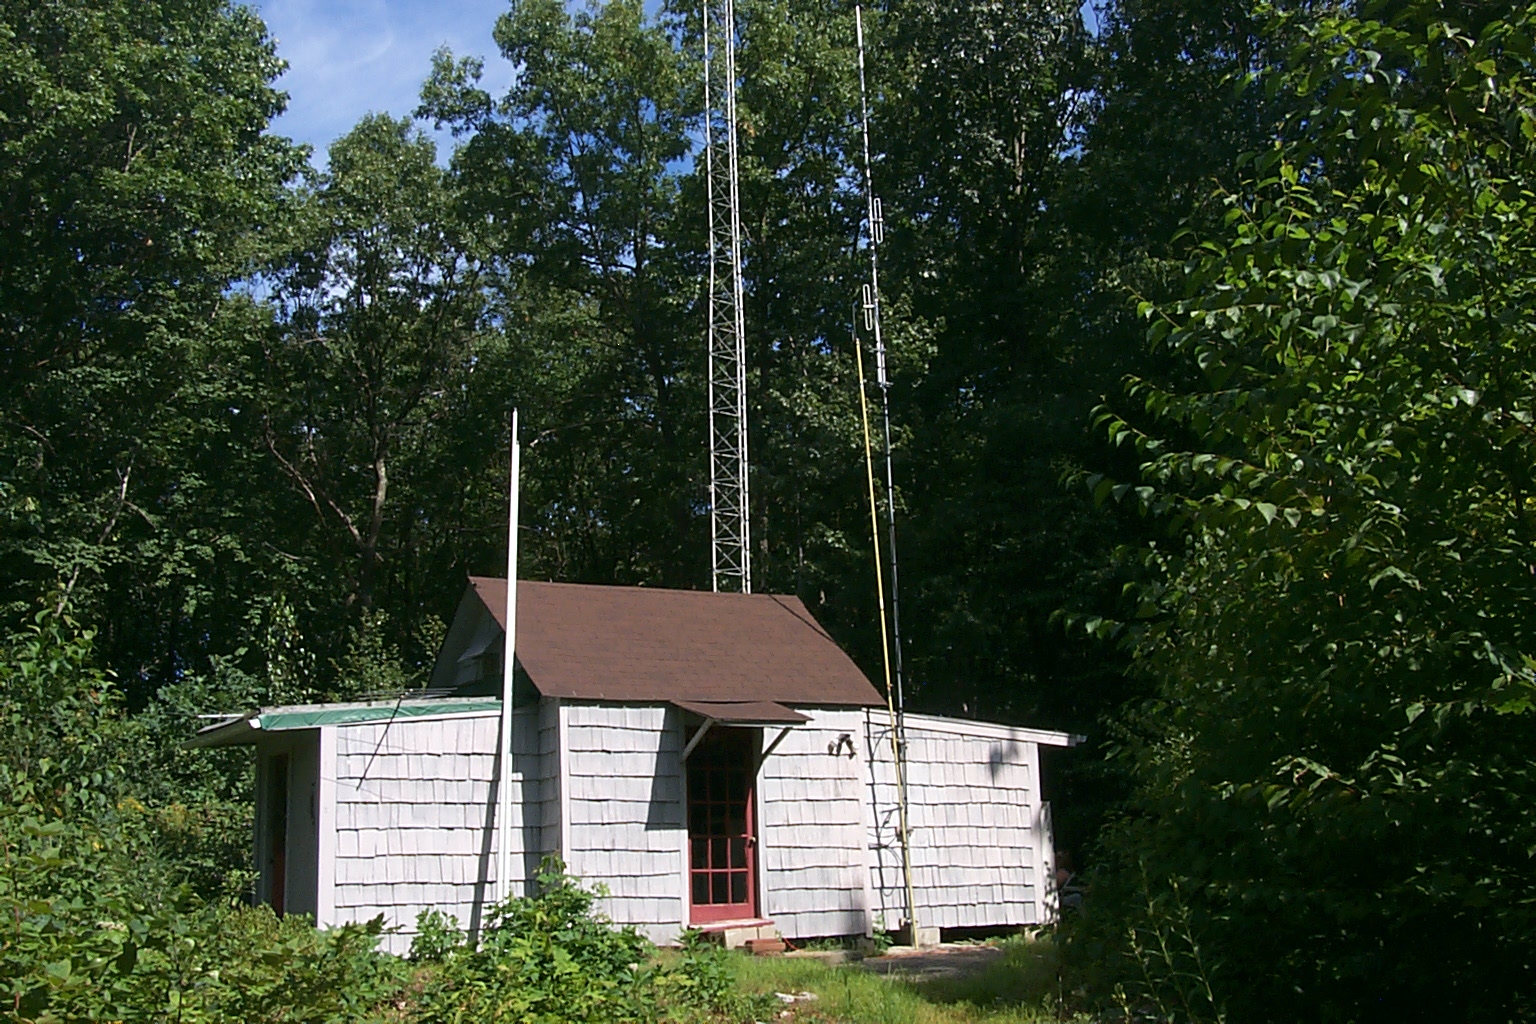
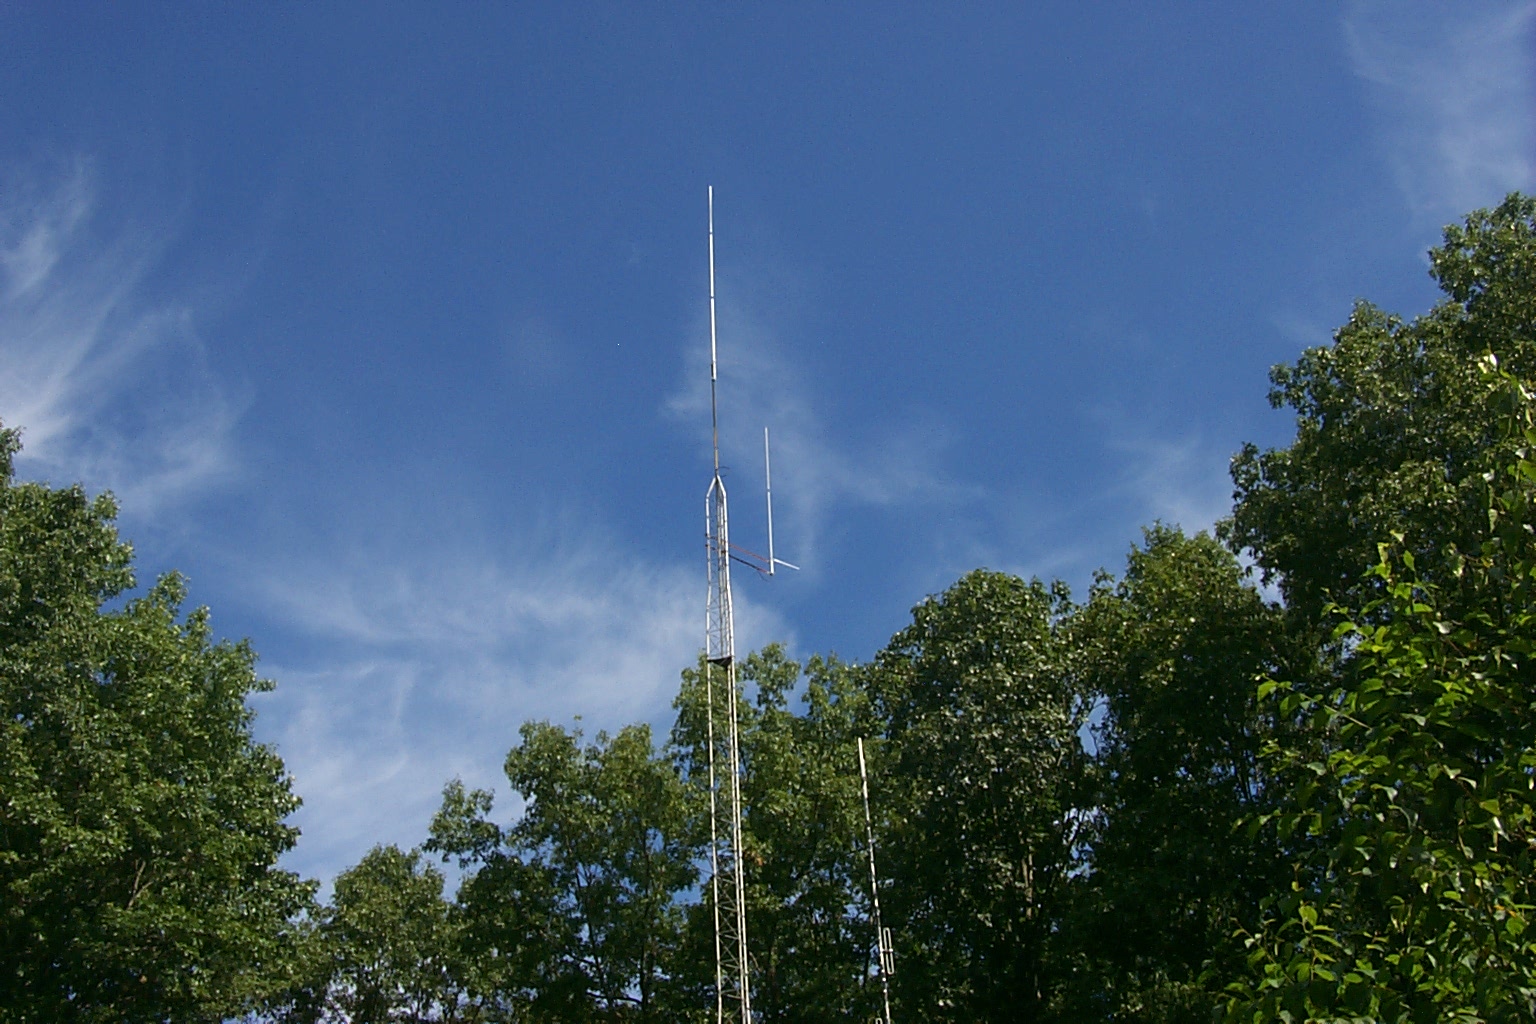
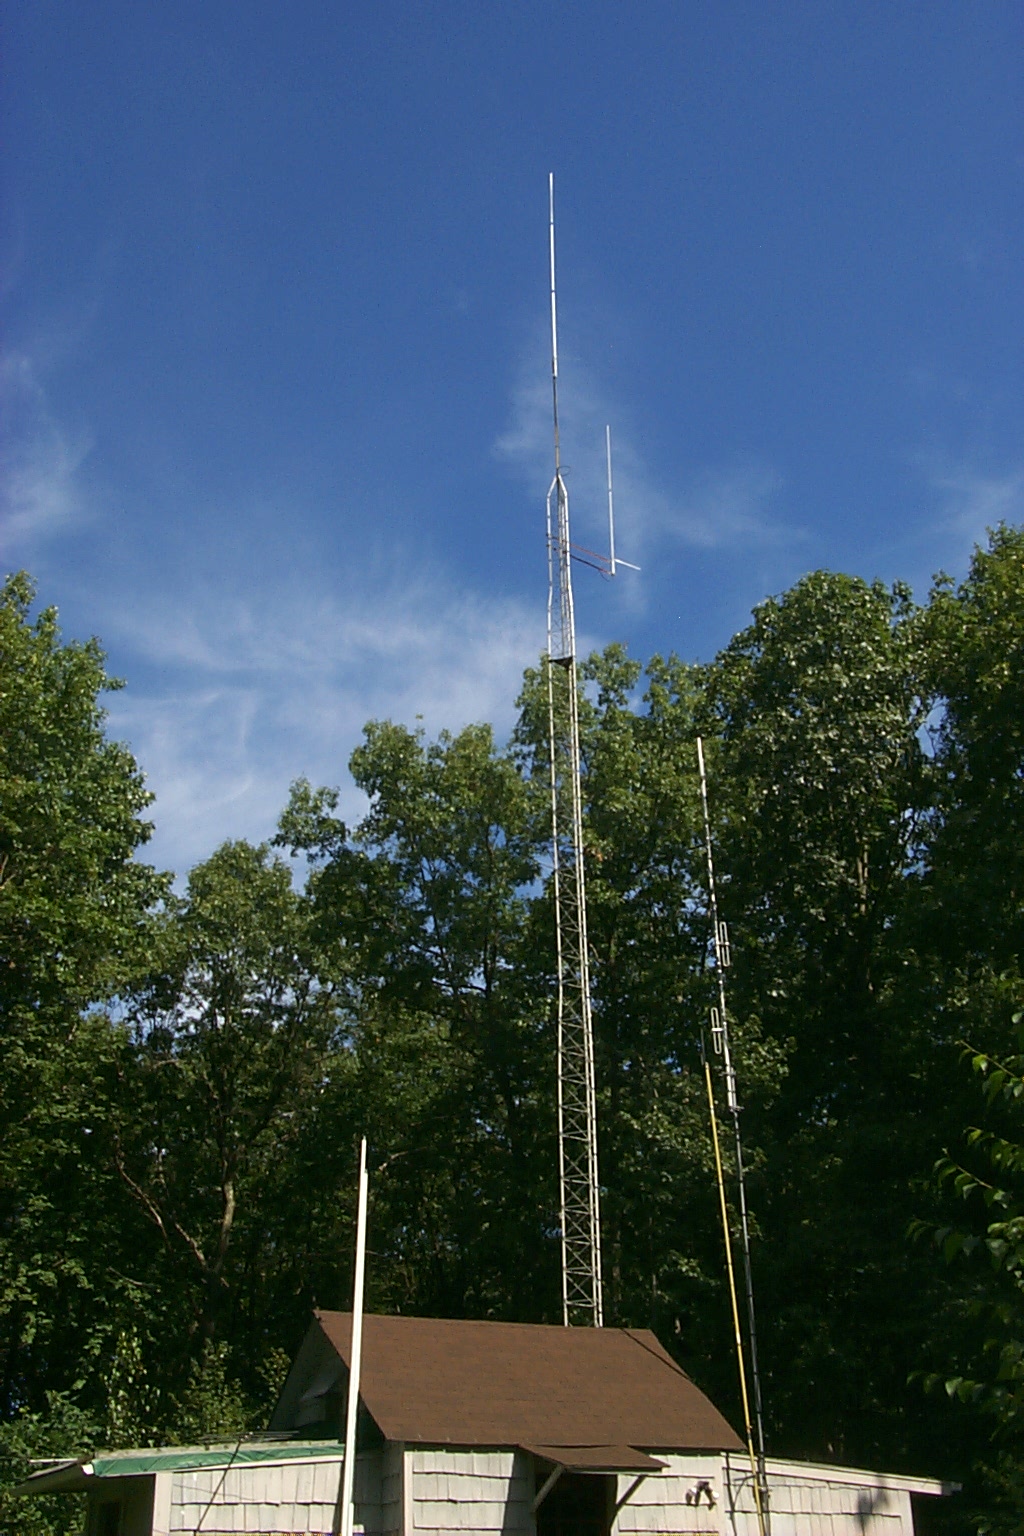
(click on images to enlarge)
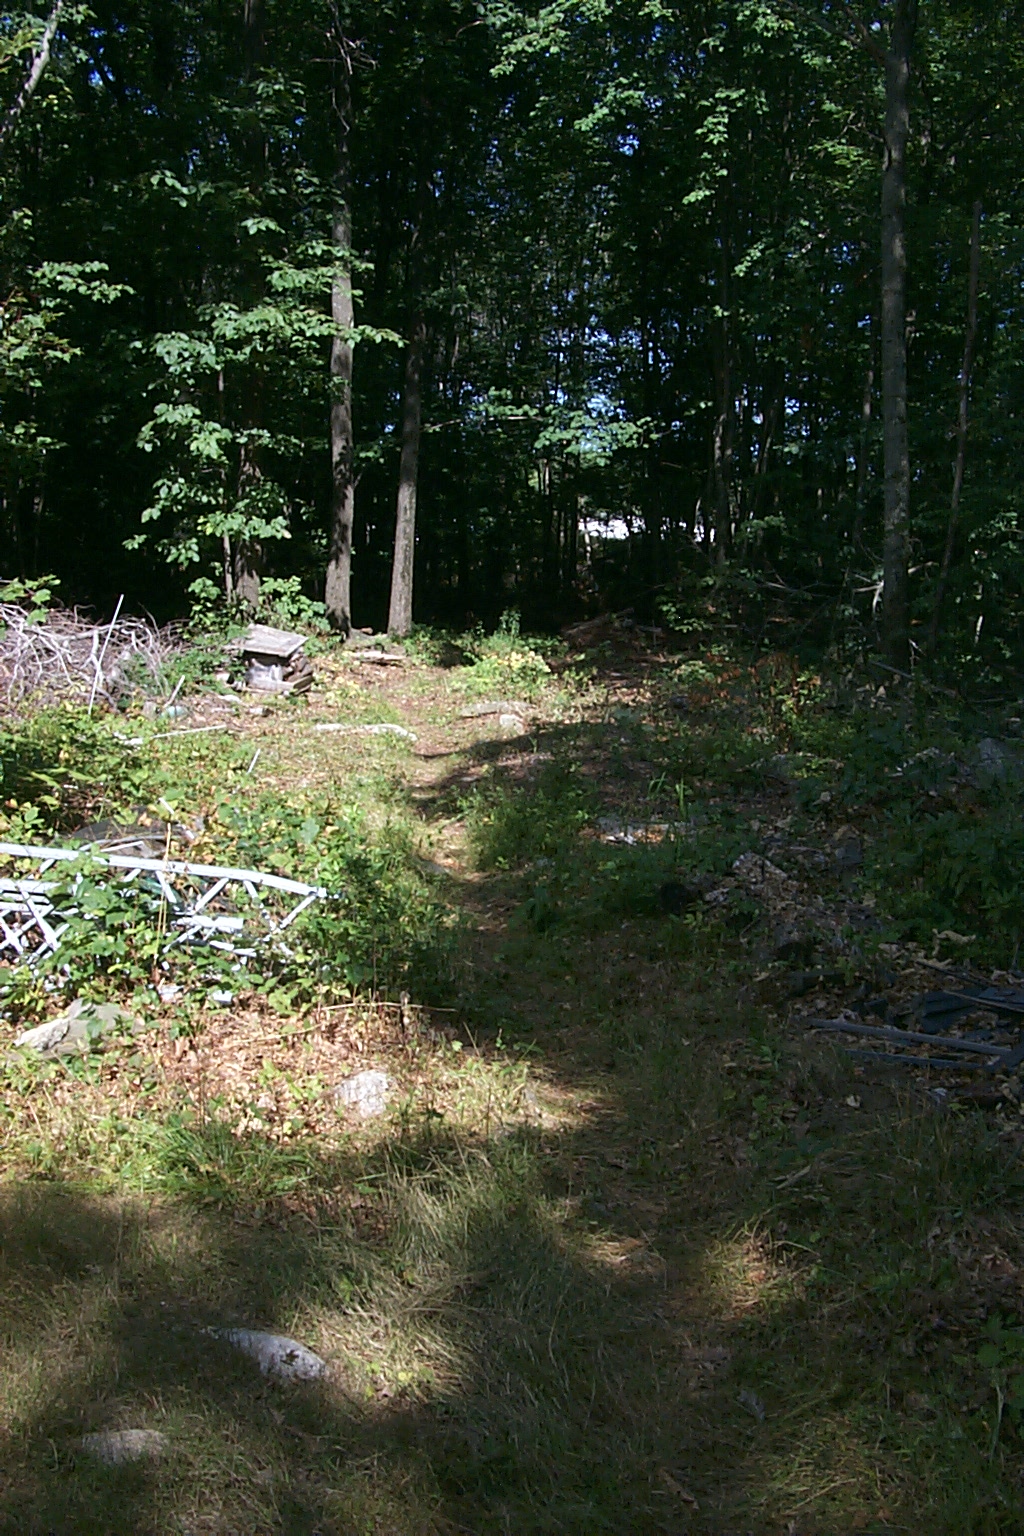
These two photos show the area in the back woods and around the tower base all cleared for our fun and excitement...
... Bill KA1VKD (my father) was proudly telling anyone that would listen, and showing them the blistering proof, that he spent last weekend clearing out all the "Poison Ivy" in woods!
(click on images to enlarge)
Dad and I have been working for two hours getting all the rusty bolts loose when we just managed to get the last bracket on the back of the hinged base plate off. This was the last part of the hinge base that was holding the tower in place and it had to be removed so I could mount the long screw drive on the two half's of the hinged base to lower the tower.
I was hitting the rusted bolts with a sledge hammer trying to drive them out of the top and bottom hinged sections while Dad was jumping up and down on a crow bar wedged into the hinged base. The weight and pressure of the tower pressing down on these two bolts was making them hard to remove.
So you have to picture my father using all his weight, jumping on the crow bar, to lift the tower just a little to relieve some of the pressure on the bolts. Then faster than you can imagine, when the last both broke free, the tower almost fell over!
I had my head down, looking at the bolts on the base plates, when Dad shouted out...
... She's going over!
My father was able to jump up onto the tower and hang off the back with all his weight stopping it from free falling to the ground. He was hanging off the tower effectively becoming a counter balance keeping the tower up!
While he held the tower upright I quickly installed the long screw drive that secured the hinged base. That was a close call, for a few moments it was very tense, and I split my jeans wide open too! I was laying on the ground in the dirt, installing the cross bolts that go through the hinged base into the hung nuts on the screw drive while Dad was holding the tower up and laughing at my back side sticking out of my jeans!
Once we had the long screw drive mounted to the top and bottom sections of the hinged base plates the tower was secure again and we could take a break... After two hours in the hot sun Dad needed some water, and I needed a new pair of pants. We took a brief rest and got back to work about 12:45 PM.
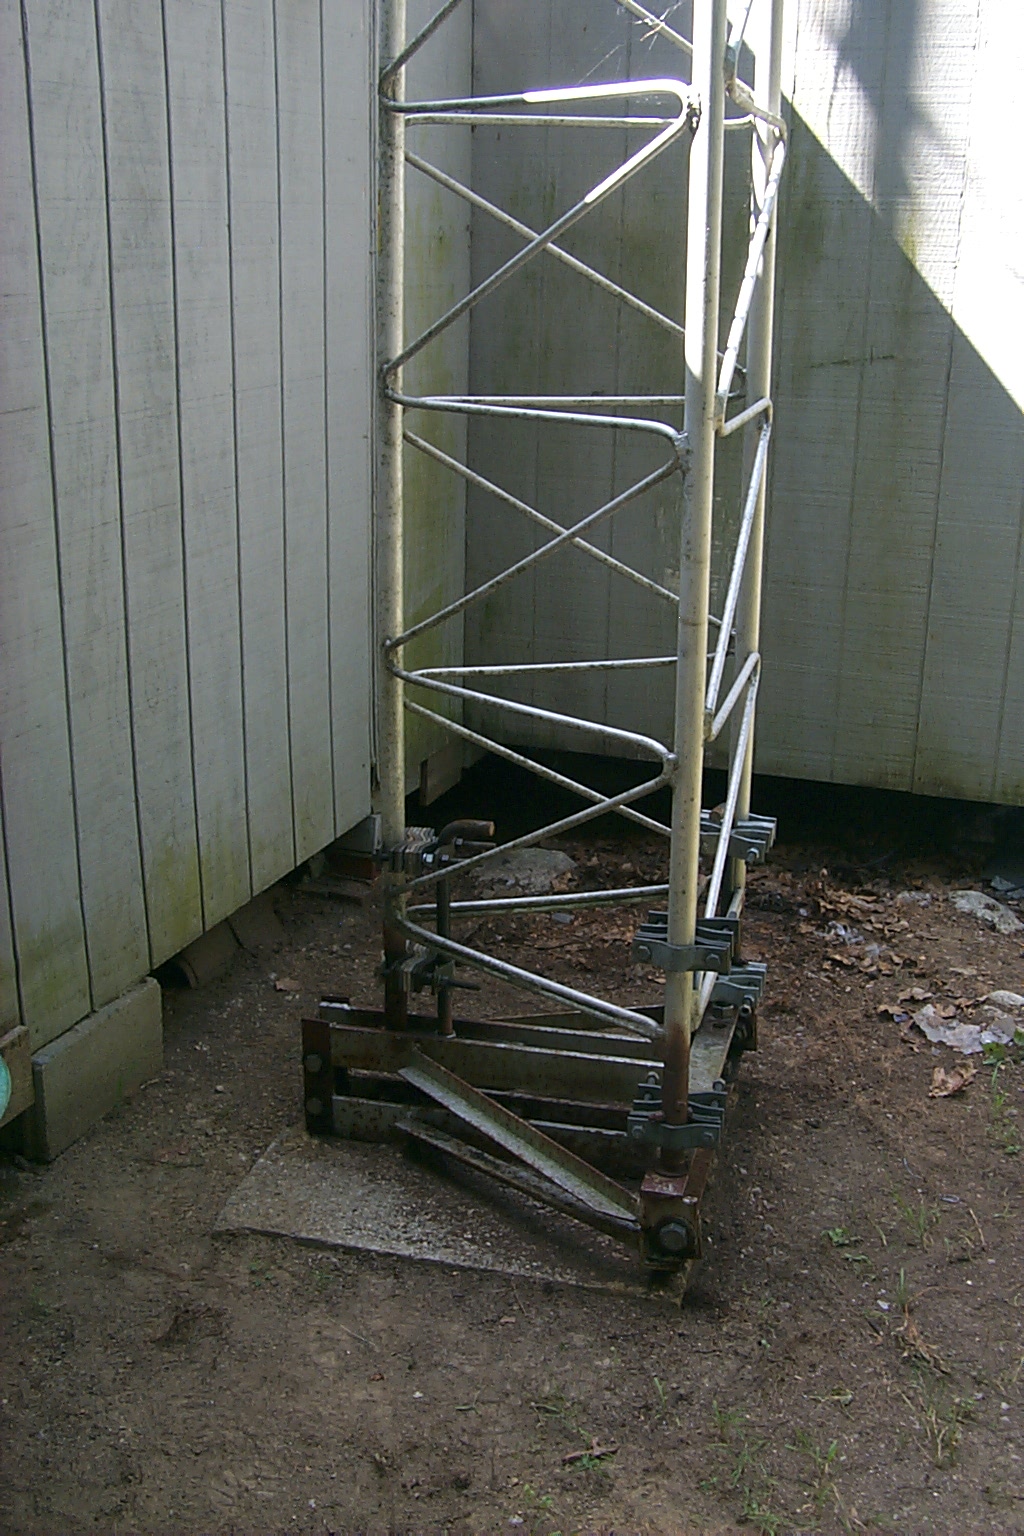
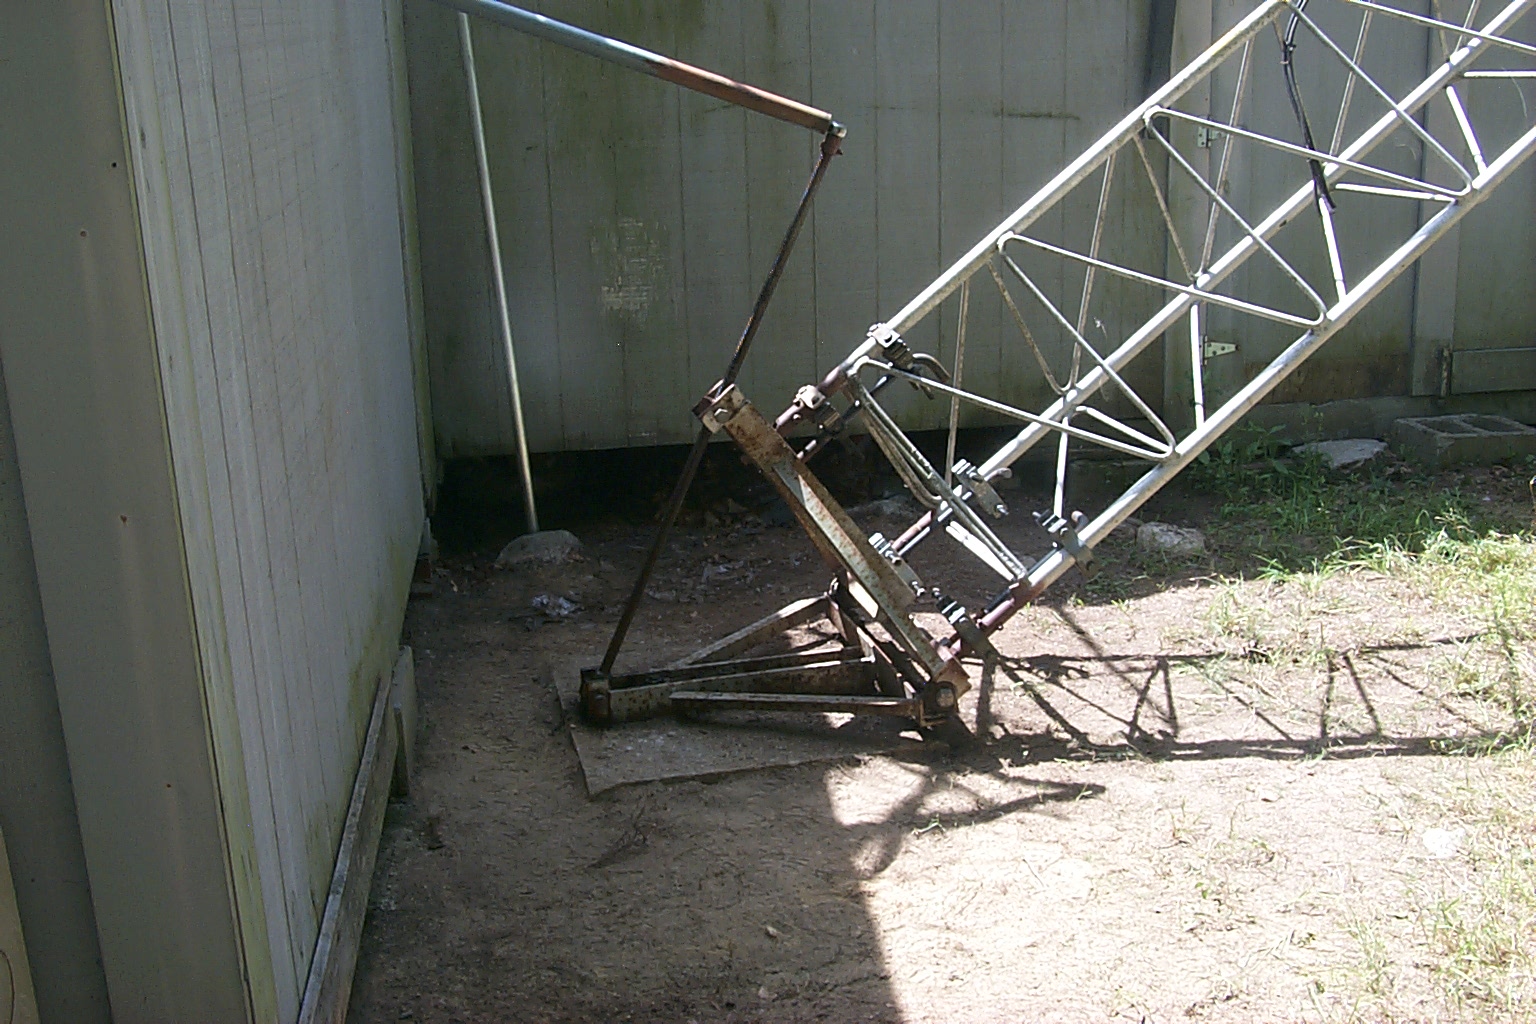
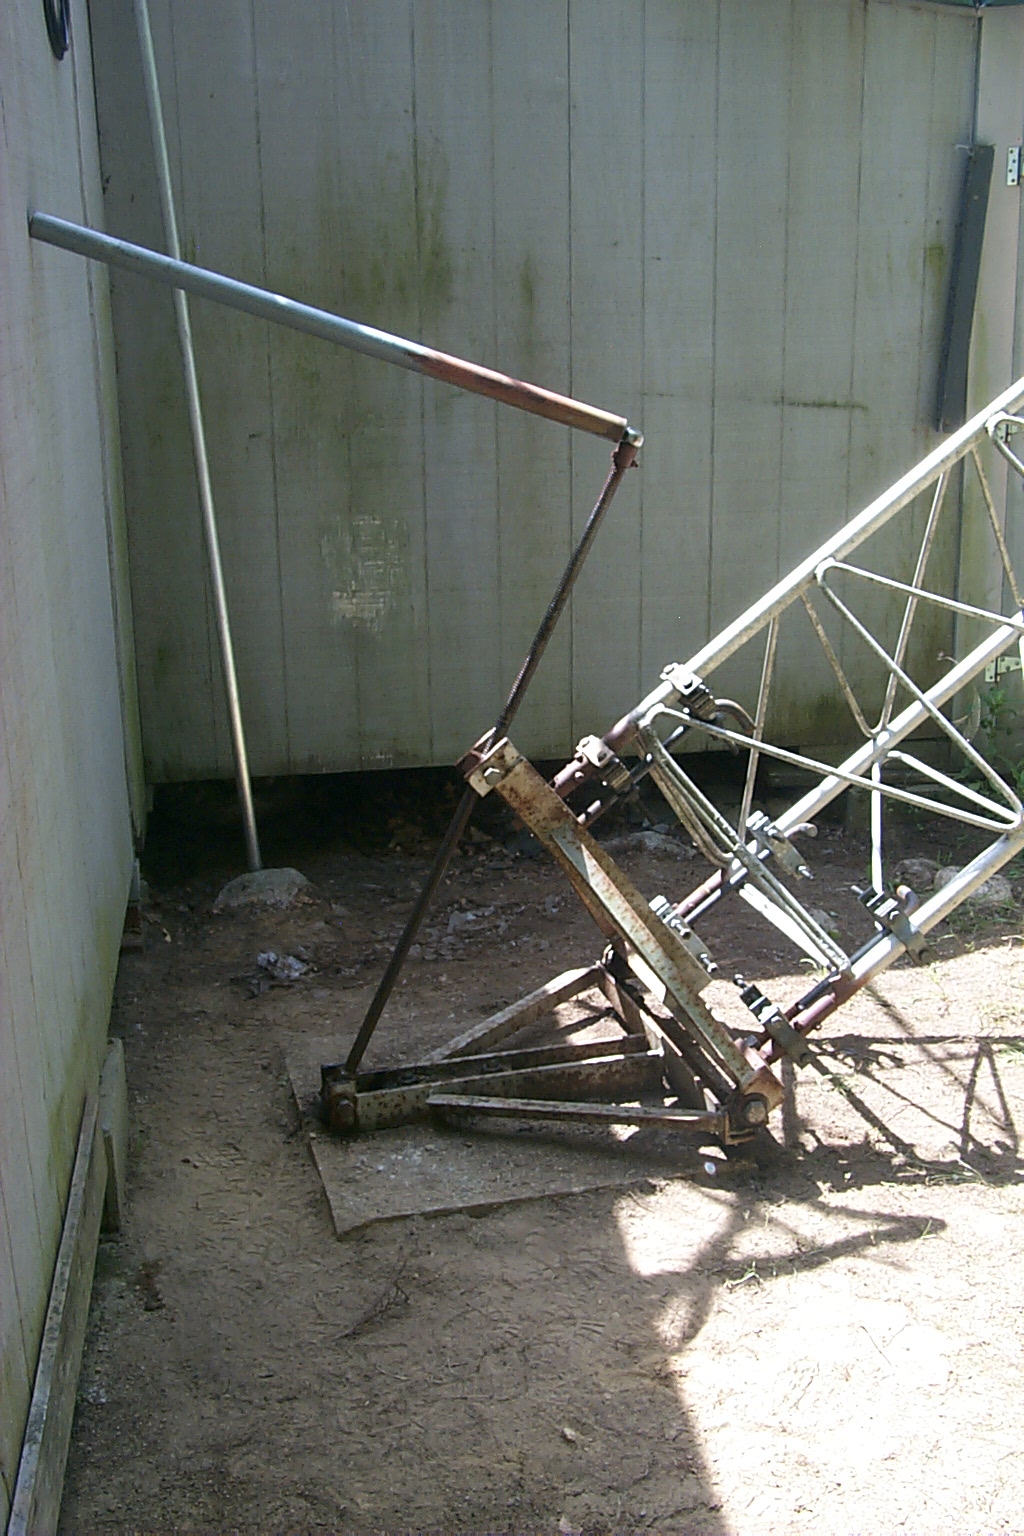
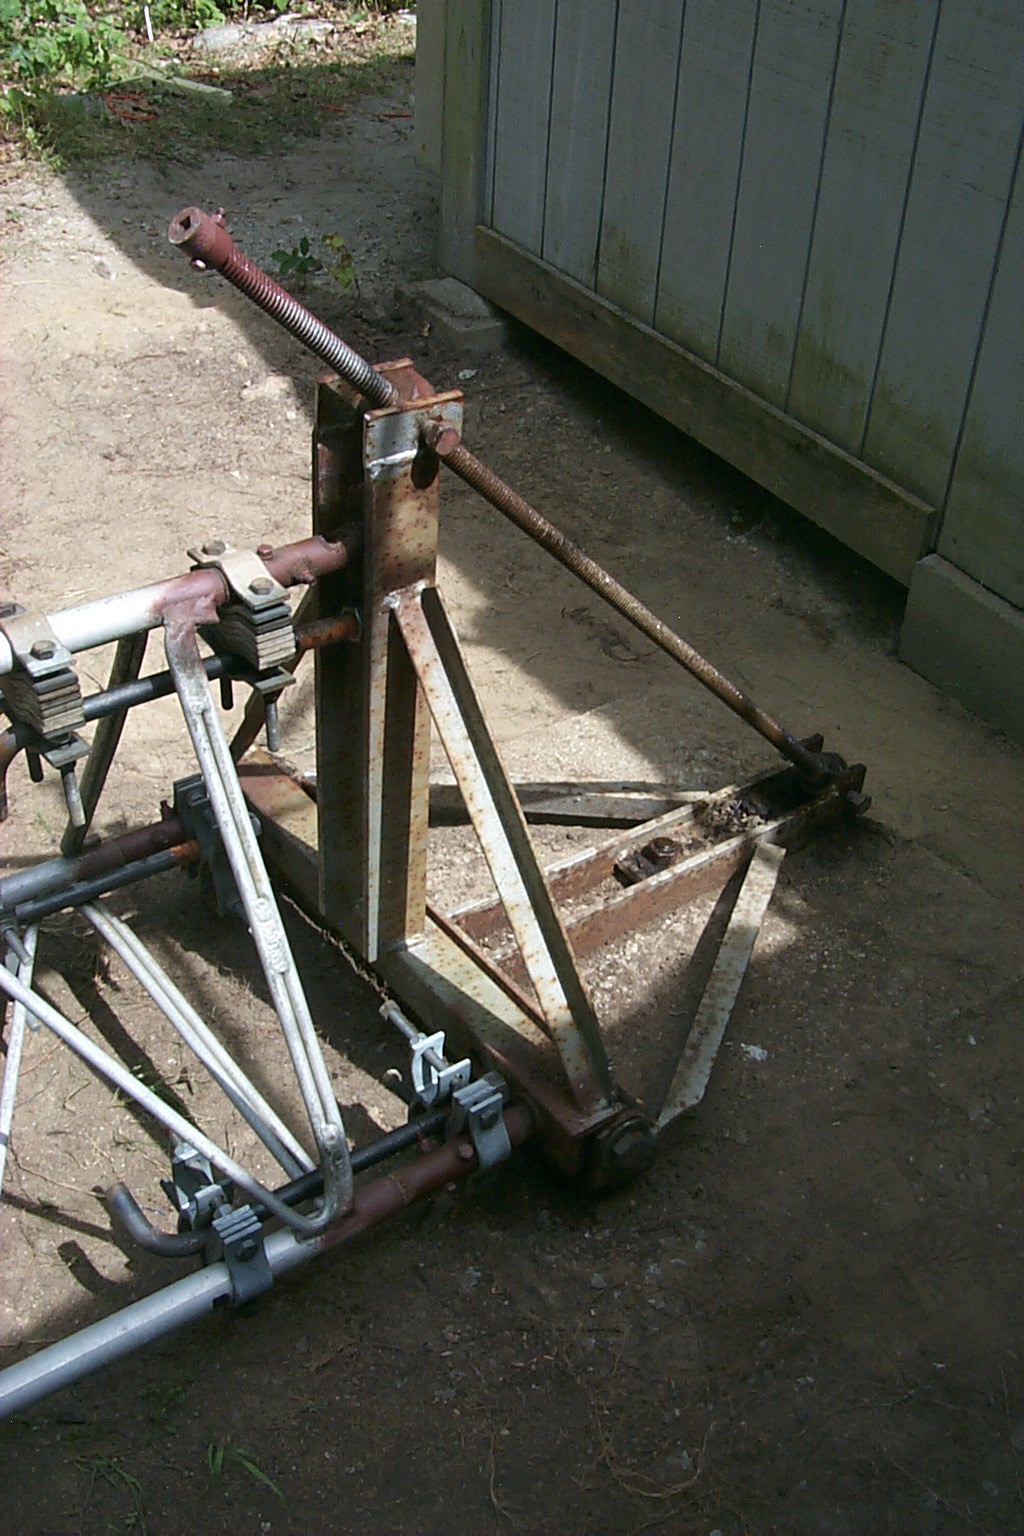
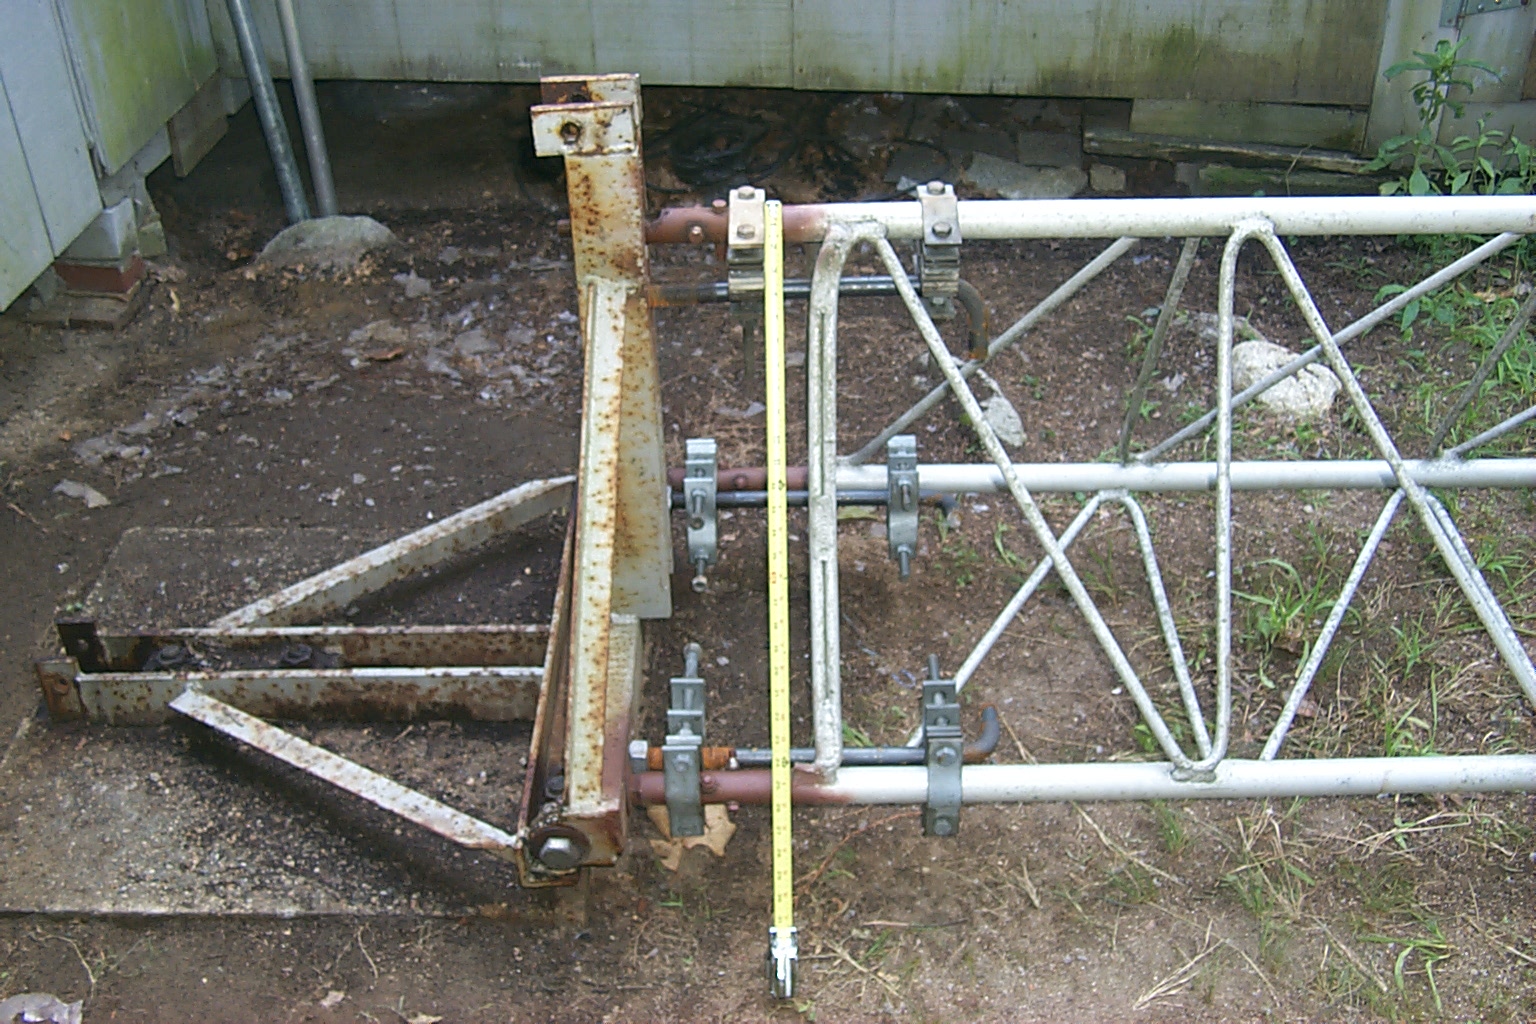
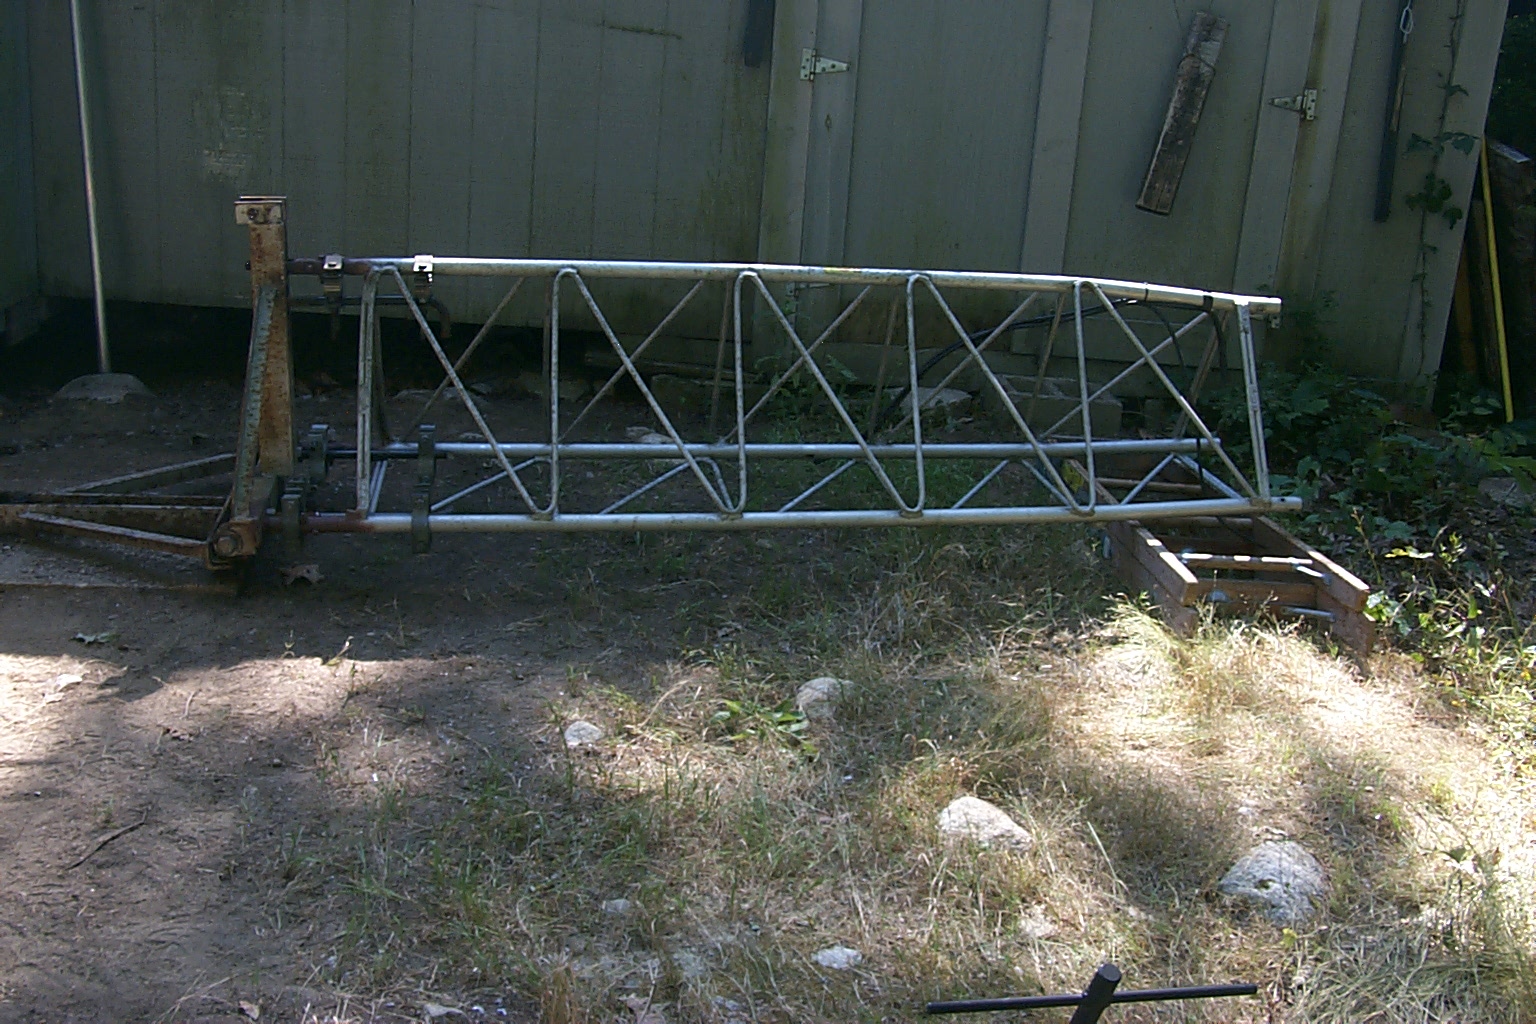
In this group of photos you can see the long screw drive in place and the tower finally ready to be cranked down.

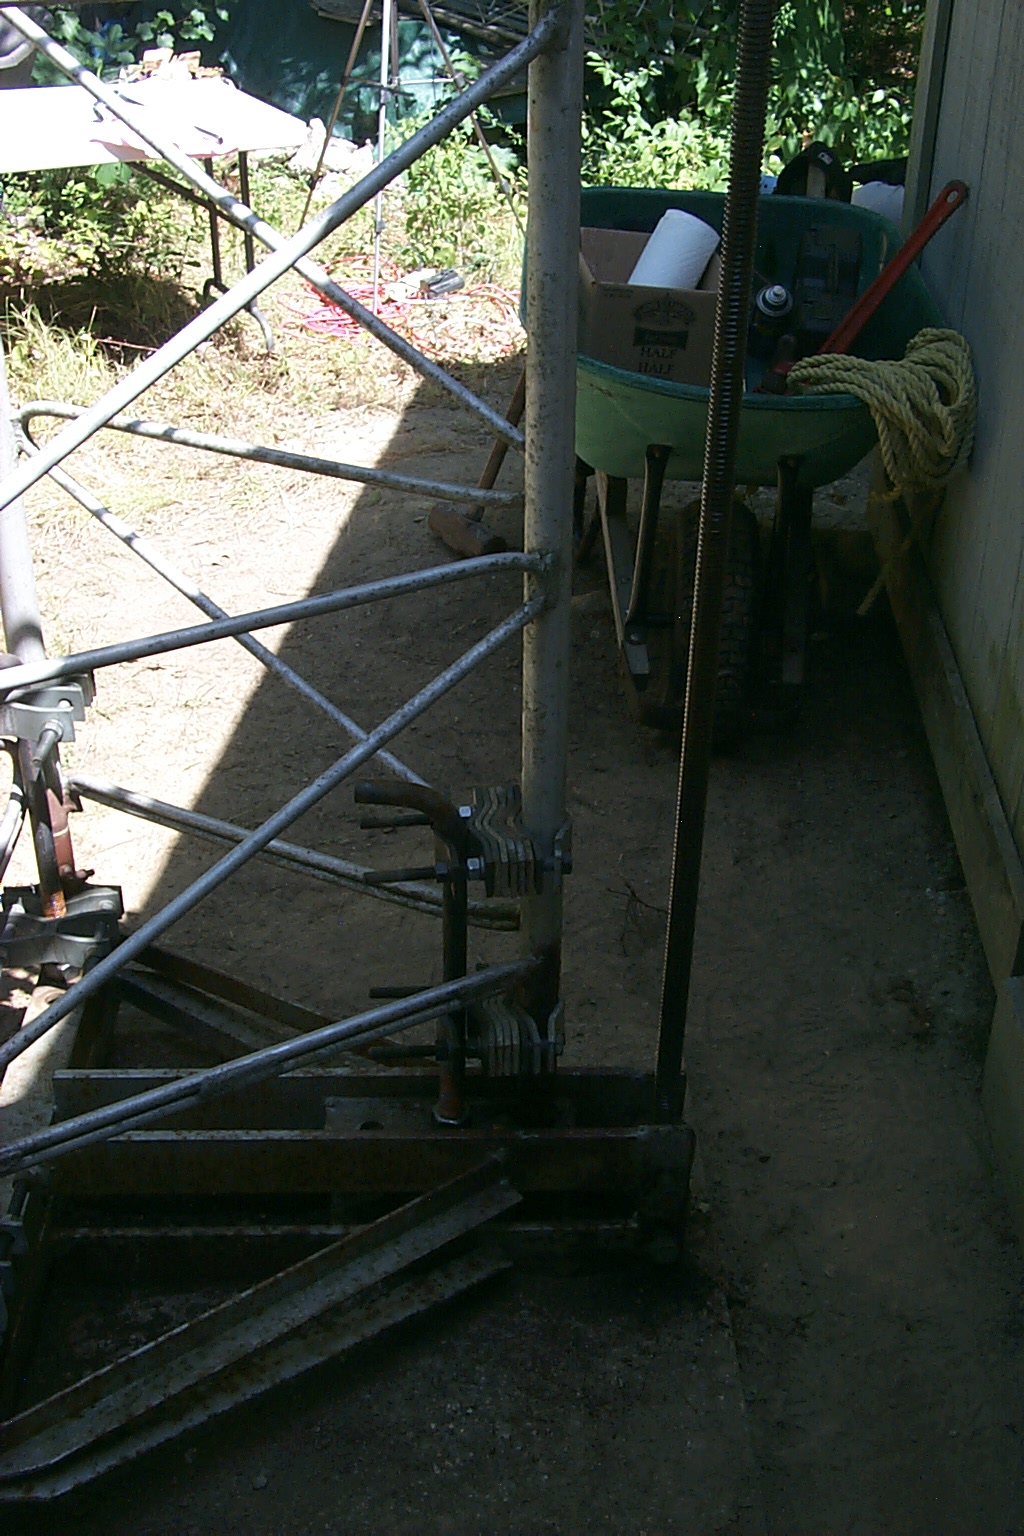
(click on images to enlarge)
Now it was just a matter of sheer effort, you have to slowly turn the long screw drive which swings the two half's of the hinged base plate away from each other tilting the the tower down to the ground. I started with my grandfathers 1/2 inch speed wrench and while there was little pressure on the screw drive it was easy to turn.
Then as it got harder to turn I switch to grandpa's ratchet wrench and eventually needed to use a long pipe on the wrench to get enough leverage to turn the screw drive.

(click on images to enlarge)
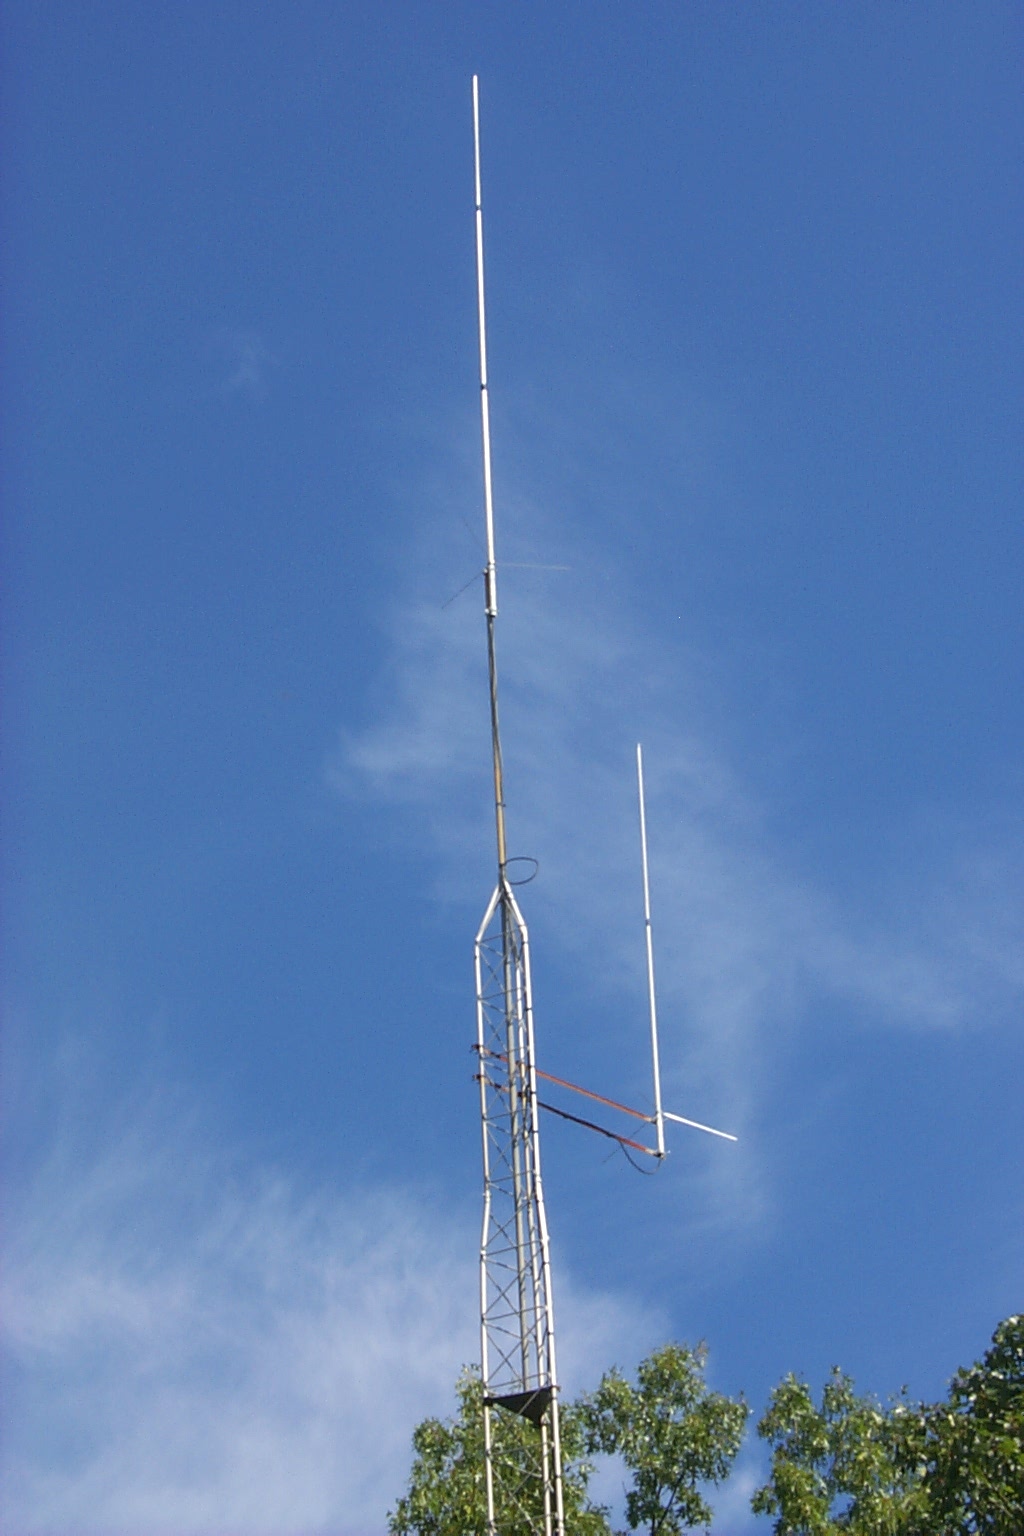
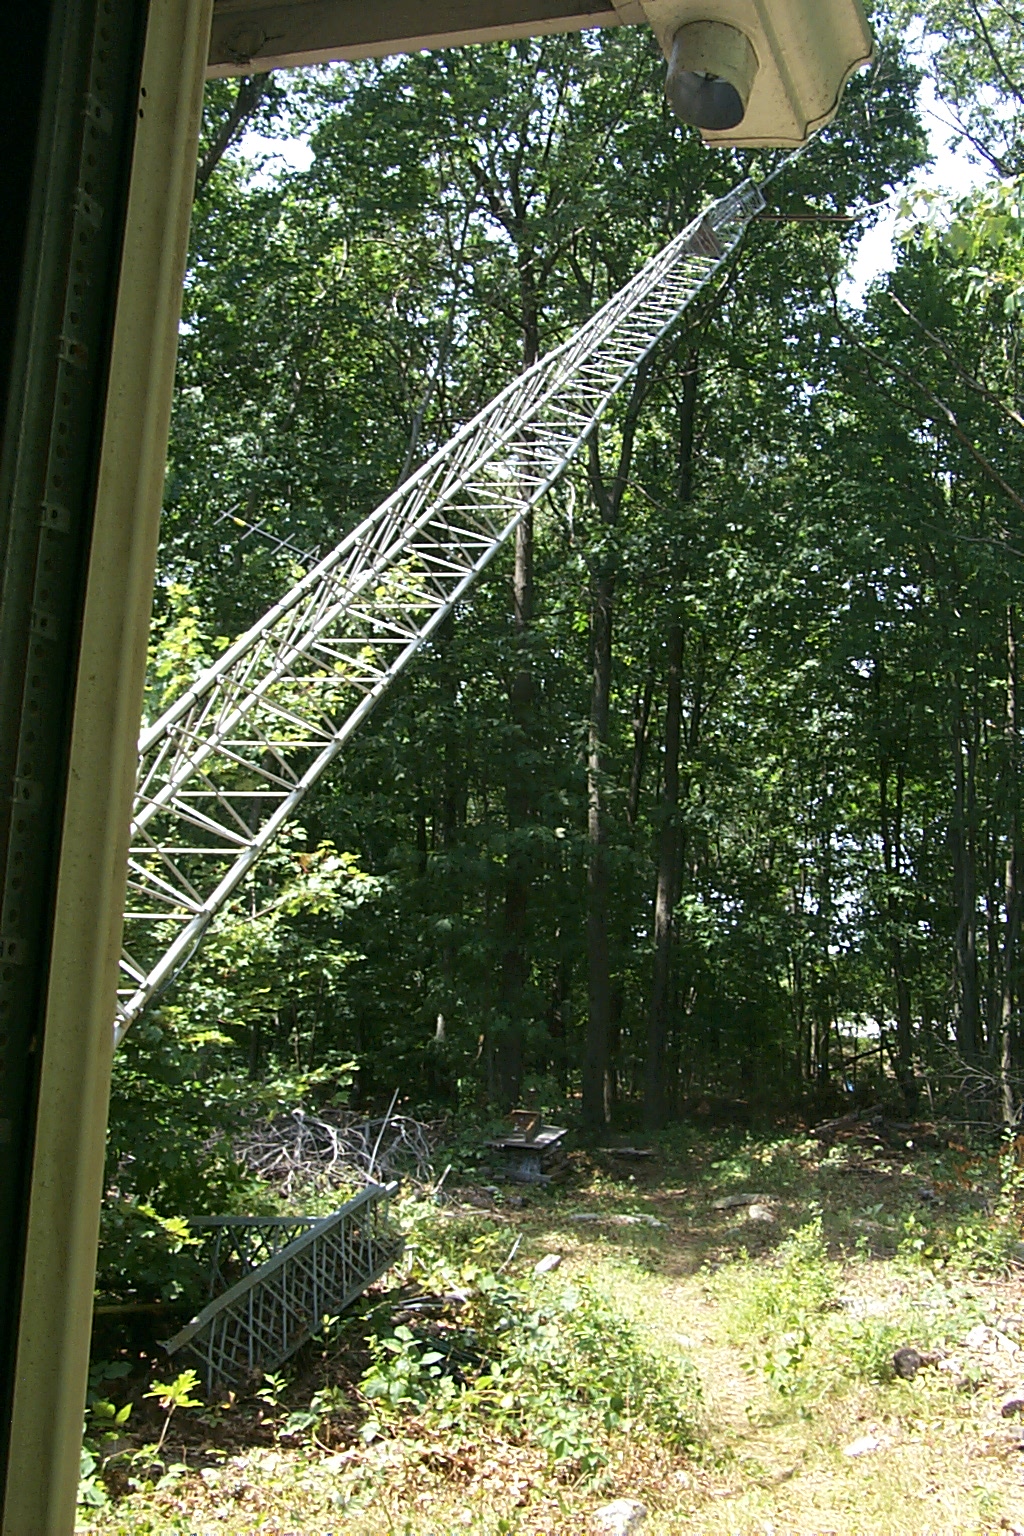
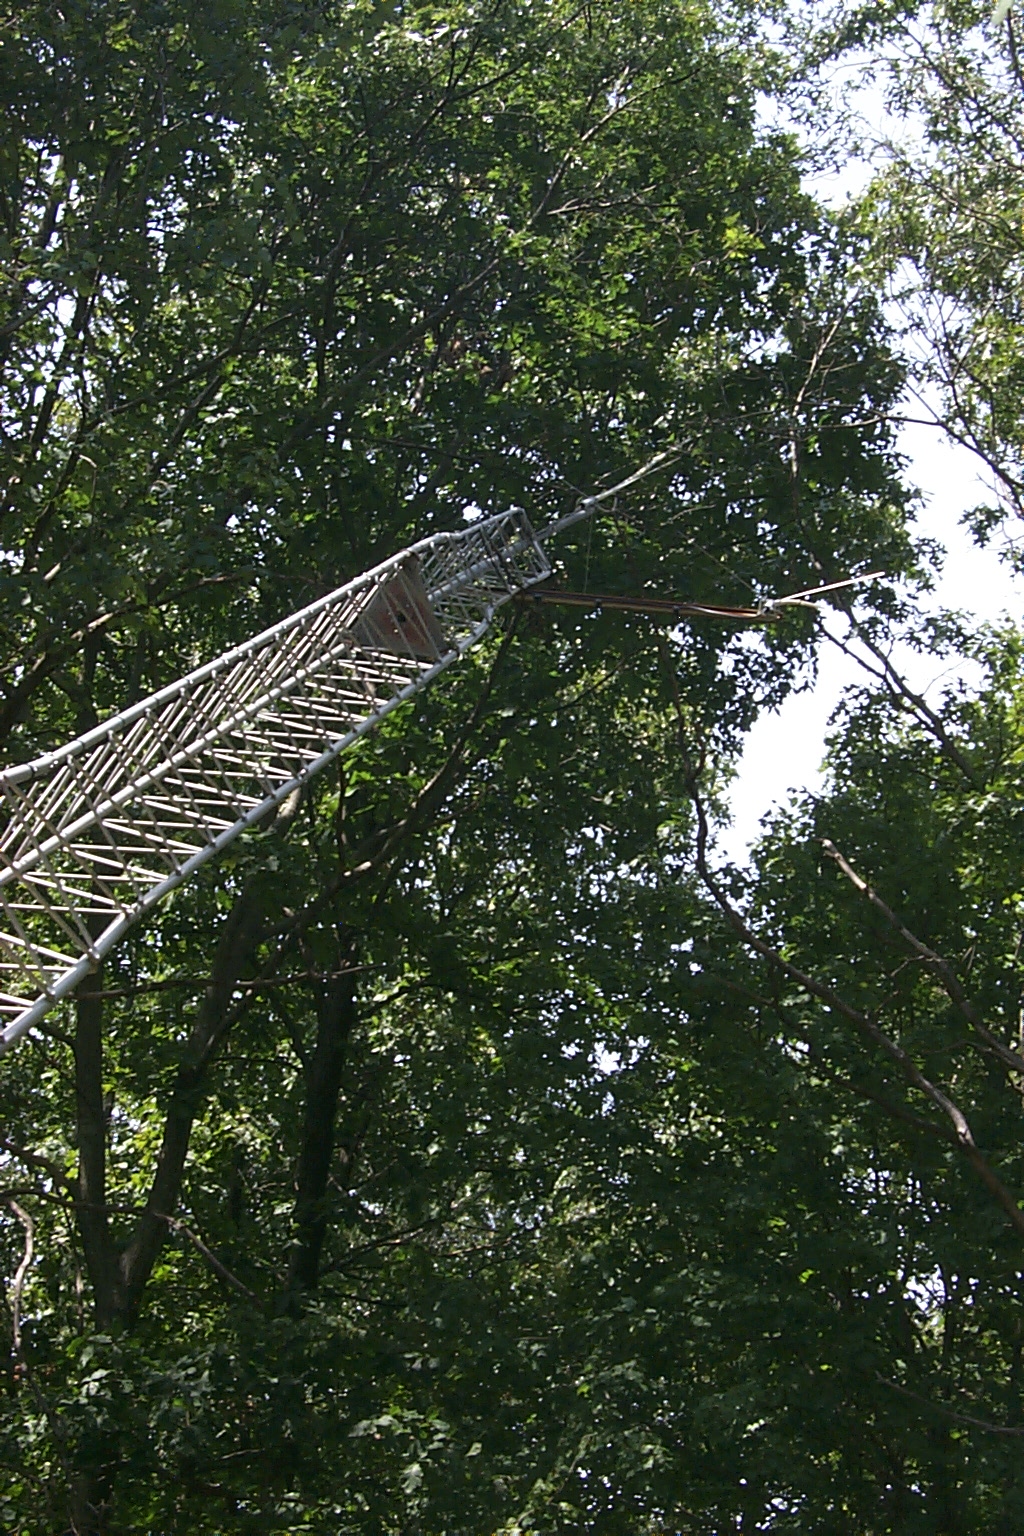
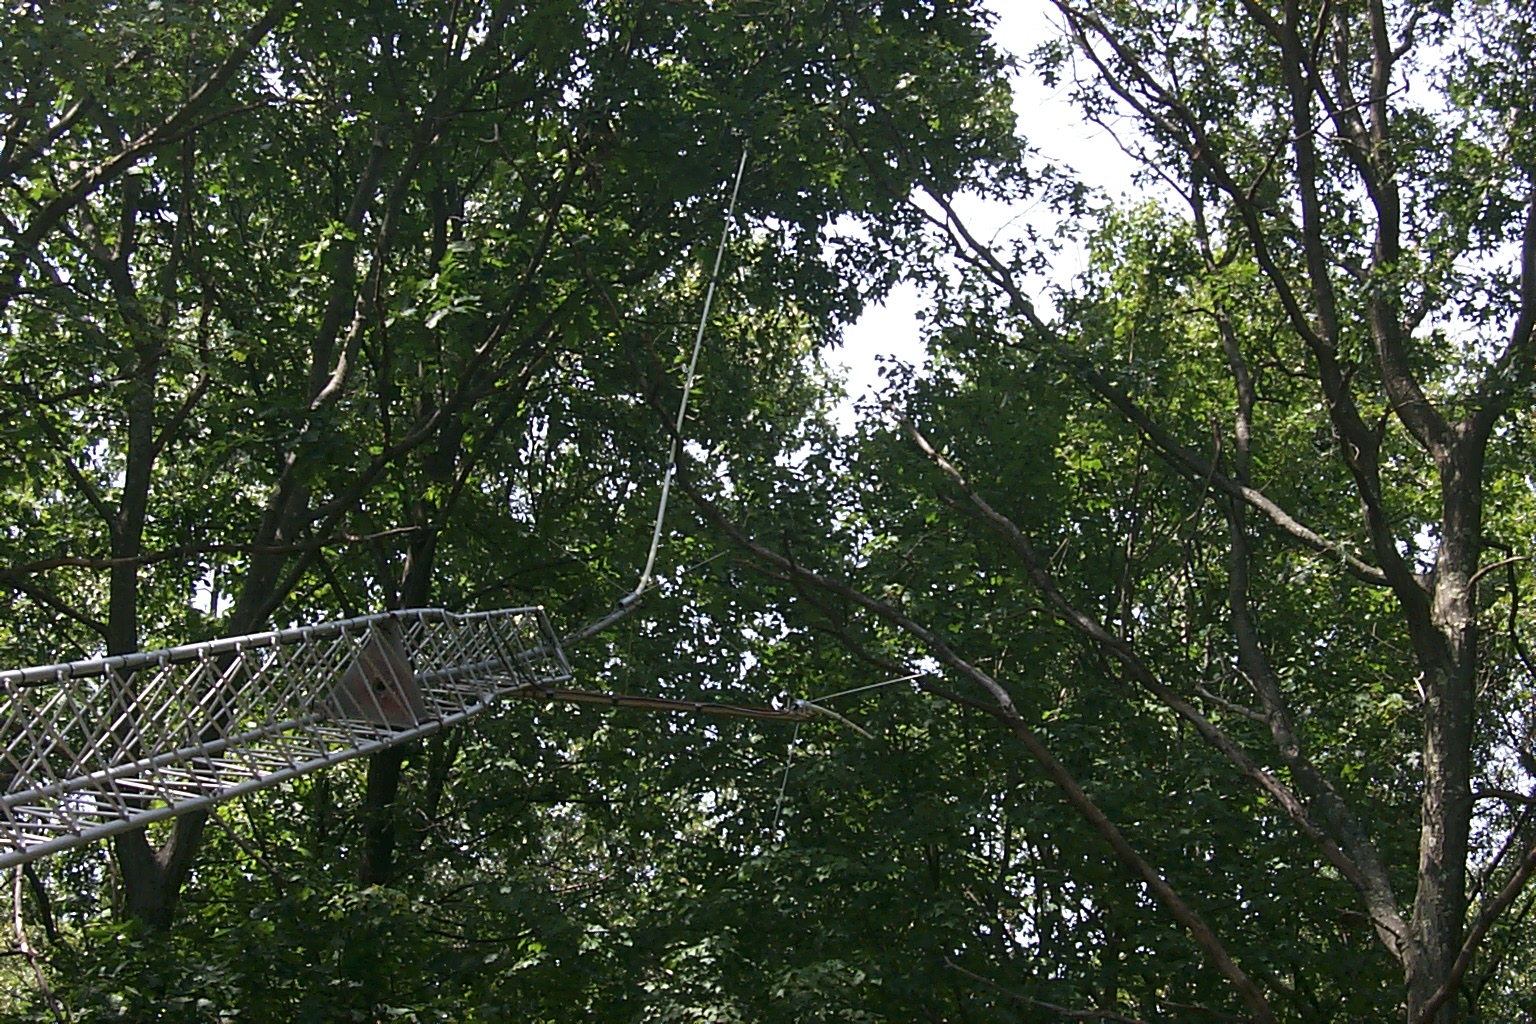
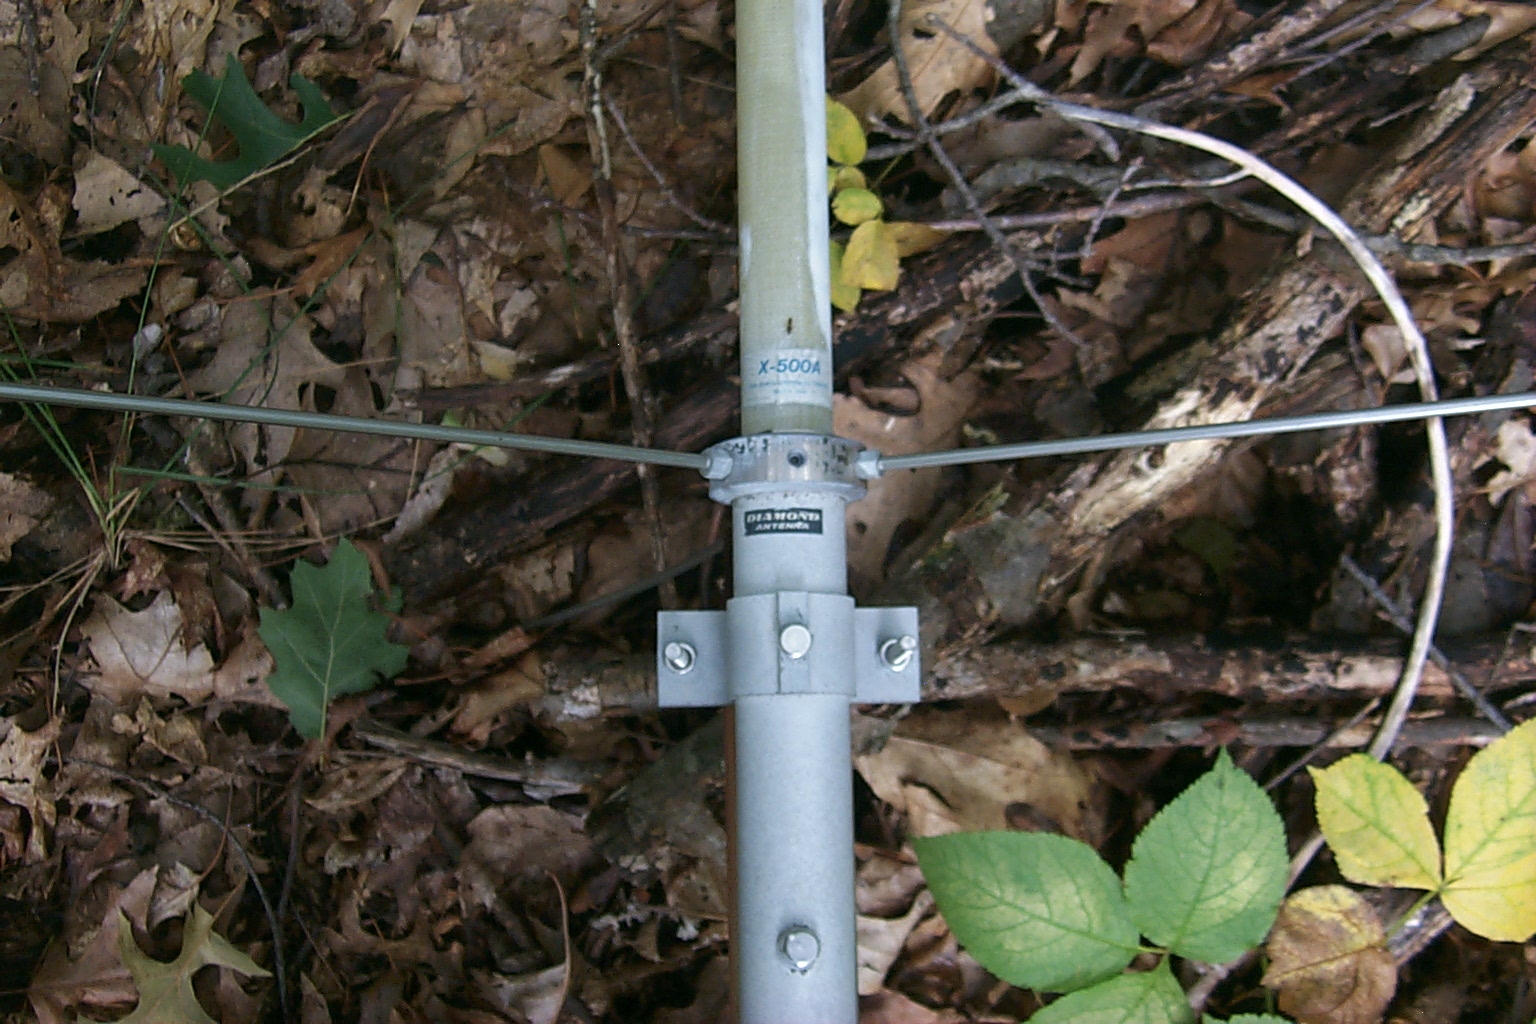
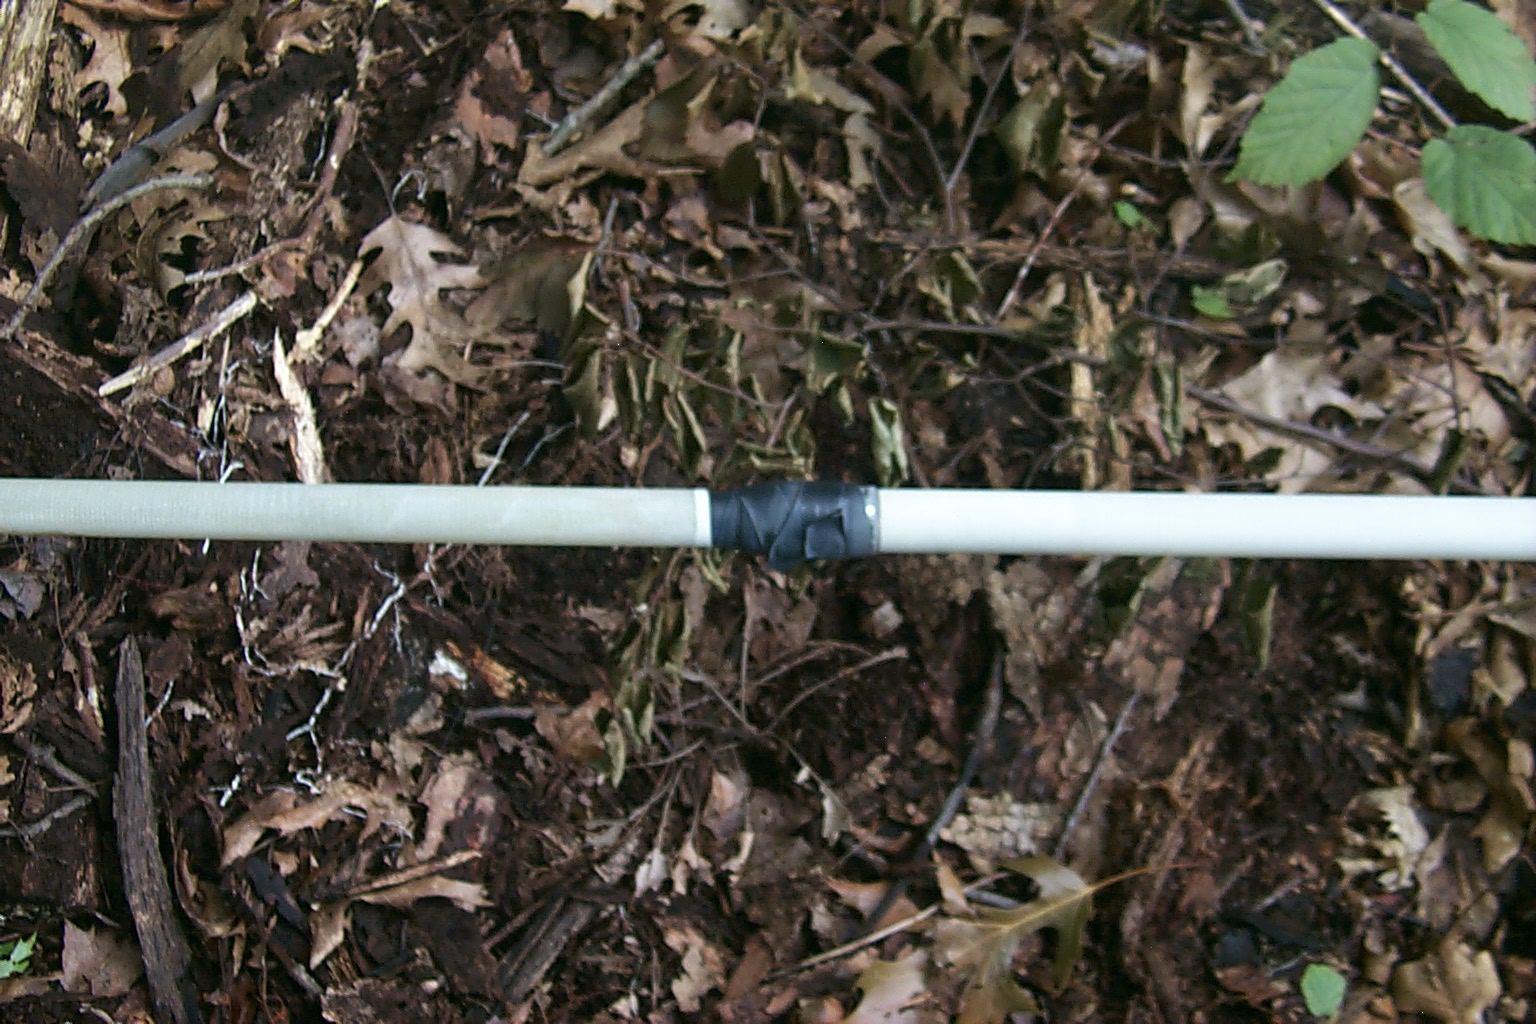
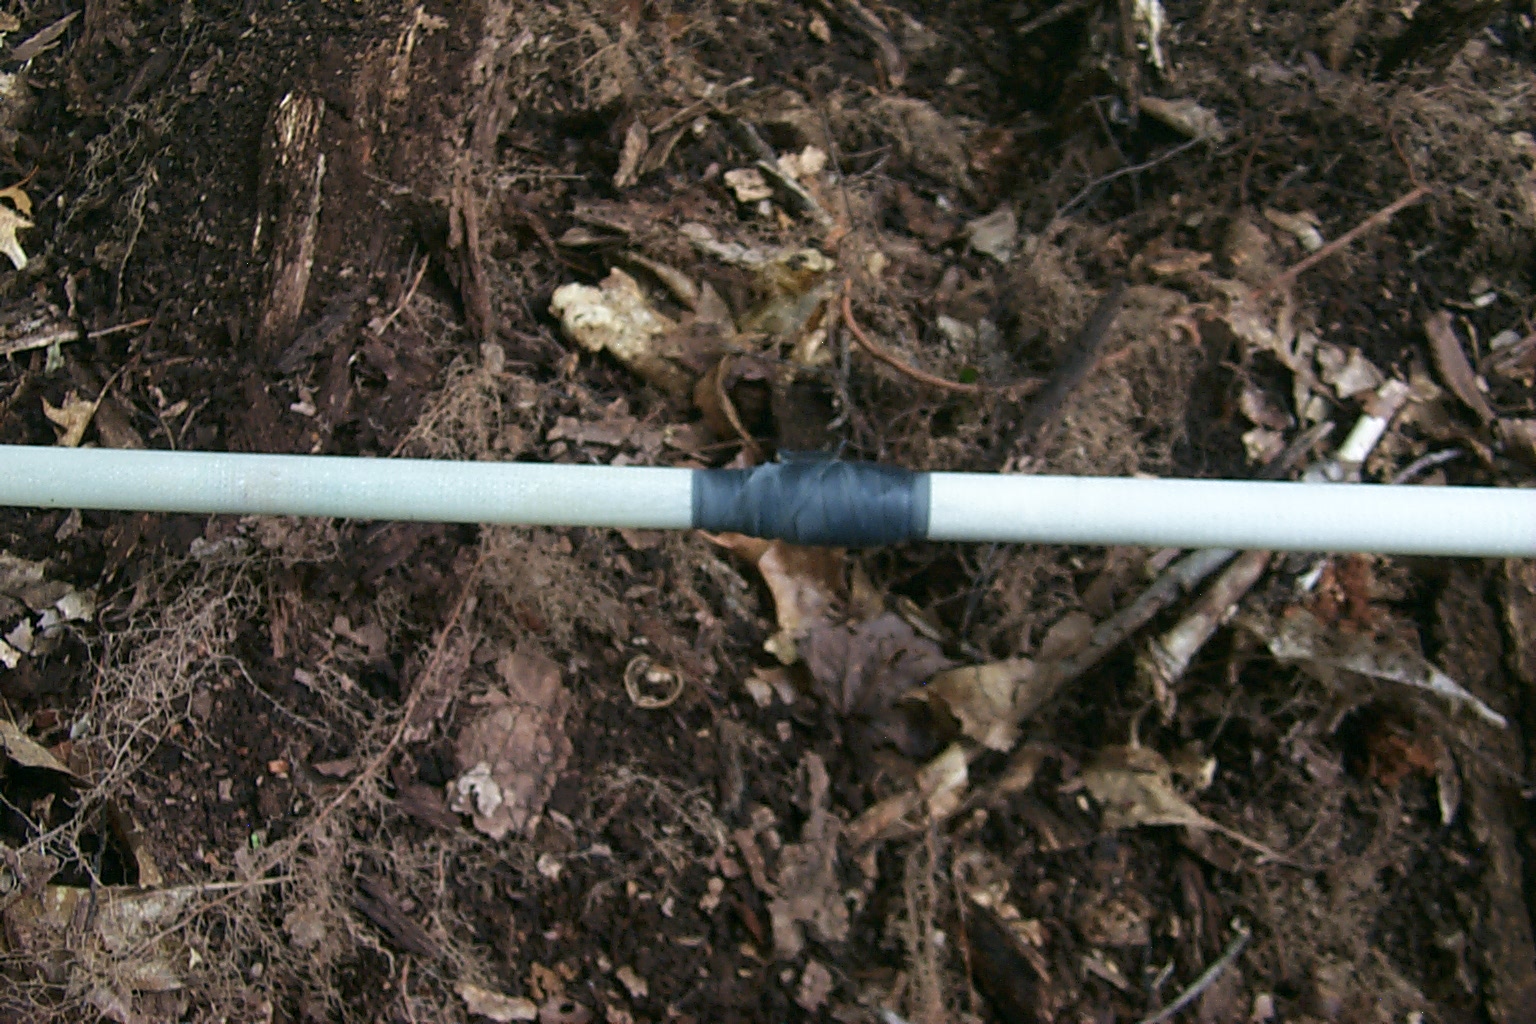
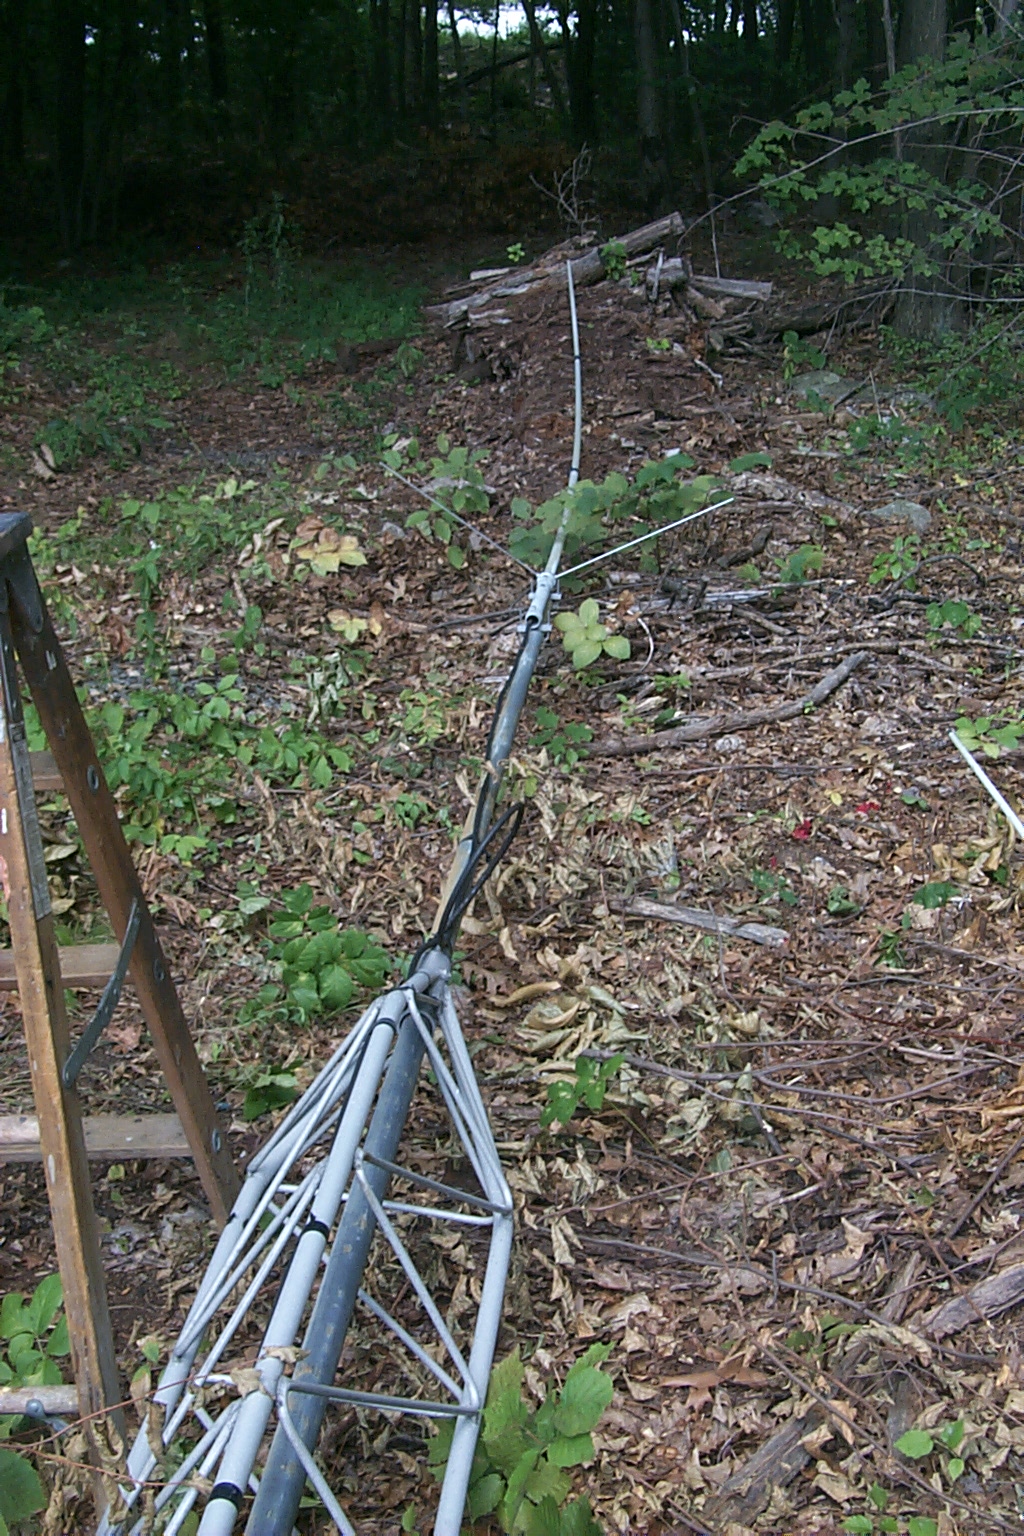
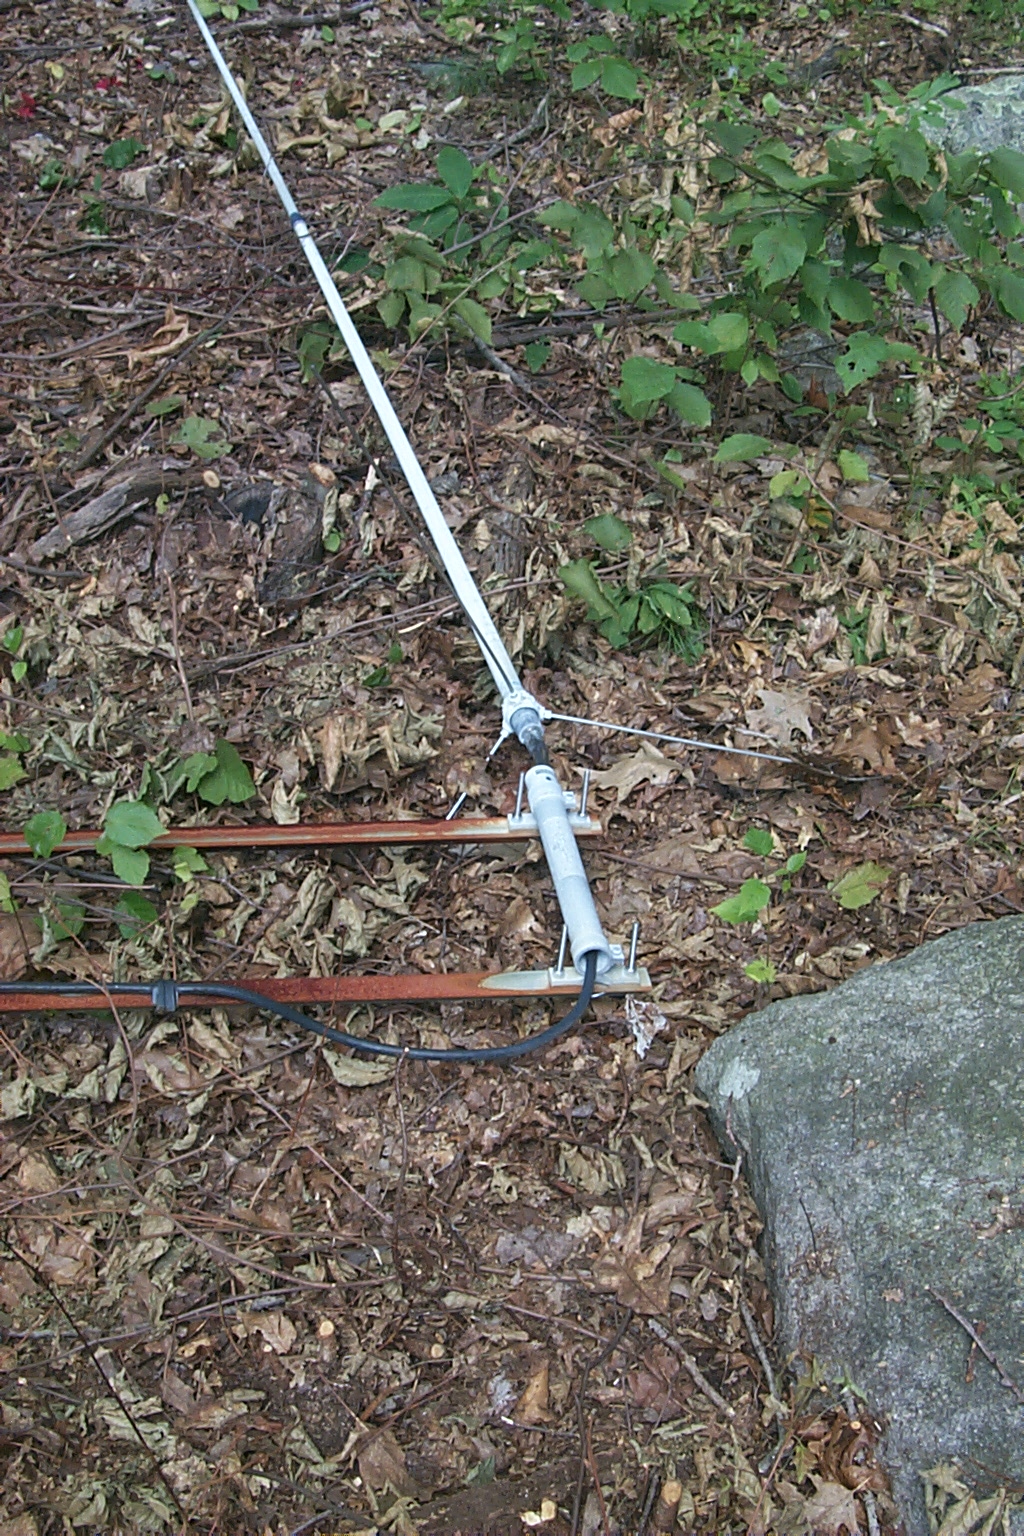
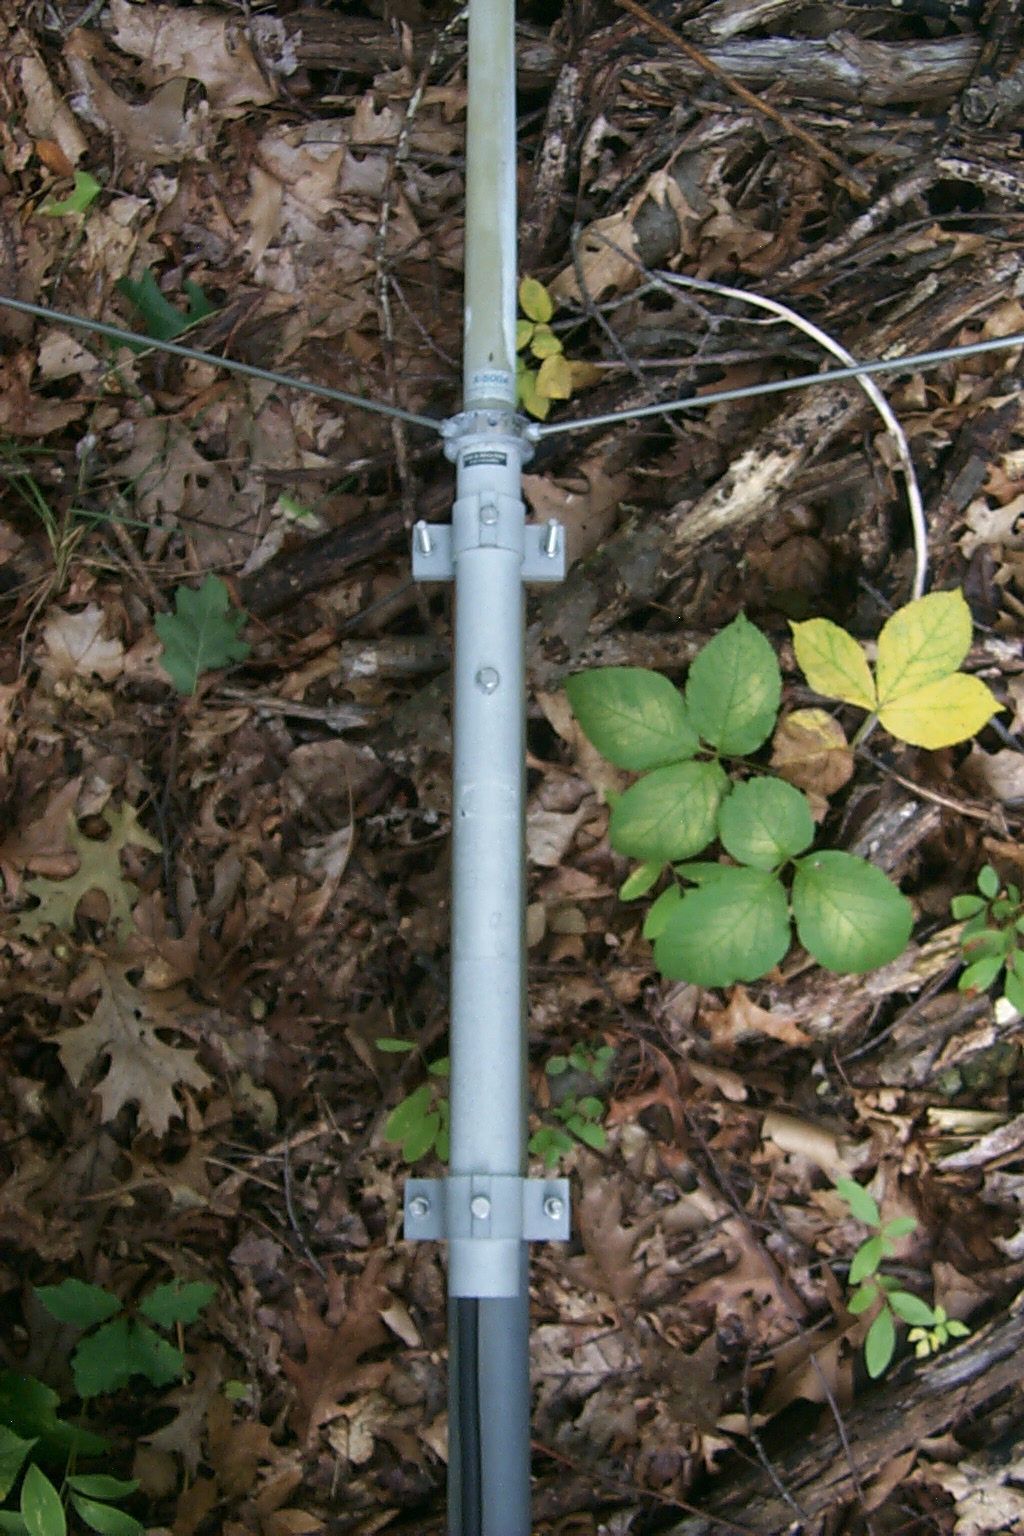
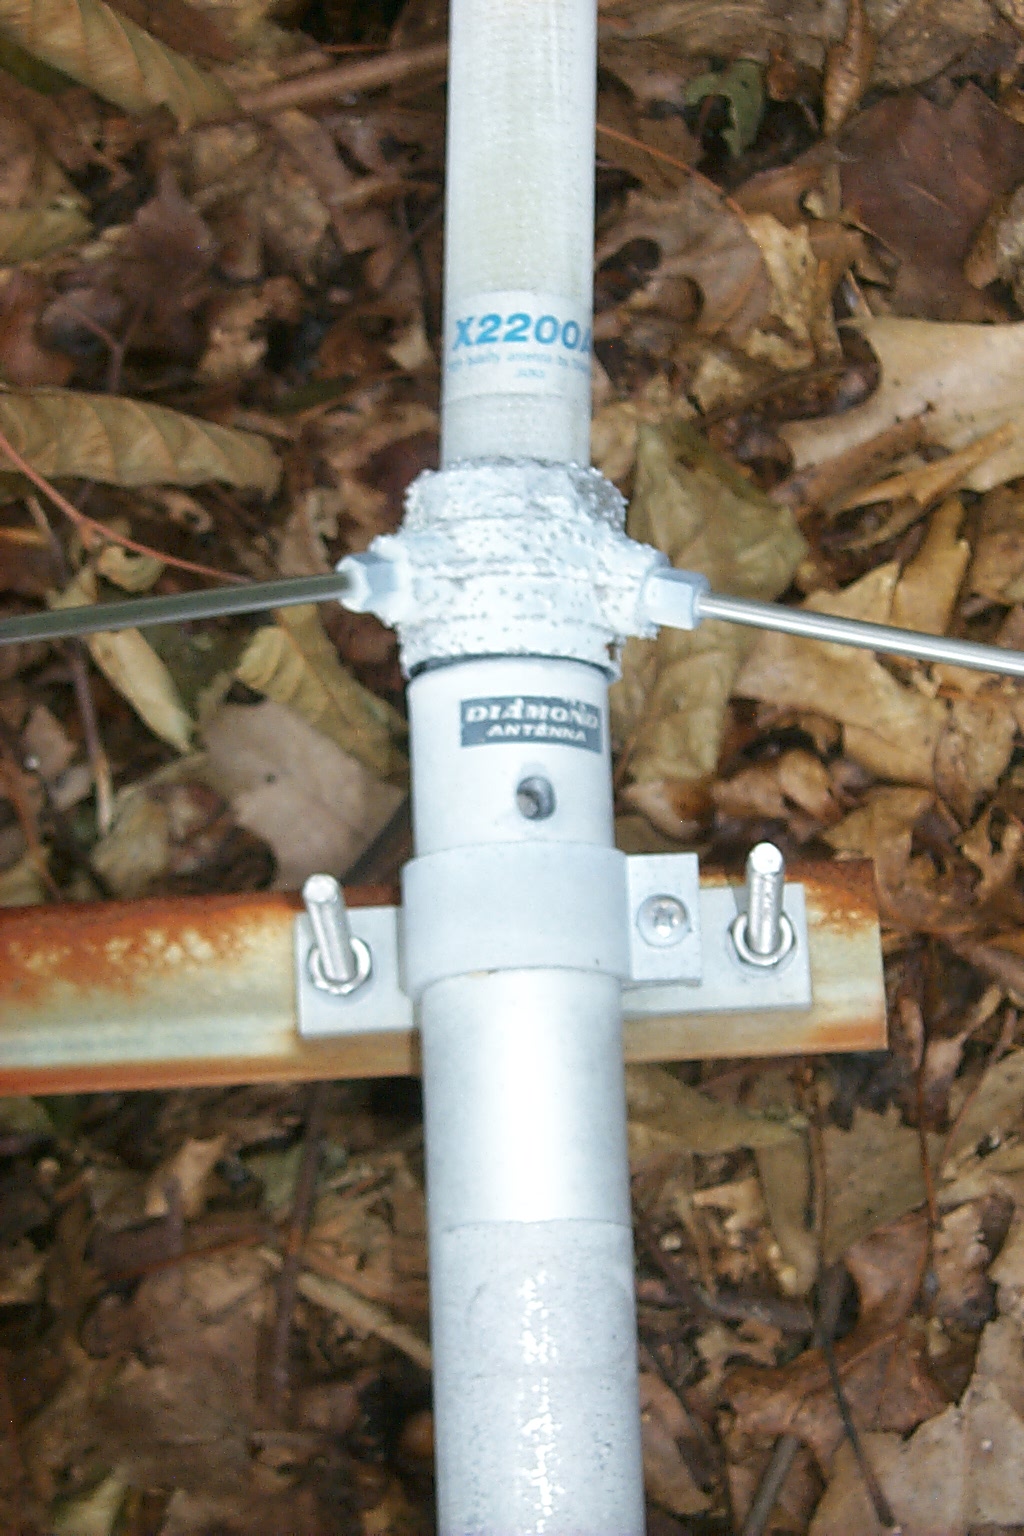
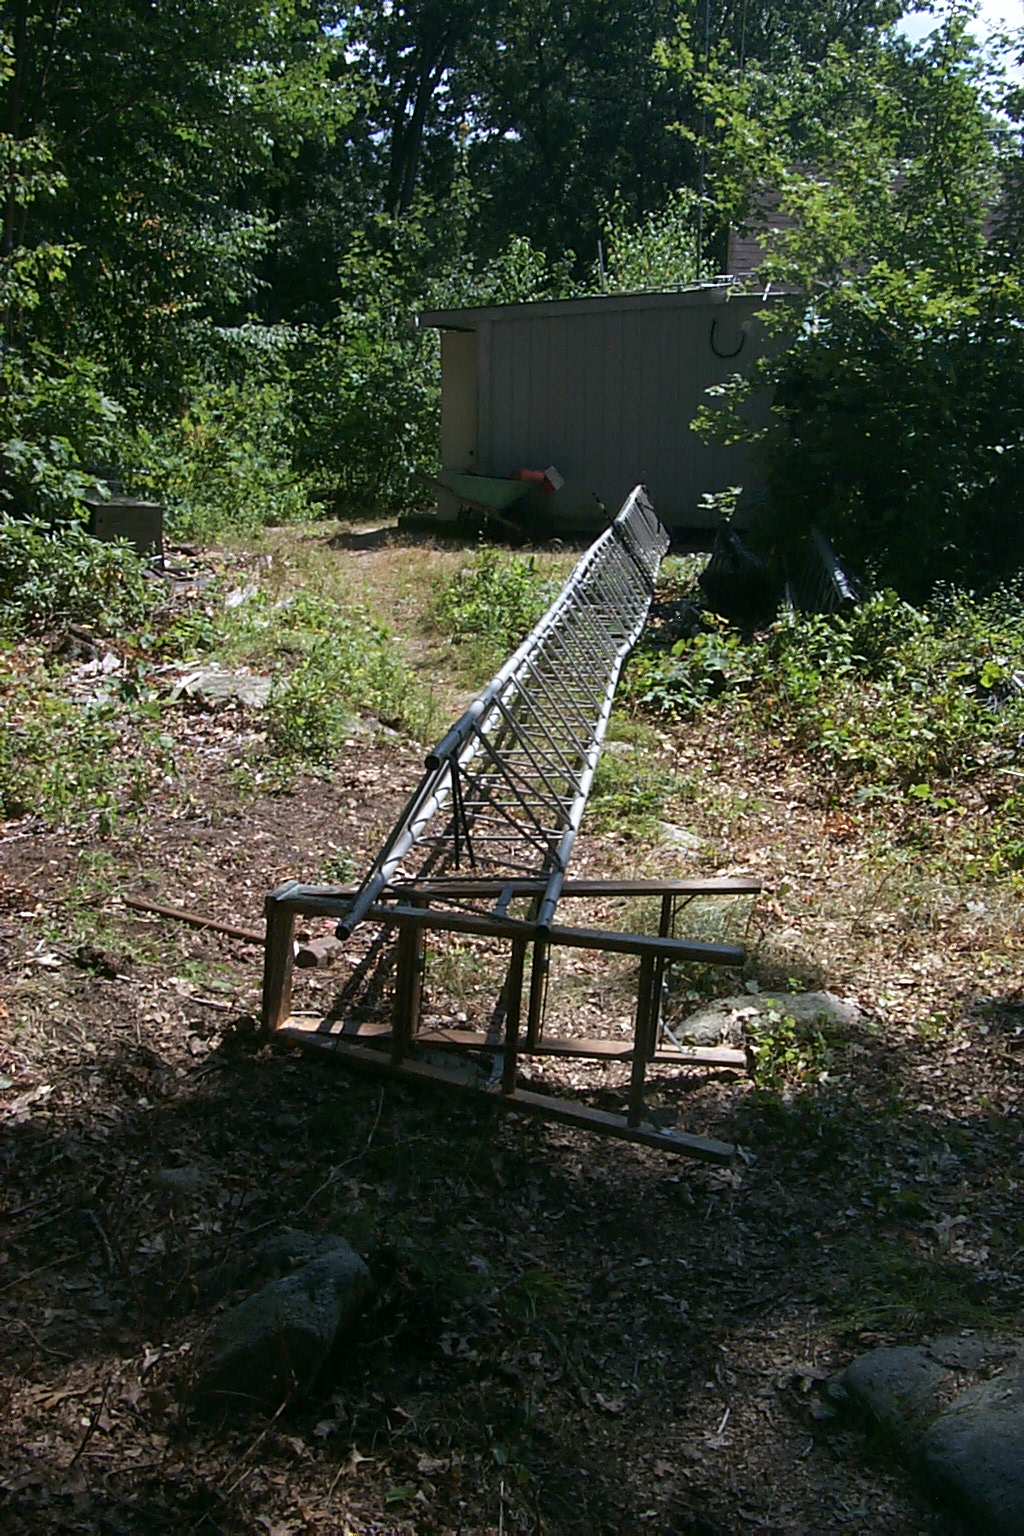
It took about two hours to slowly crank the tower down and at one point both of the antennas got hung up in the trees.
I had several trees cut down last October to make room for the tower to tilt
down but apparently we did not go back far enough. The large Diamond
X500-NHA was folded nearly in half and I thought for sure it was going to
snap...
...but the antenna survived the abuse.


(click on images to enlarge)
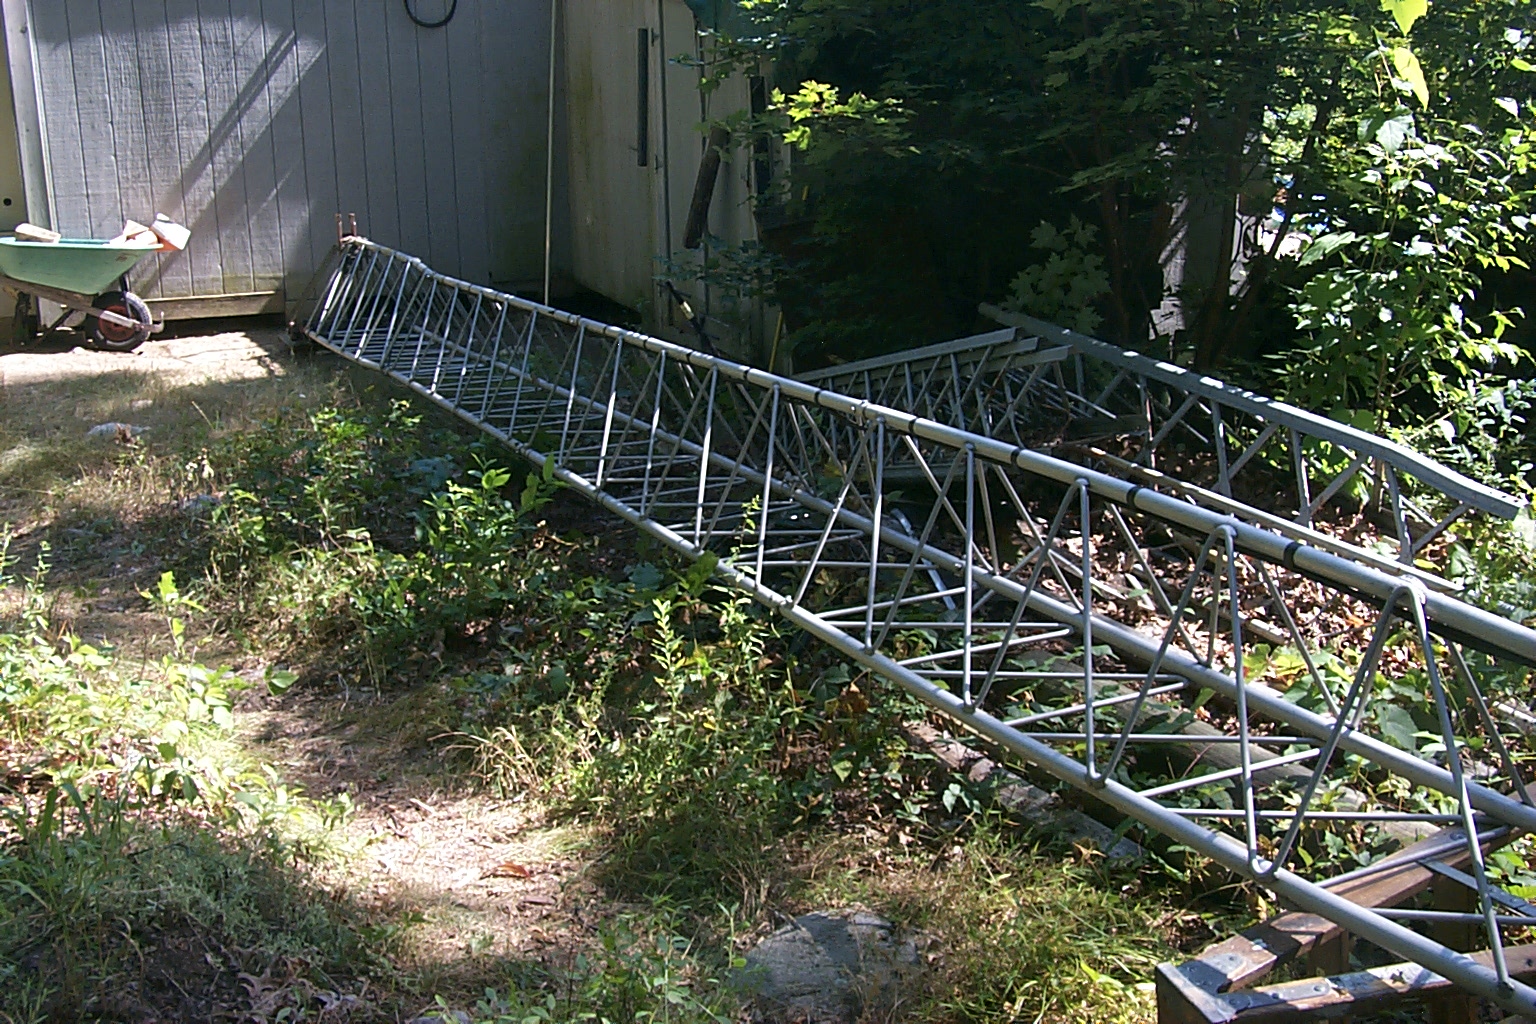
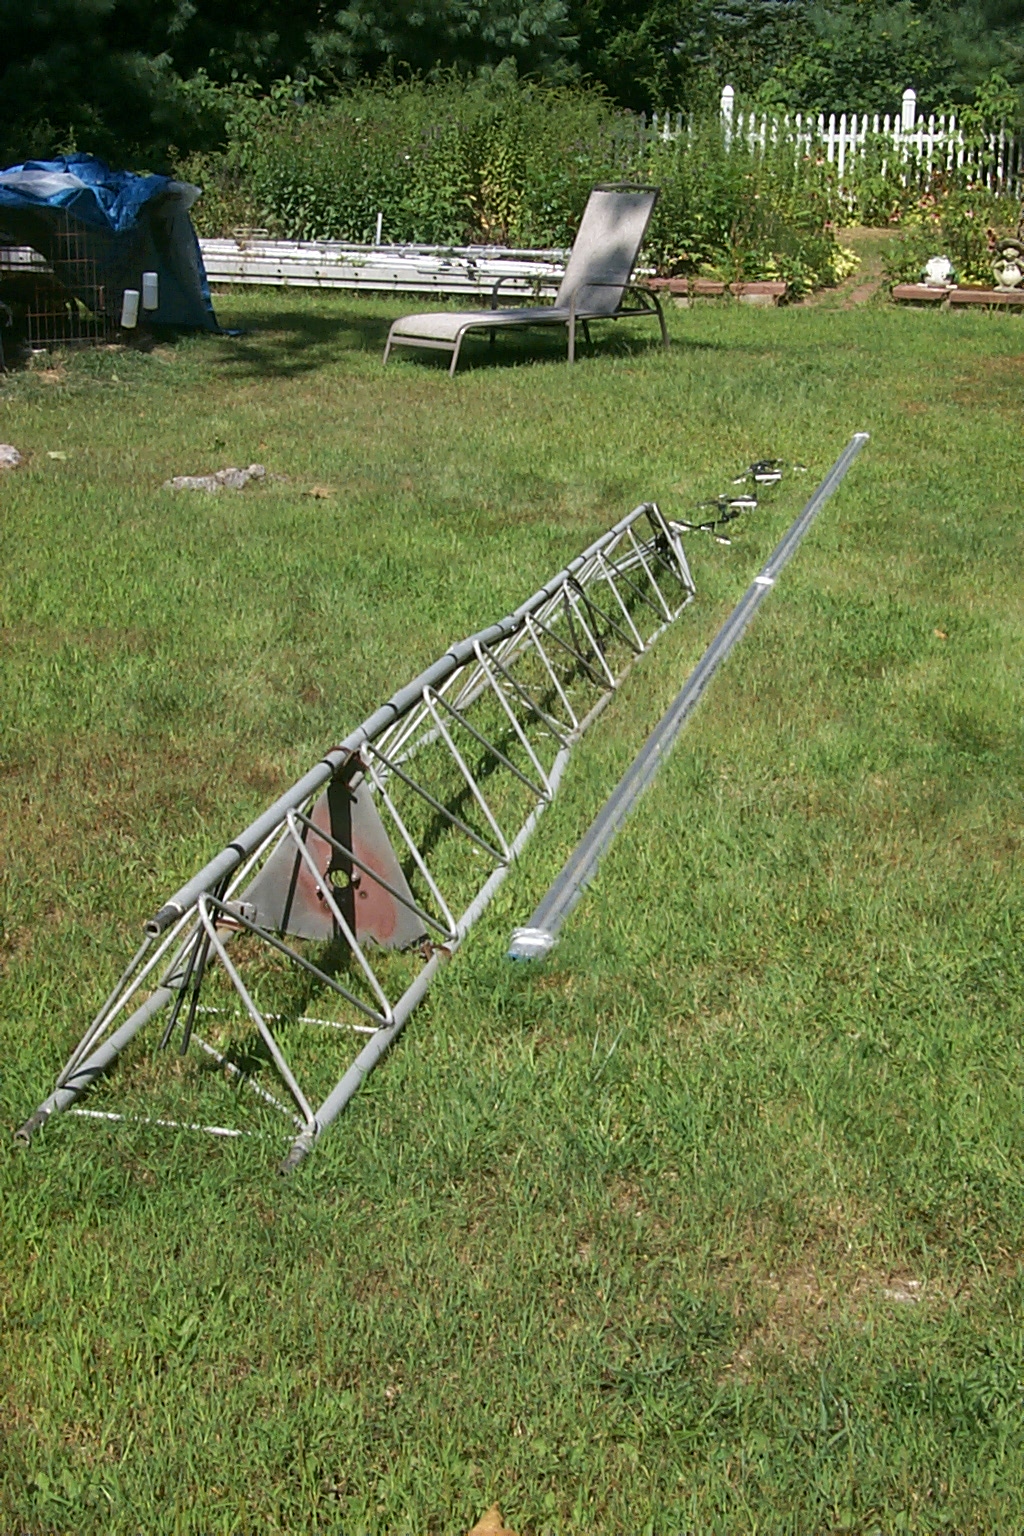
After two years of planning, waiting, and trying several different times, the tower is finally safely down on the ground and the real fun can start. I have to unbolt the tower from the tops section of the hinged base plate and remove the three rusted out mounts.
(click on images to enlarge)
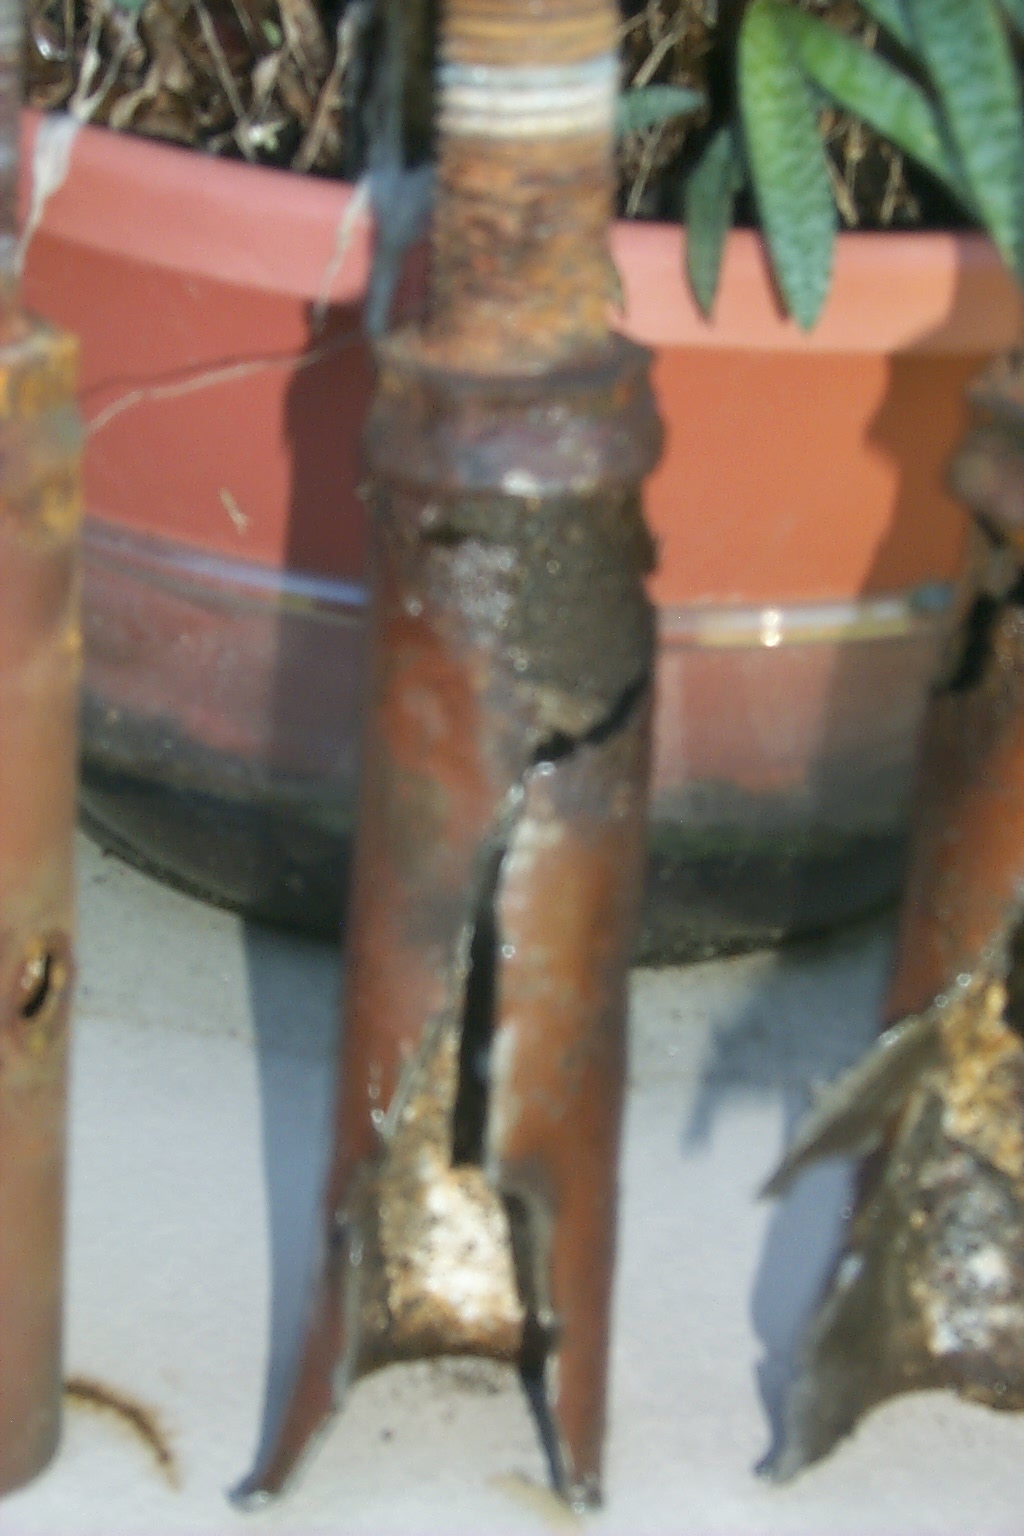
My friend Jag from JAG Electromagnetics will be fabricating three new mounts out of stainless steel for the project. Then while Jag is making the new mounts for the tower I will take the largest base section at the bottom of the tower over to my brother-in-law, Scott, so he can repair a large crack that has developed in one of the three legs. I am also going to replace the large galvanized mast in the top section of tower with a new aluminum mast hopefully reducing some of the weight and wind loading at the very top of the tower.


(click on images to enlarge)
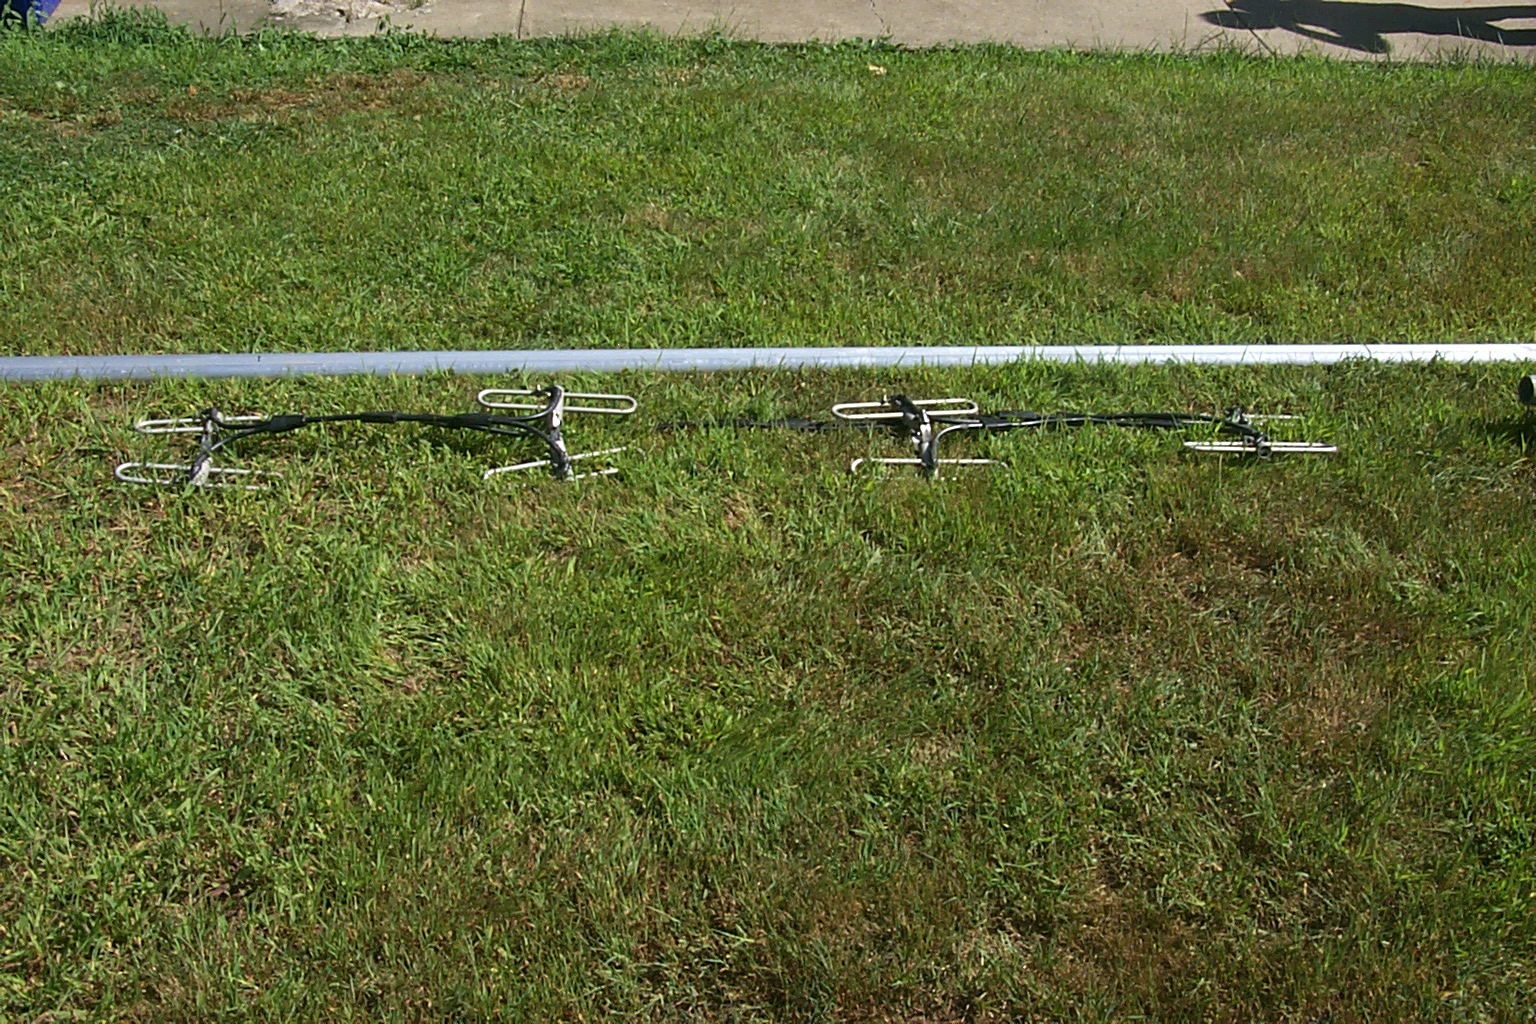
With the tower safely on the ground, we decided to quit for the day and I took a few last photos of the temporary 220 MHz exposed dipole array for the 224.040 repeater and the big empty space in the sky where the repeater tower has been standing for 18 years...

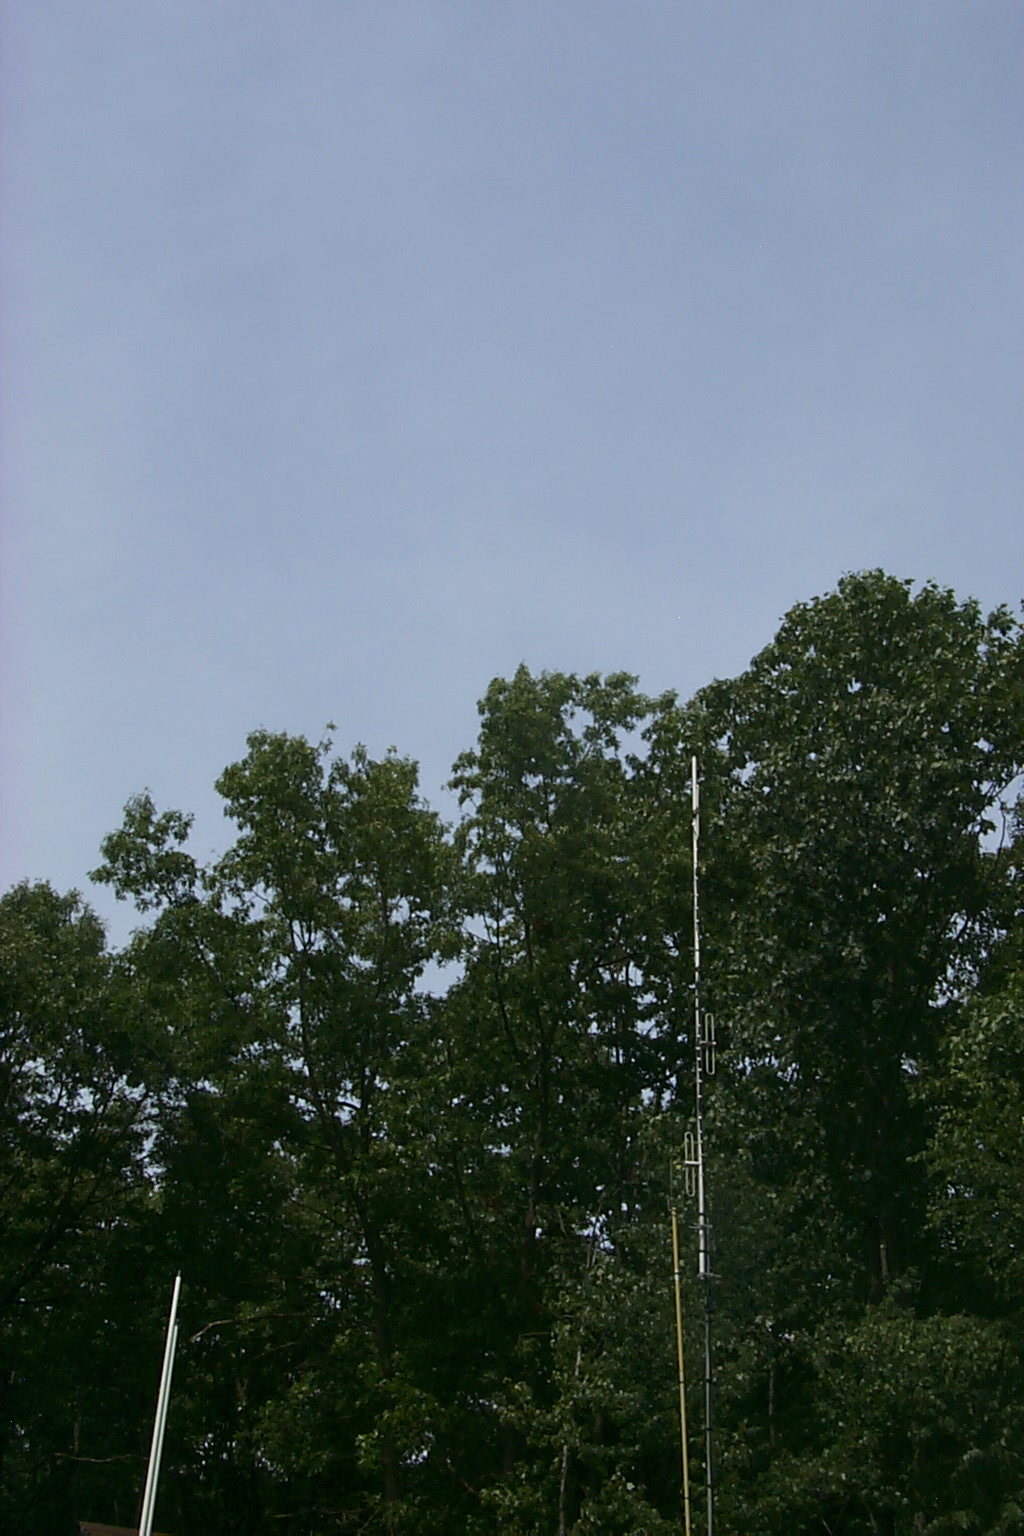
(click on images to enlarge)
... tomorrow I will start taking the tower apart so we can get going will all the repairs and maintenance.
Update - August 19th - 2010
I ordered a new 24 foot long piece of aluminum 6061-T6 tubing to replace the old 21 foot galvanized pipe in the top section of tower. I actually purchase two of them so I would have some stock for additional mast on a new side-arm etc. They were delivered this afternoon and I can not wait to start rebuilding the tower with this new mast.
The new aluminum pipe will eliminate the dissimilar metal issues with the galvanized pipe and the aluminum tower and the extra three feet will allow me to extend the mast out the top of the tower far enough to accommodate the new DB-408 dipoles for the 447.775 repeater. I am also going to replace the old galvanized angle iron brackets on the side of the tower with a new aluminum stand-off bracket from Heights Towers. If my work schedule and the weather cooperate I might be able to start taking all the old antennas, feed-line, and hardware off the tower tomorrow...
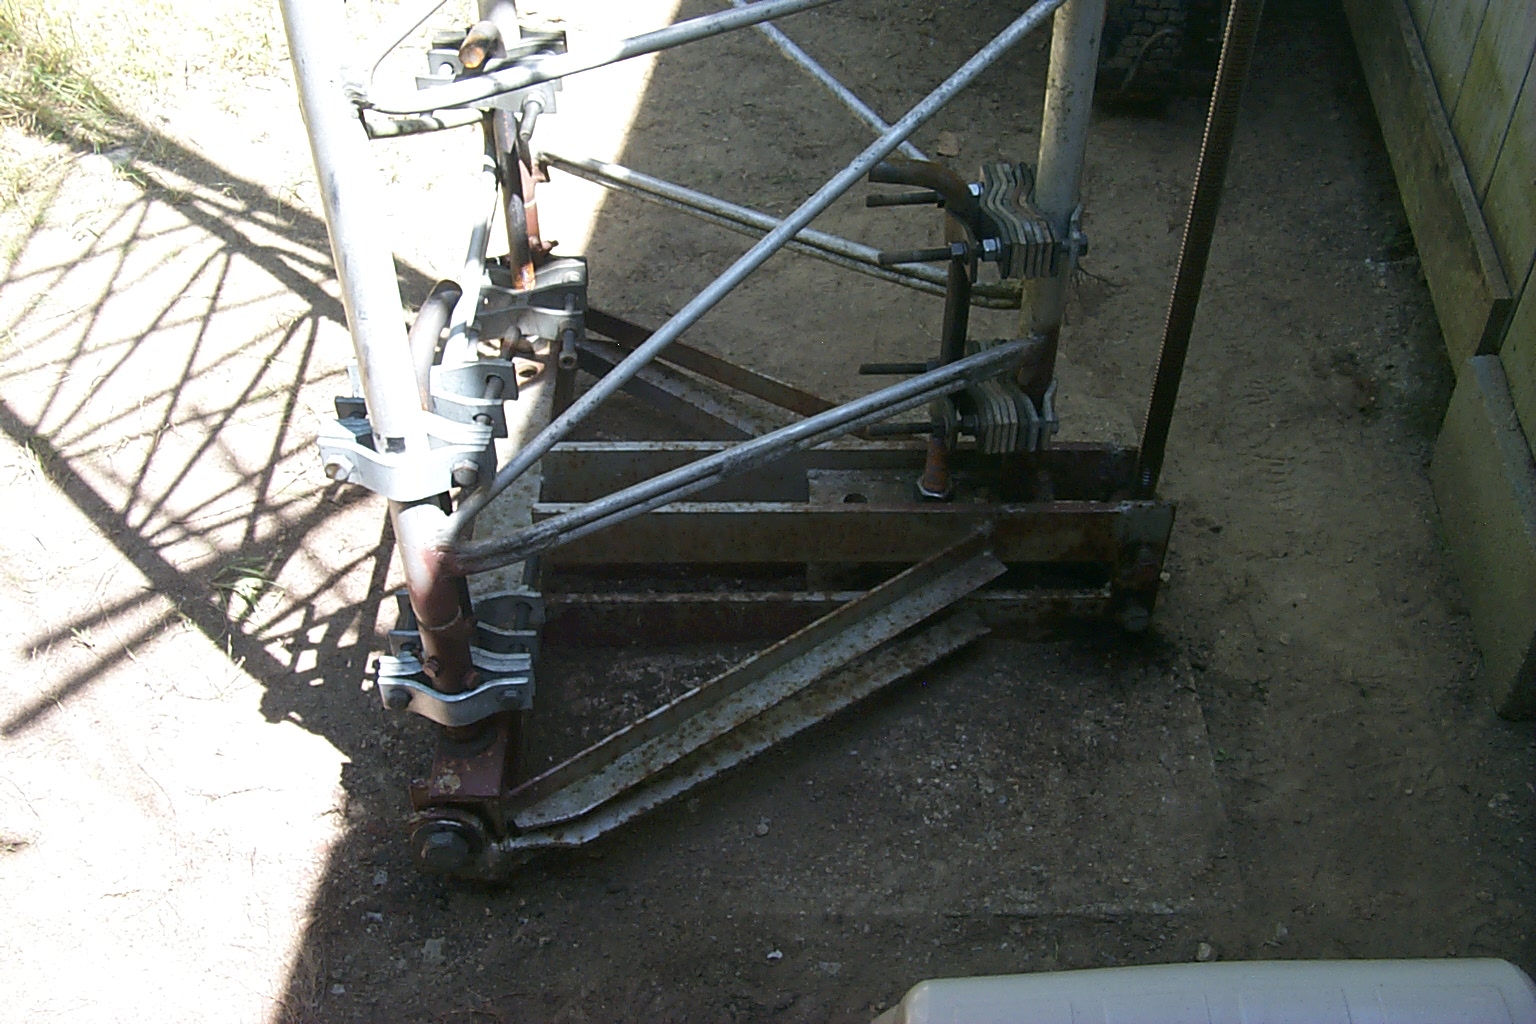
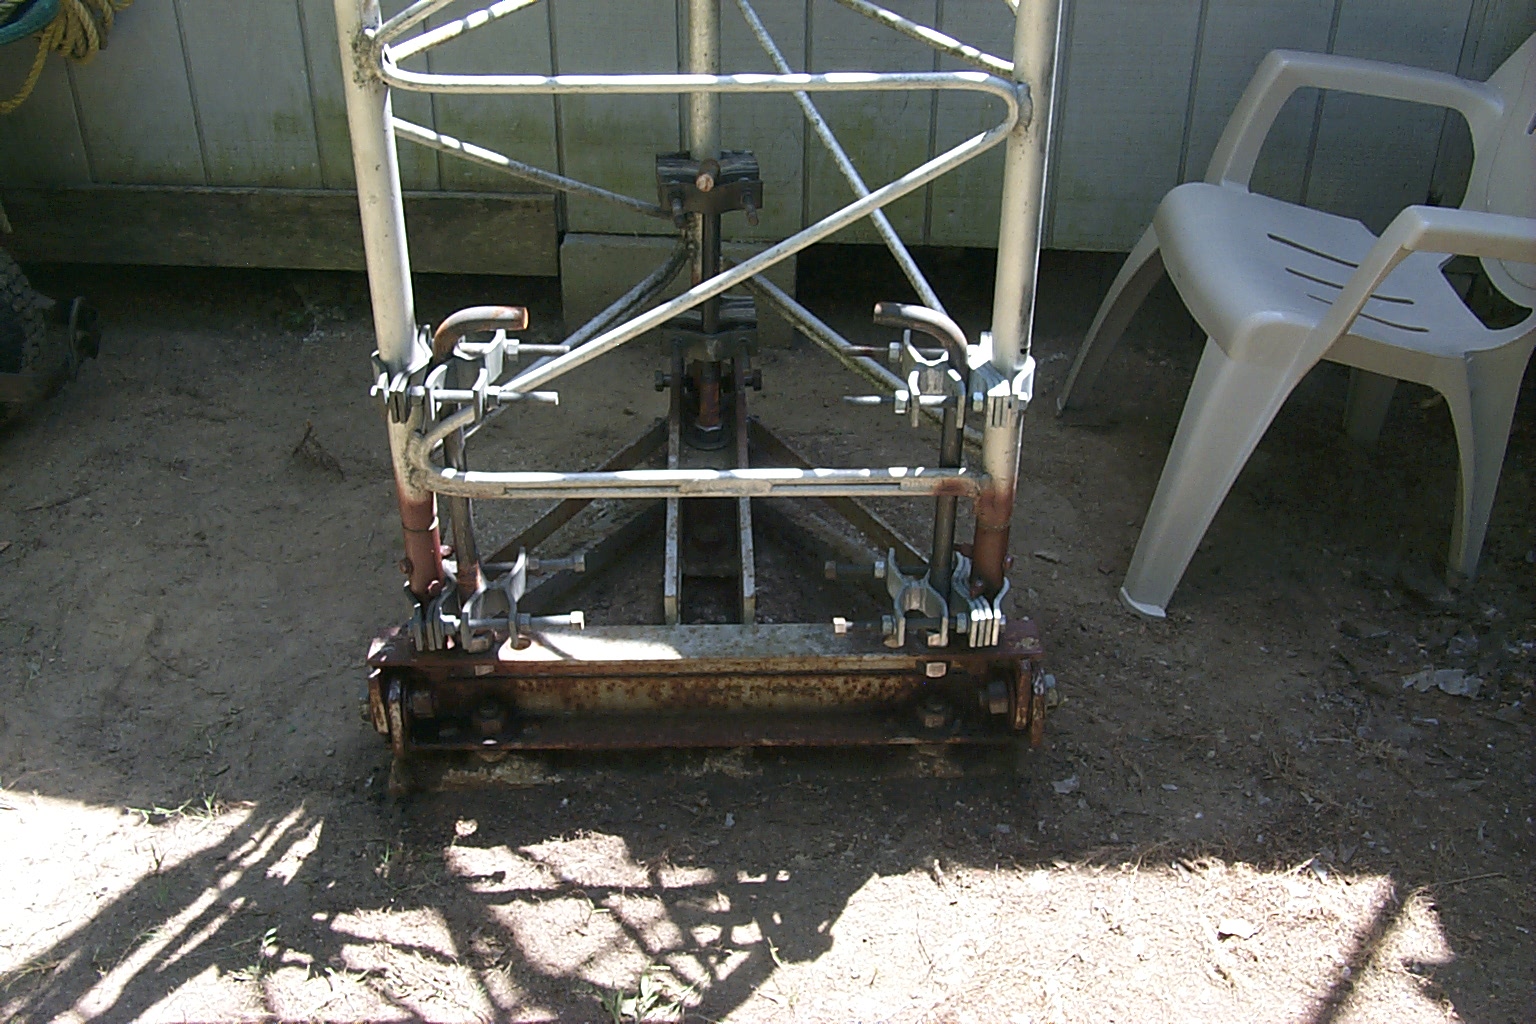
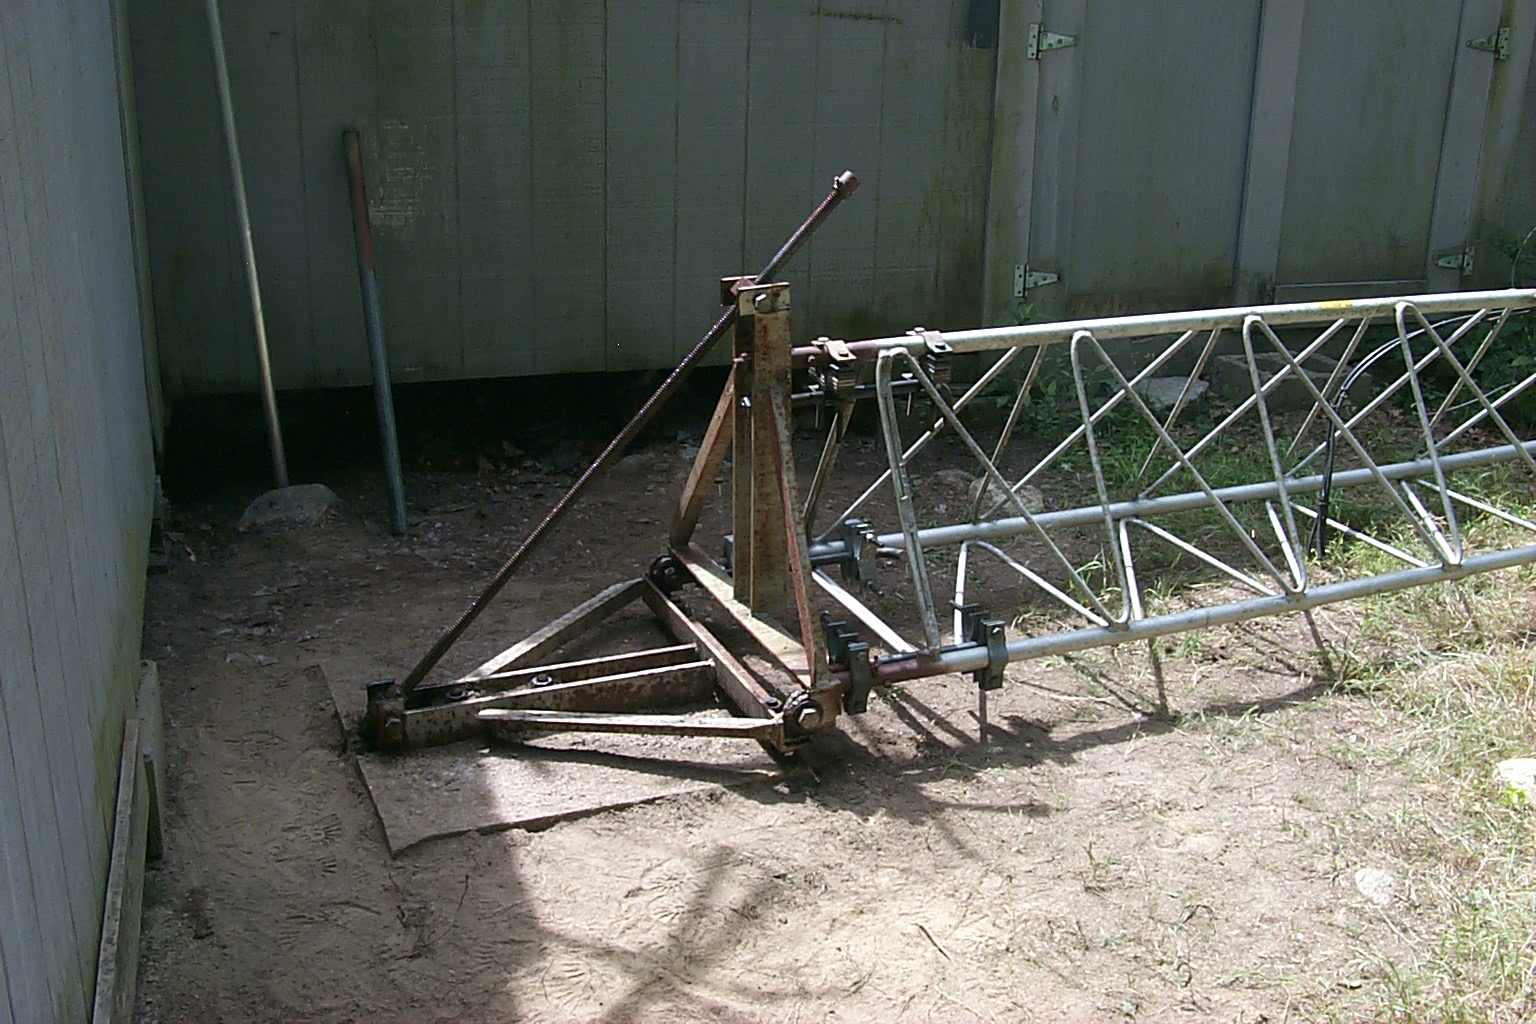
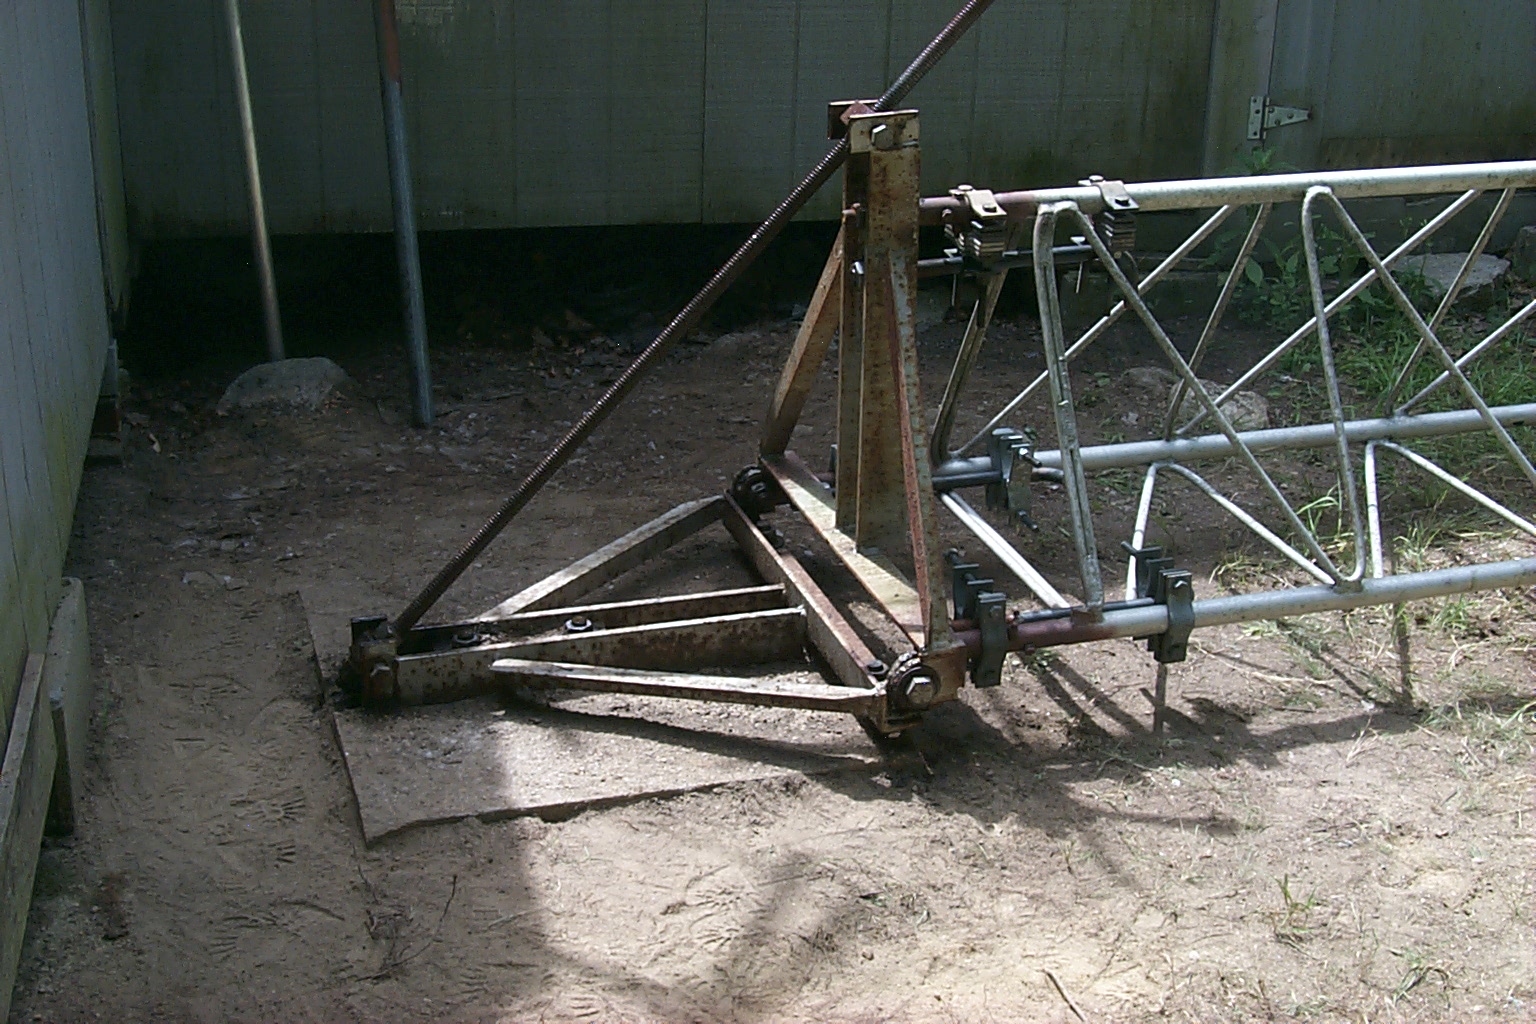
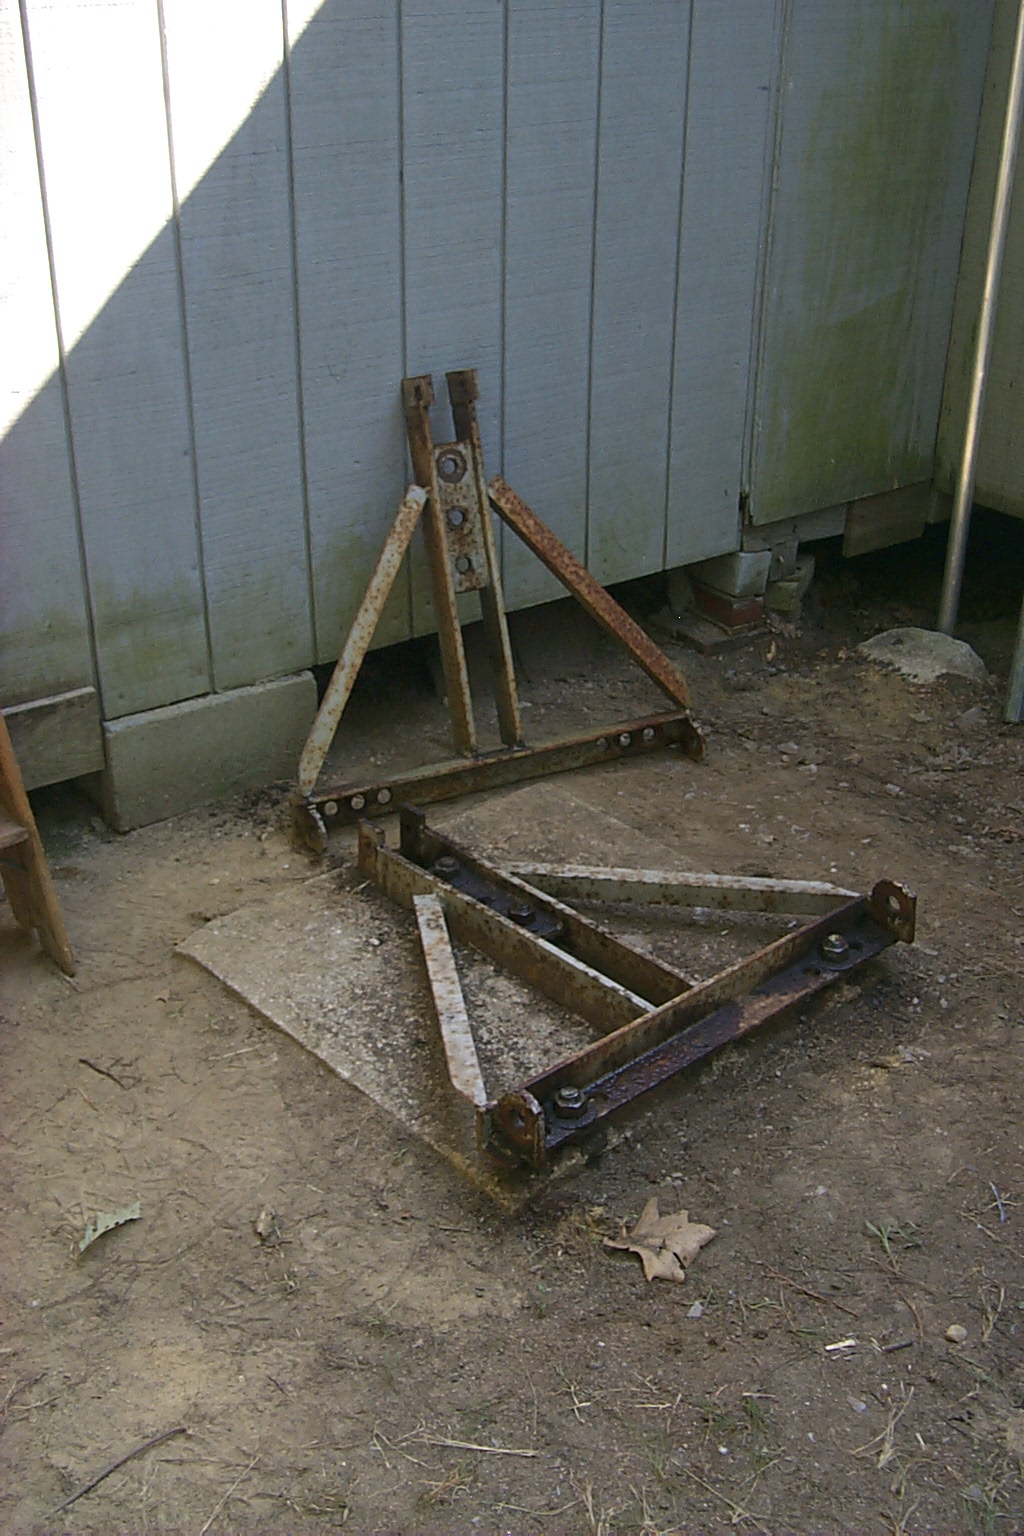
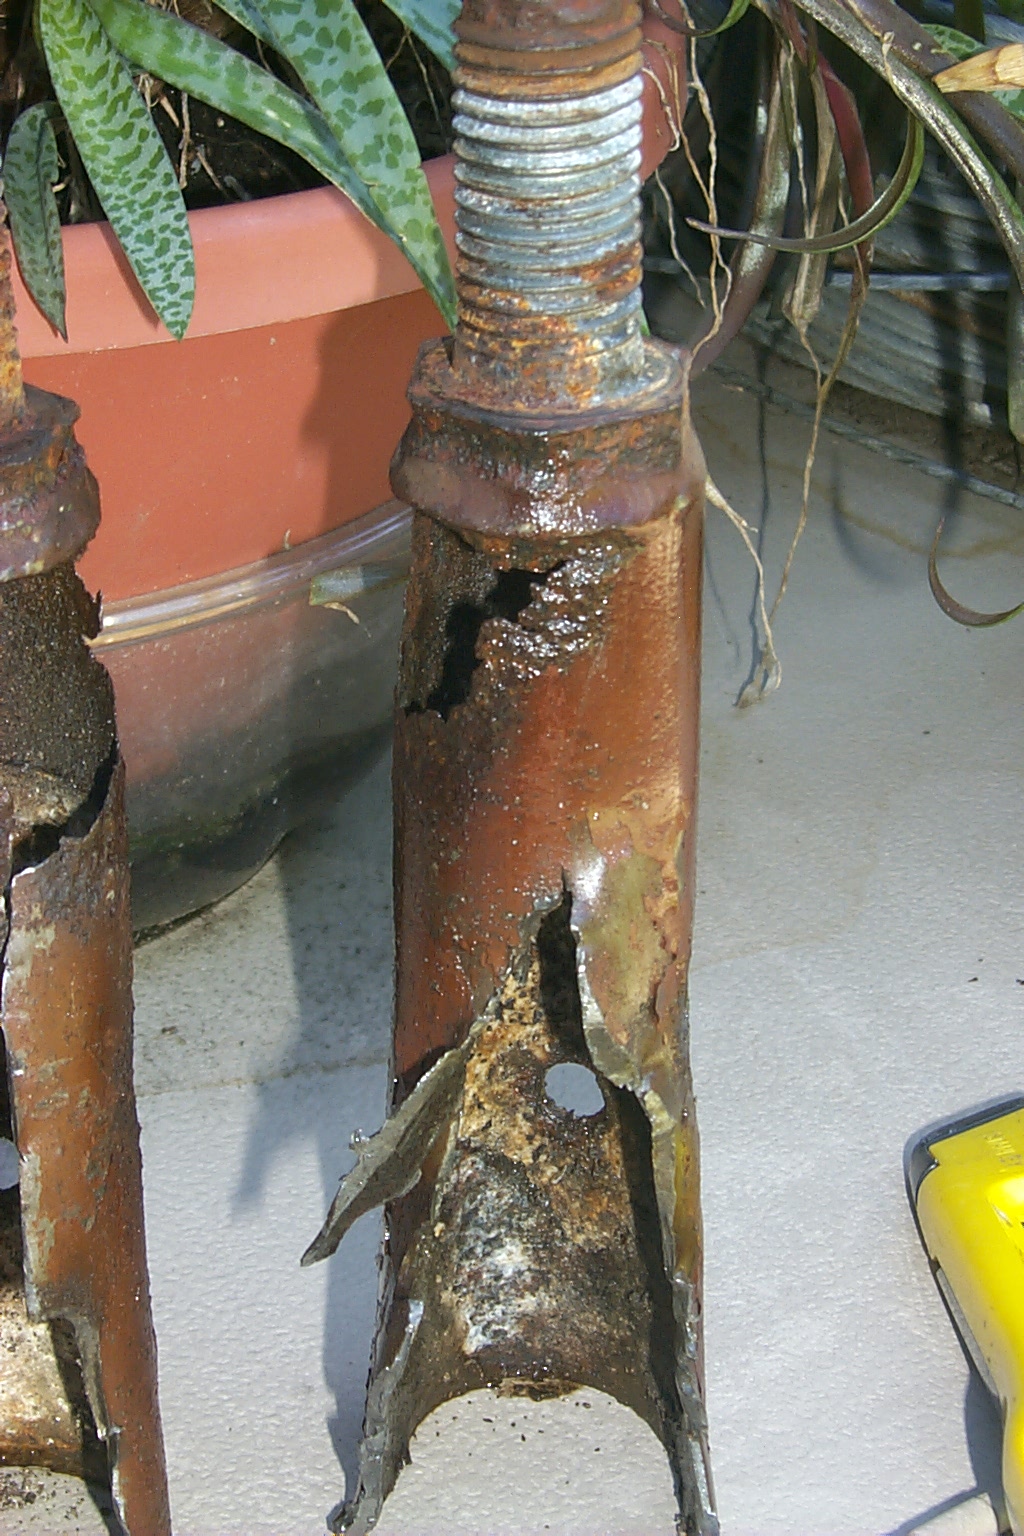
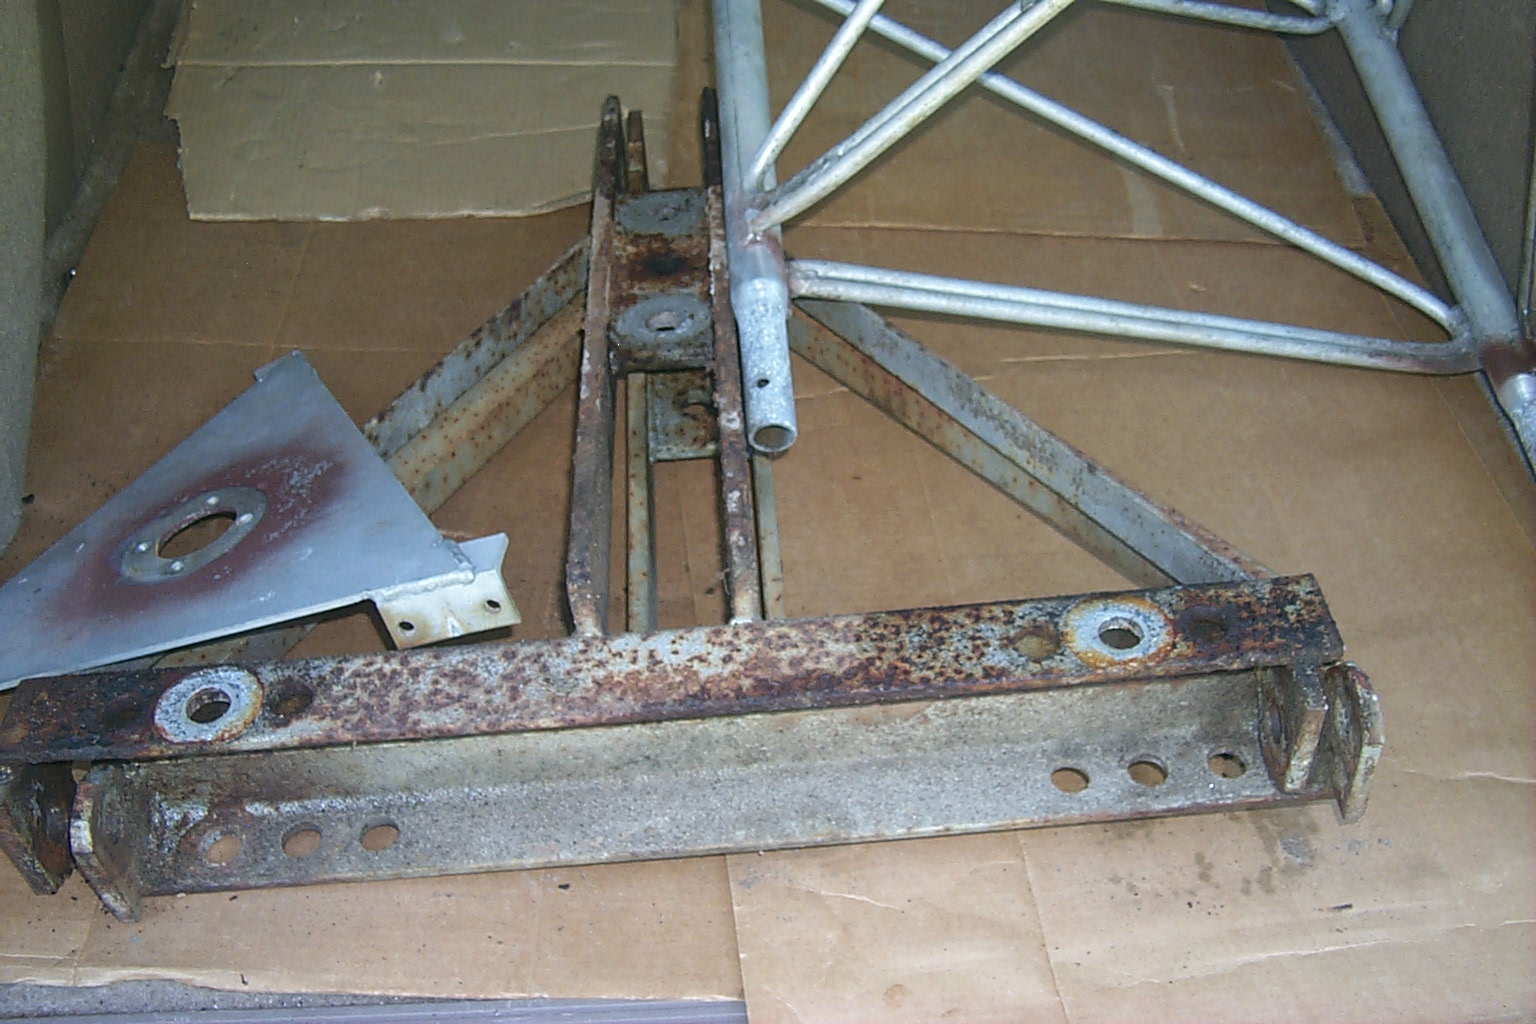
In this group of photos you can see the rusted out mounts and hinged base section. I had intended to send one of these mounts along with some drawings to Jag to have some new stainless steel mounts made in his shop but I found the original tower manufacture online and I am going to purchase new mounts from them...


(click on images to enlarge)
Update - August 20th - 2010
Taking the tower apart... Part One!
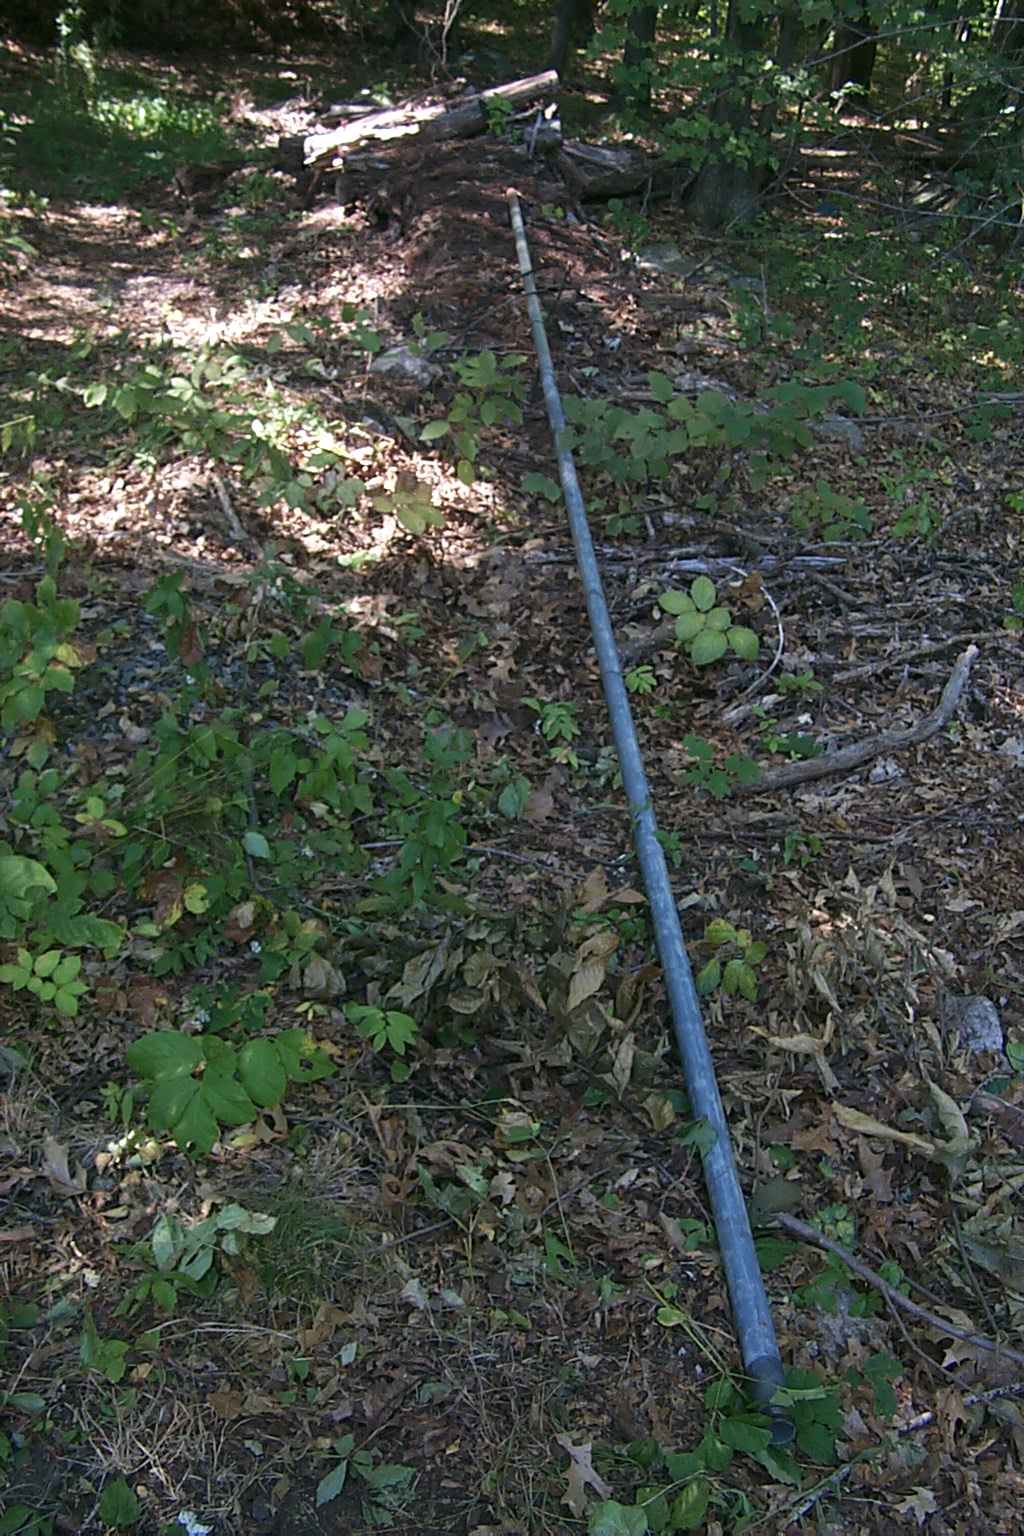
Today Dad and I
started talking apart the tower so we can have some more trees cleared out
of the way and replace all the old antennas etc. We have removed the two old
Diamond antennas, the old 21 foot galvanized mast, and the old galvanized
side-arm brackets...


Taking the tower apart... Part Two!
After Dad and I took a break for lunch and to get out of the blazing hot sun we got right back to work taking apart the rest of the tower...


(click on images to enlarge)
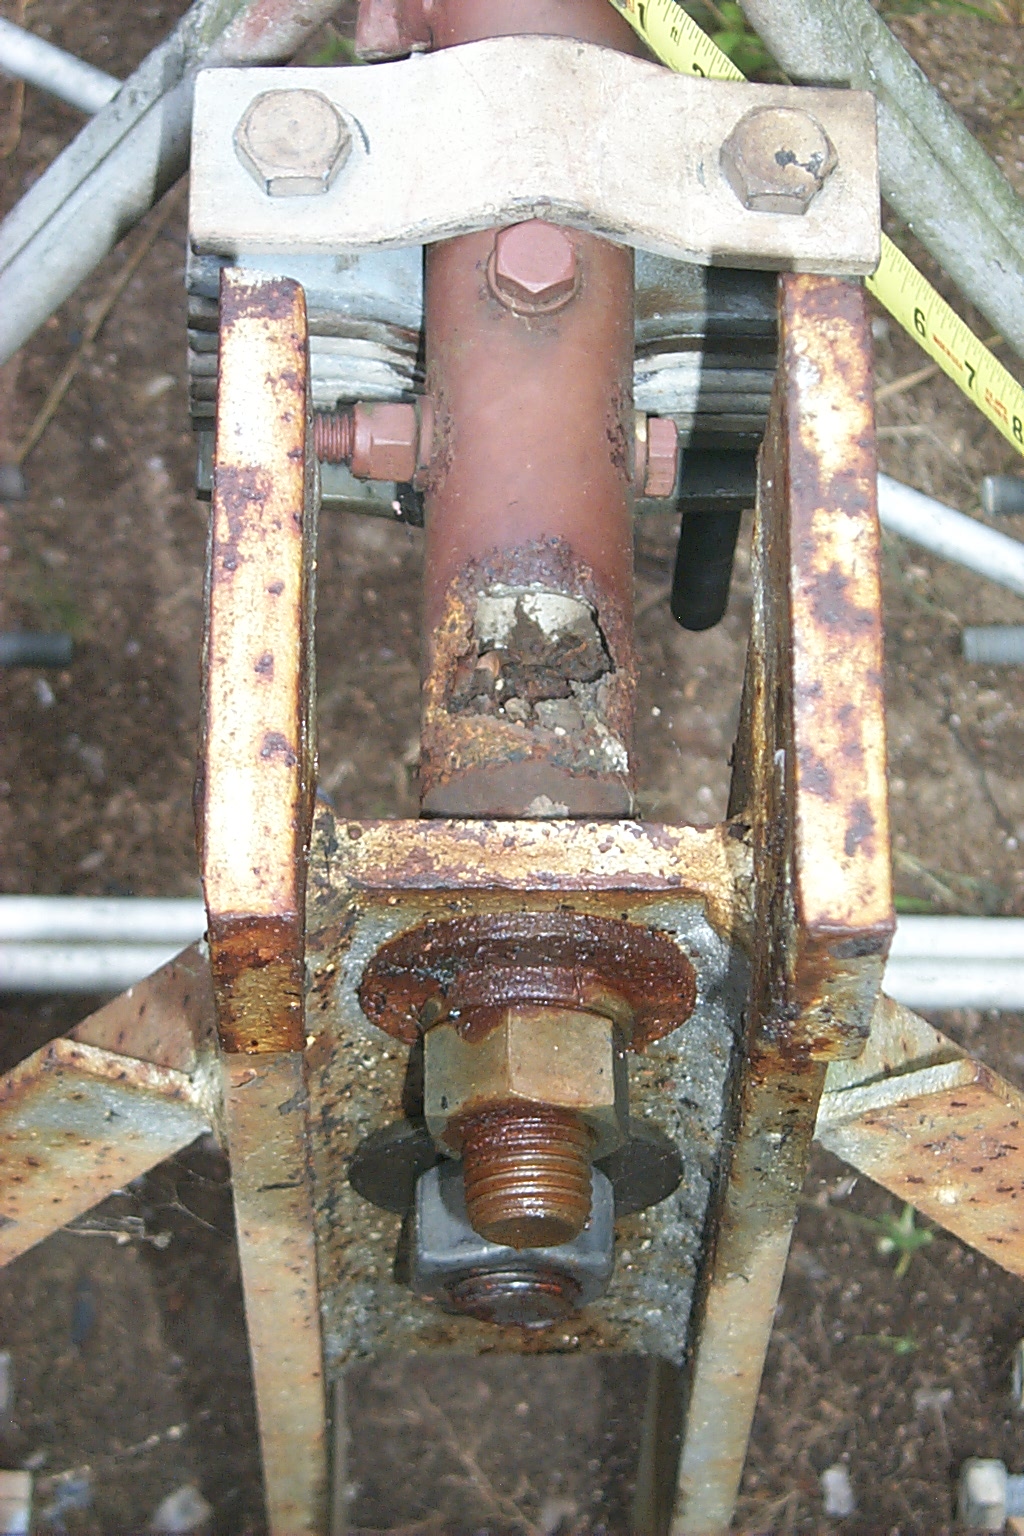
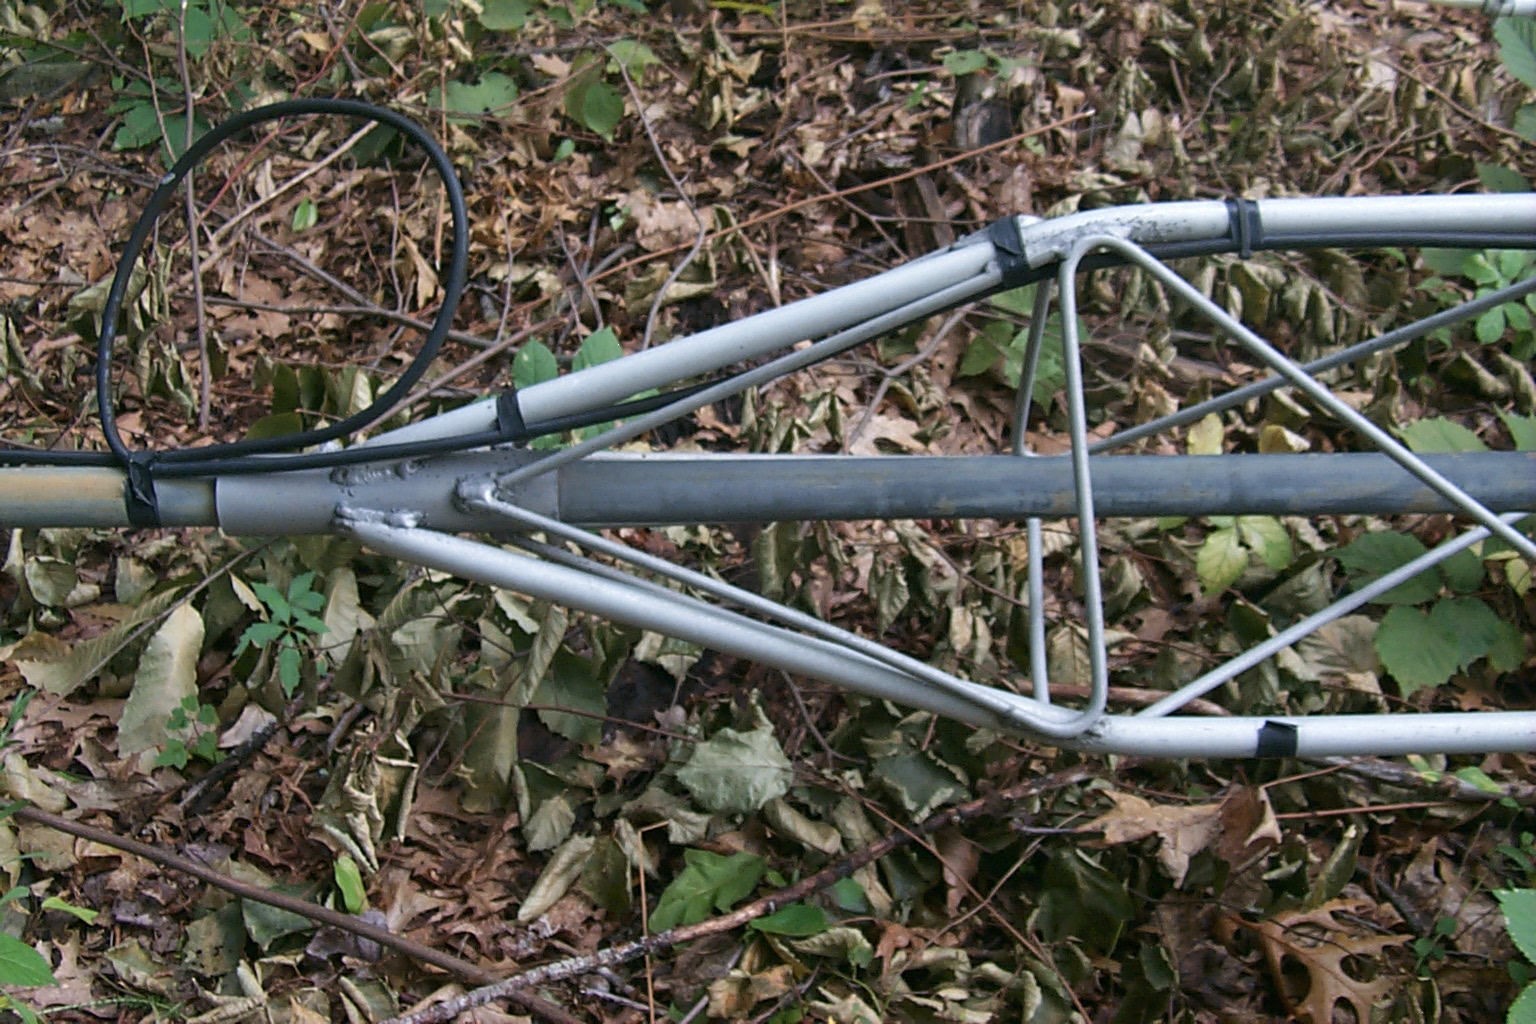
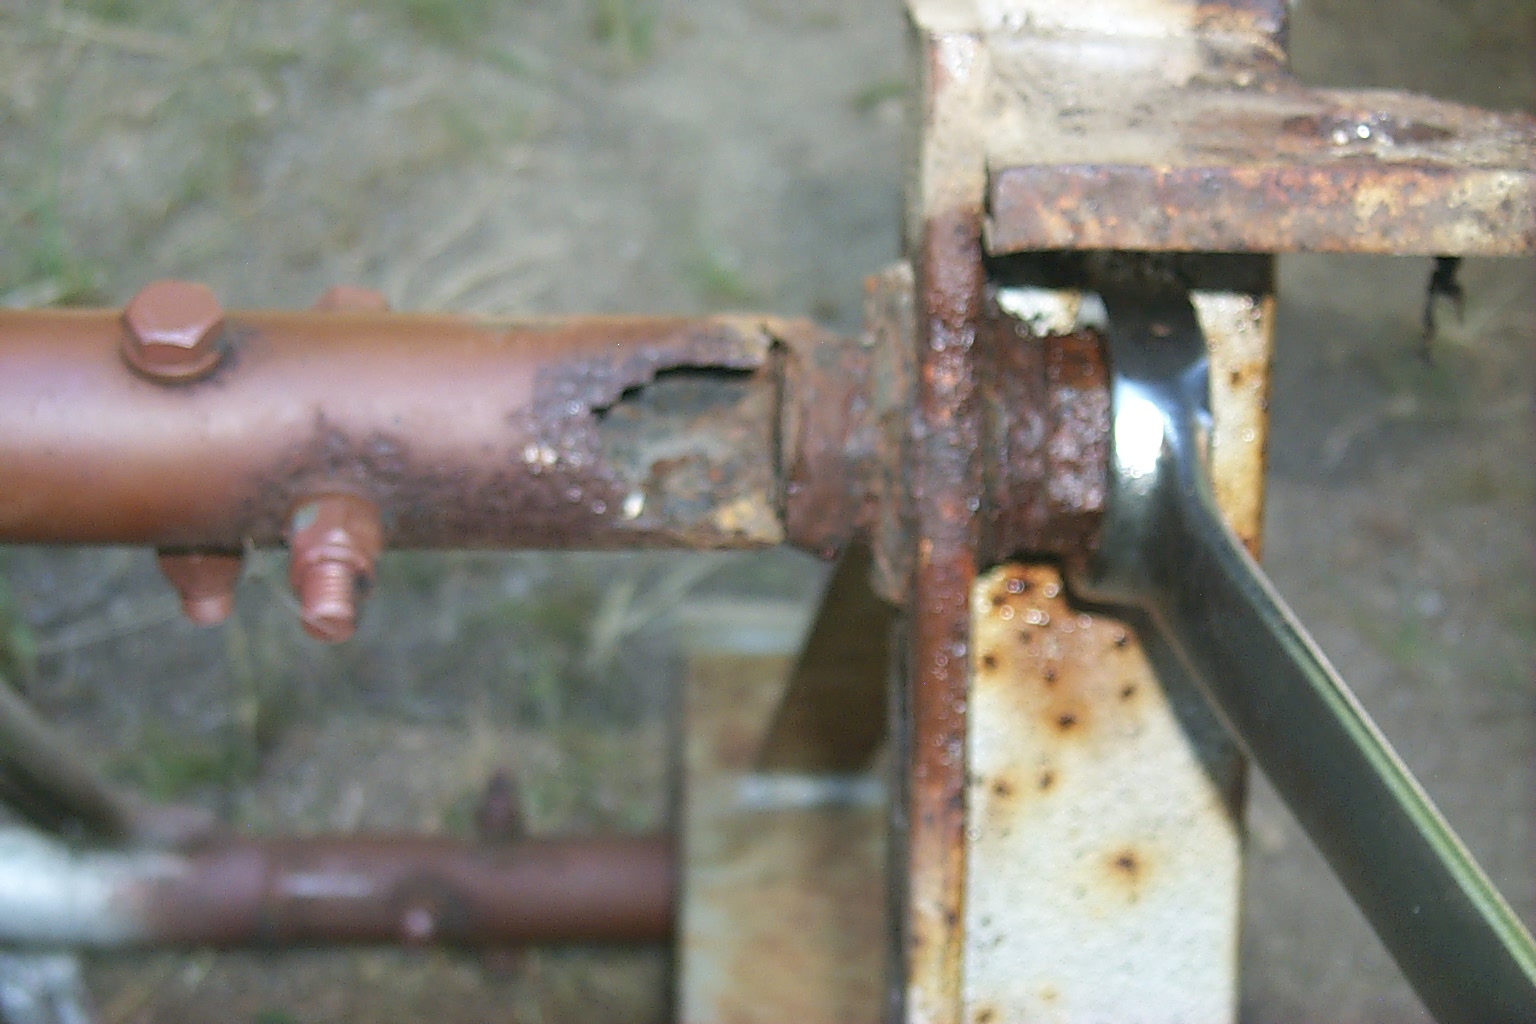
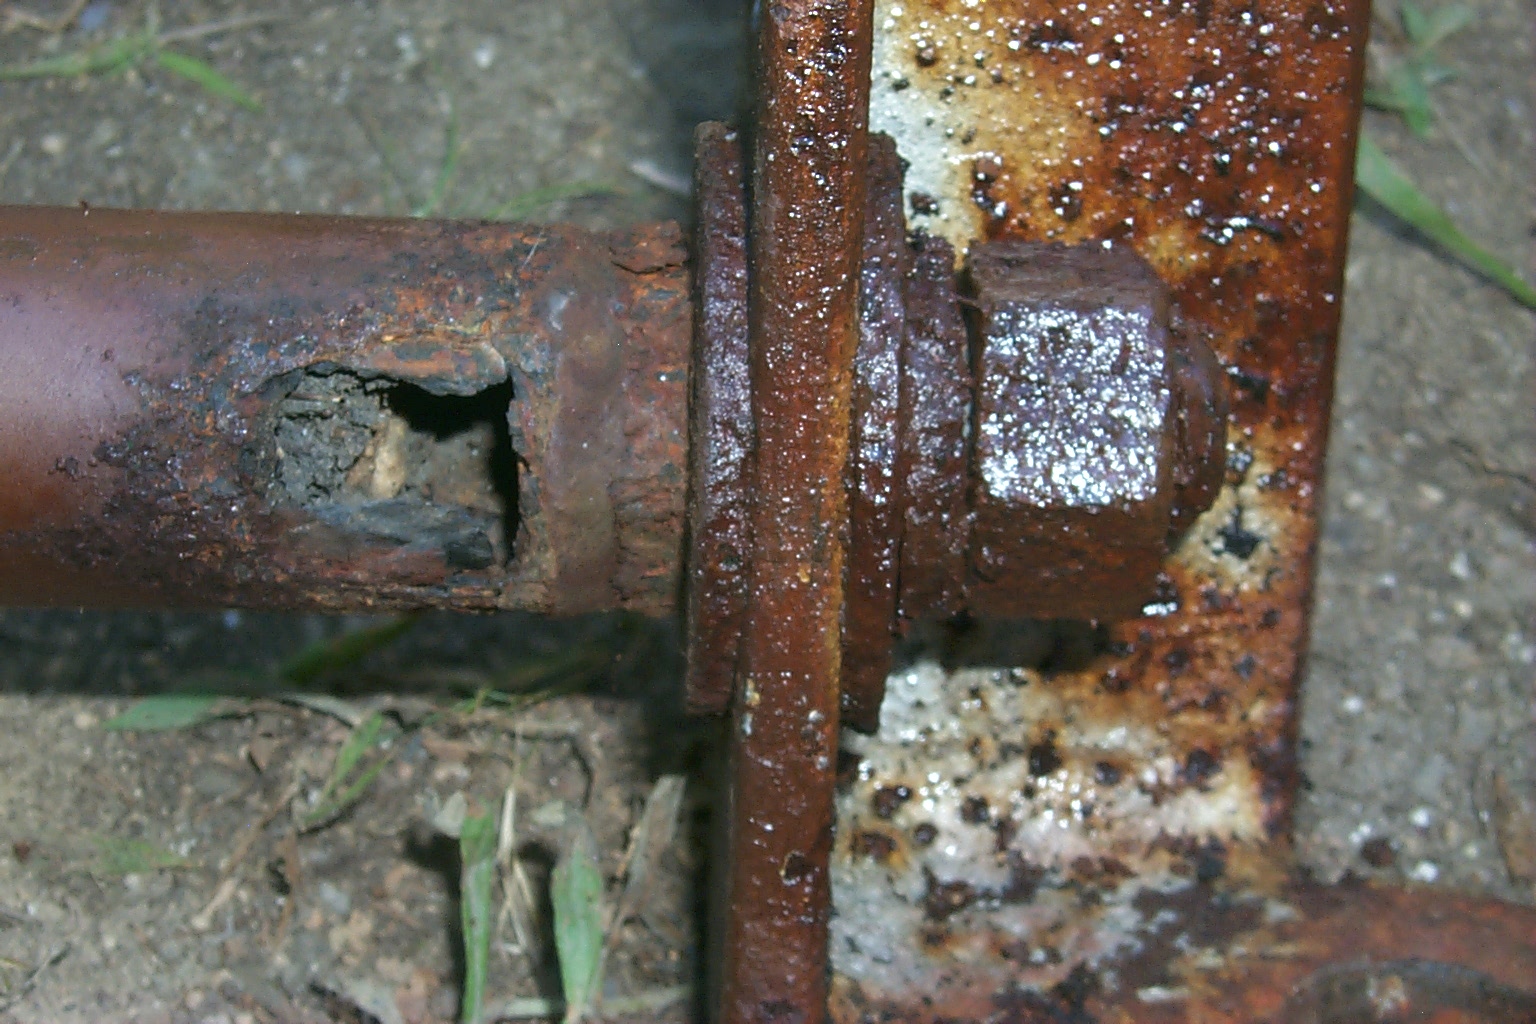
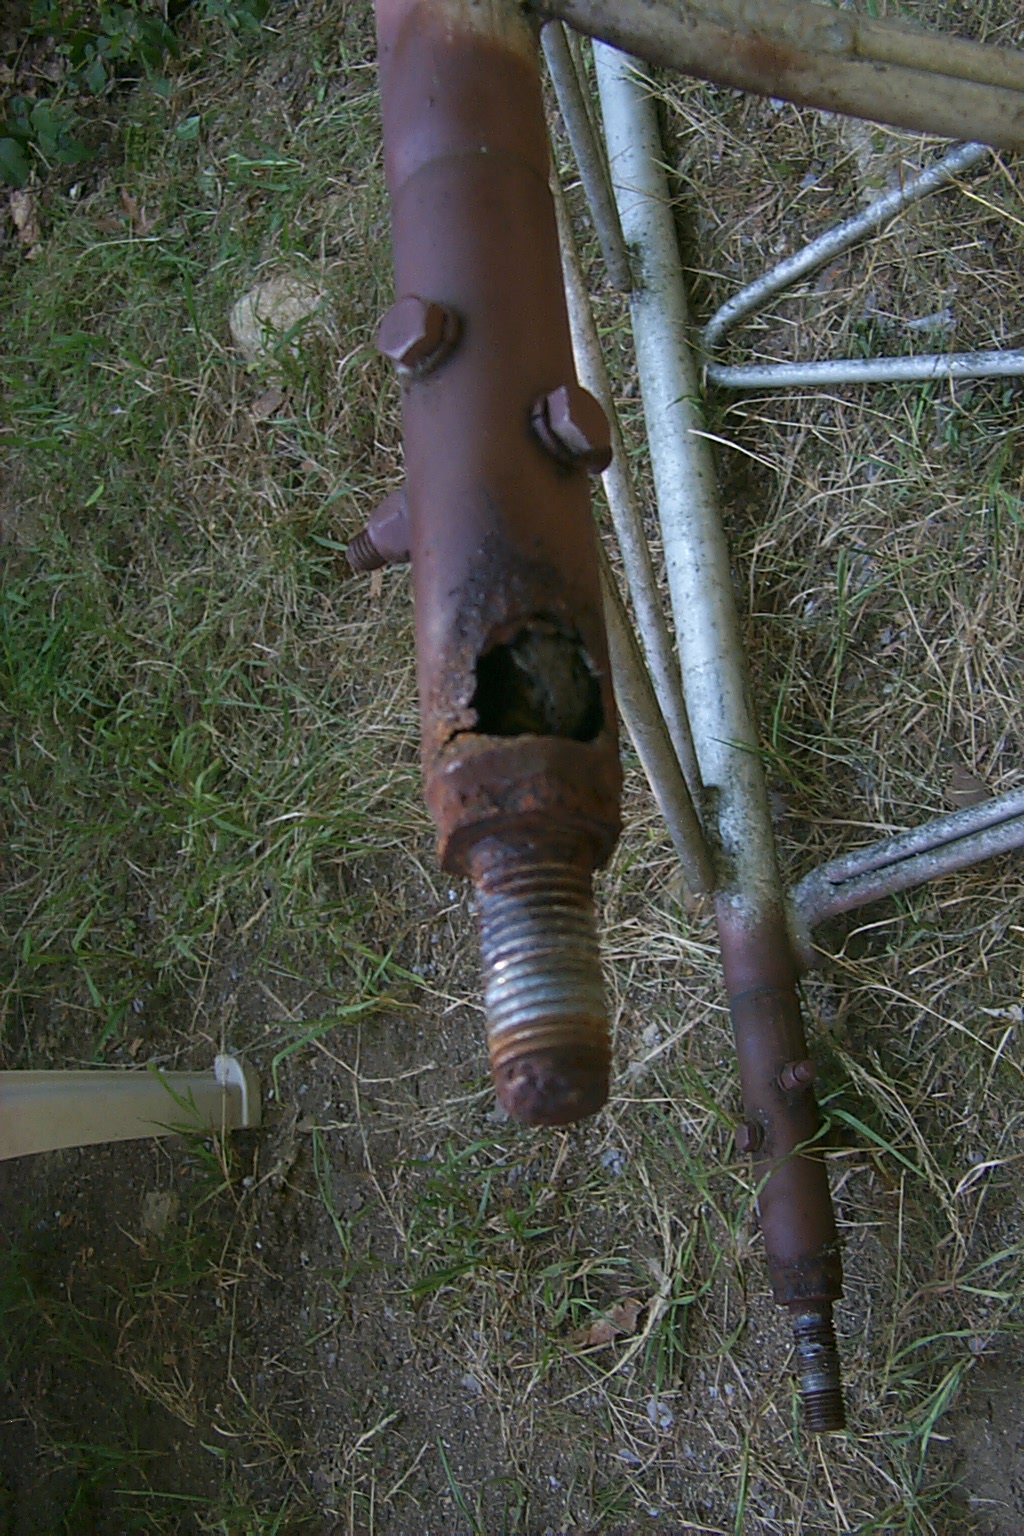
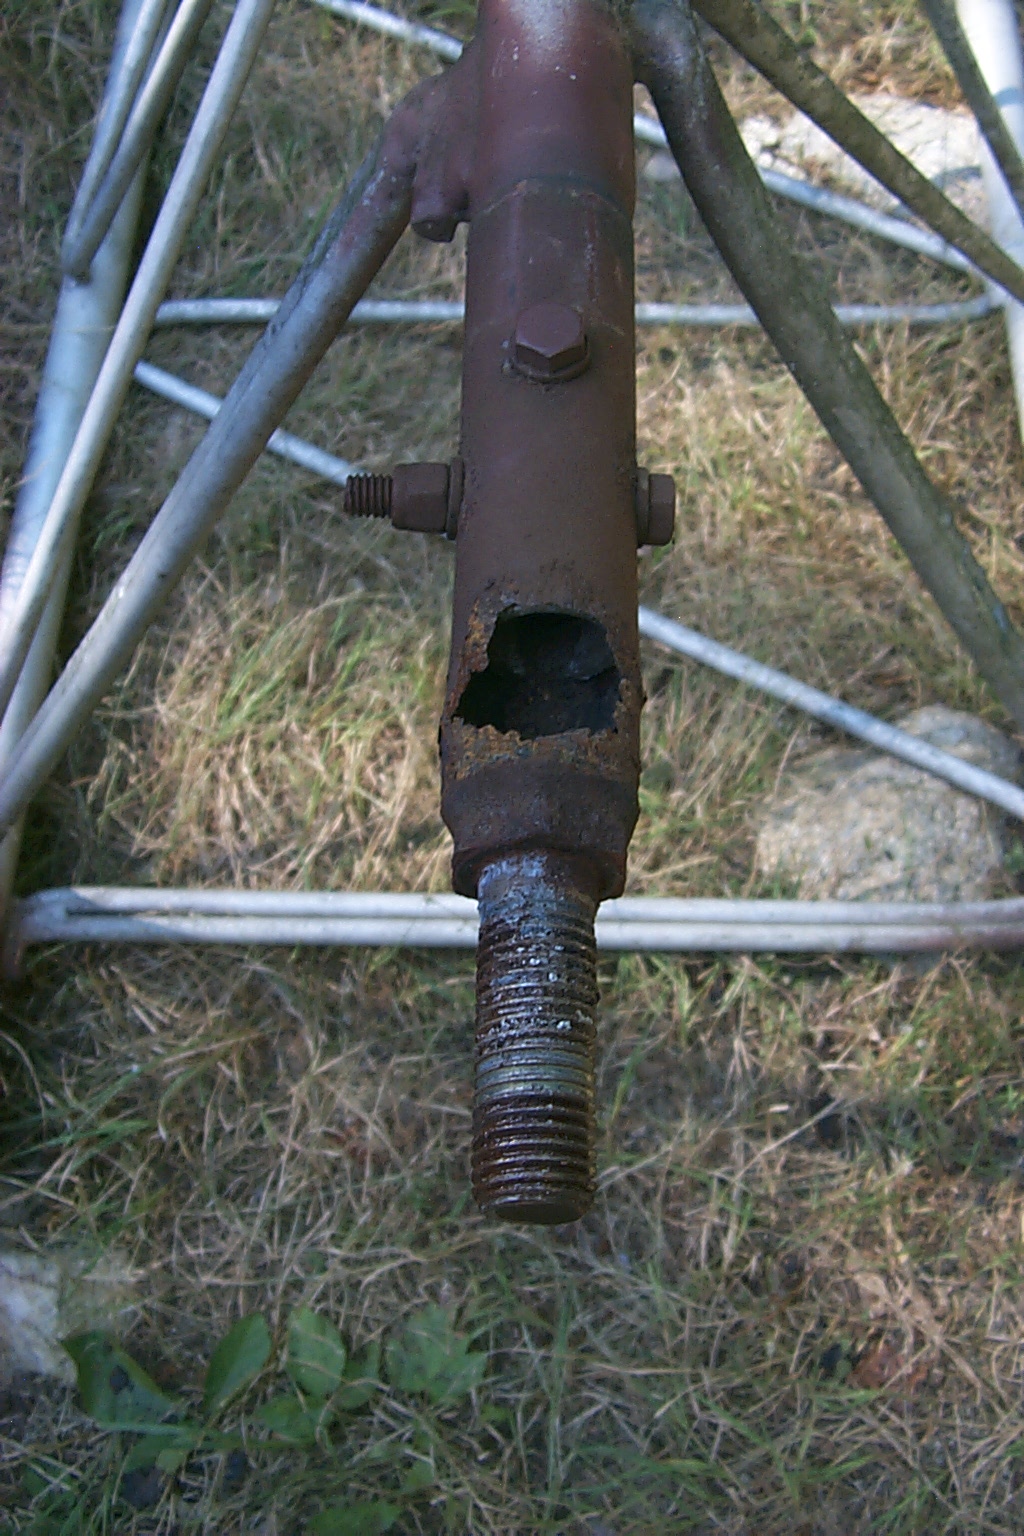
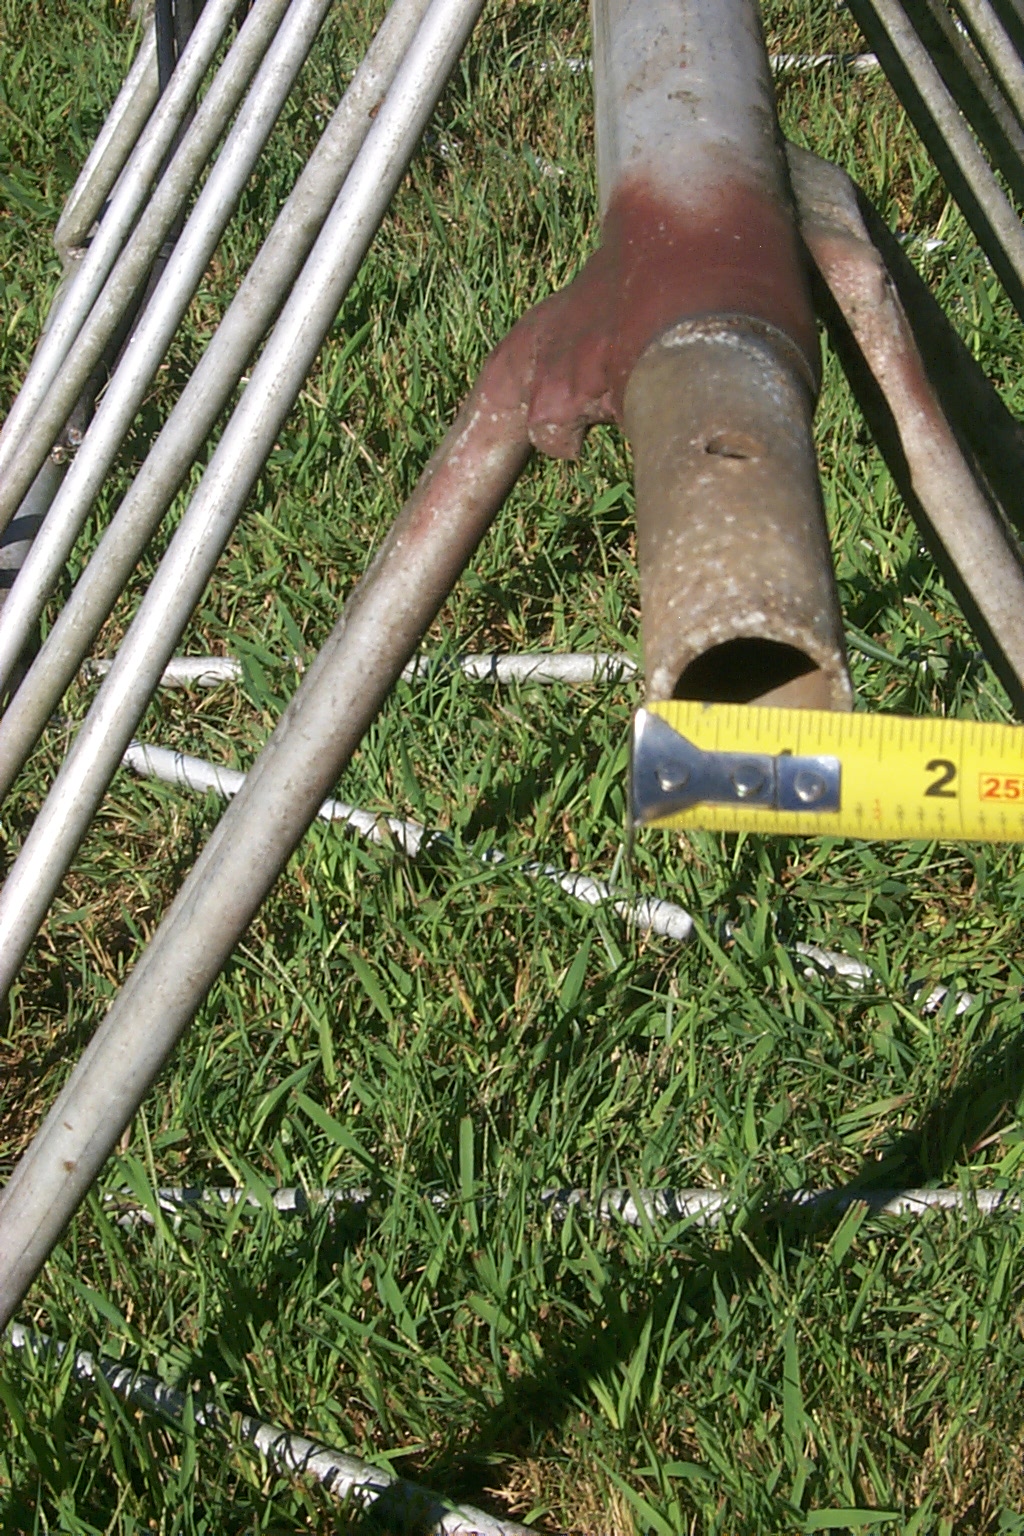
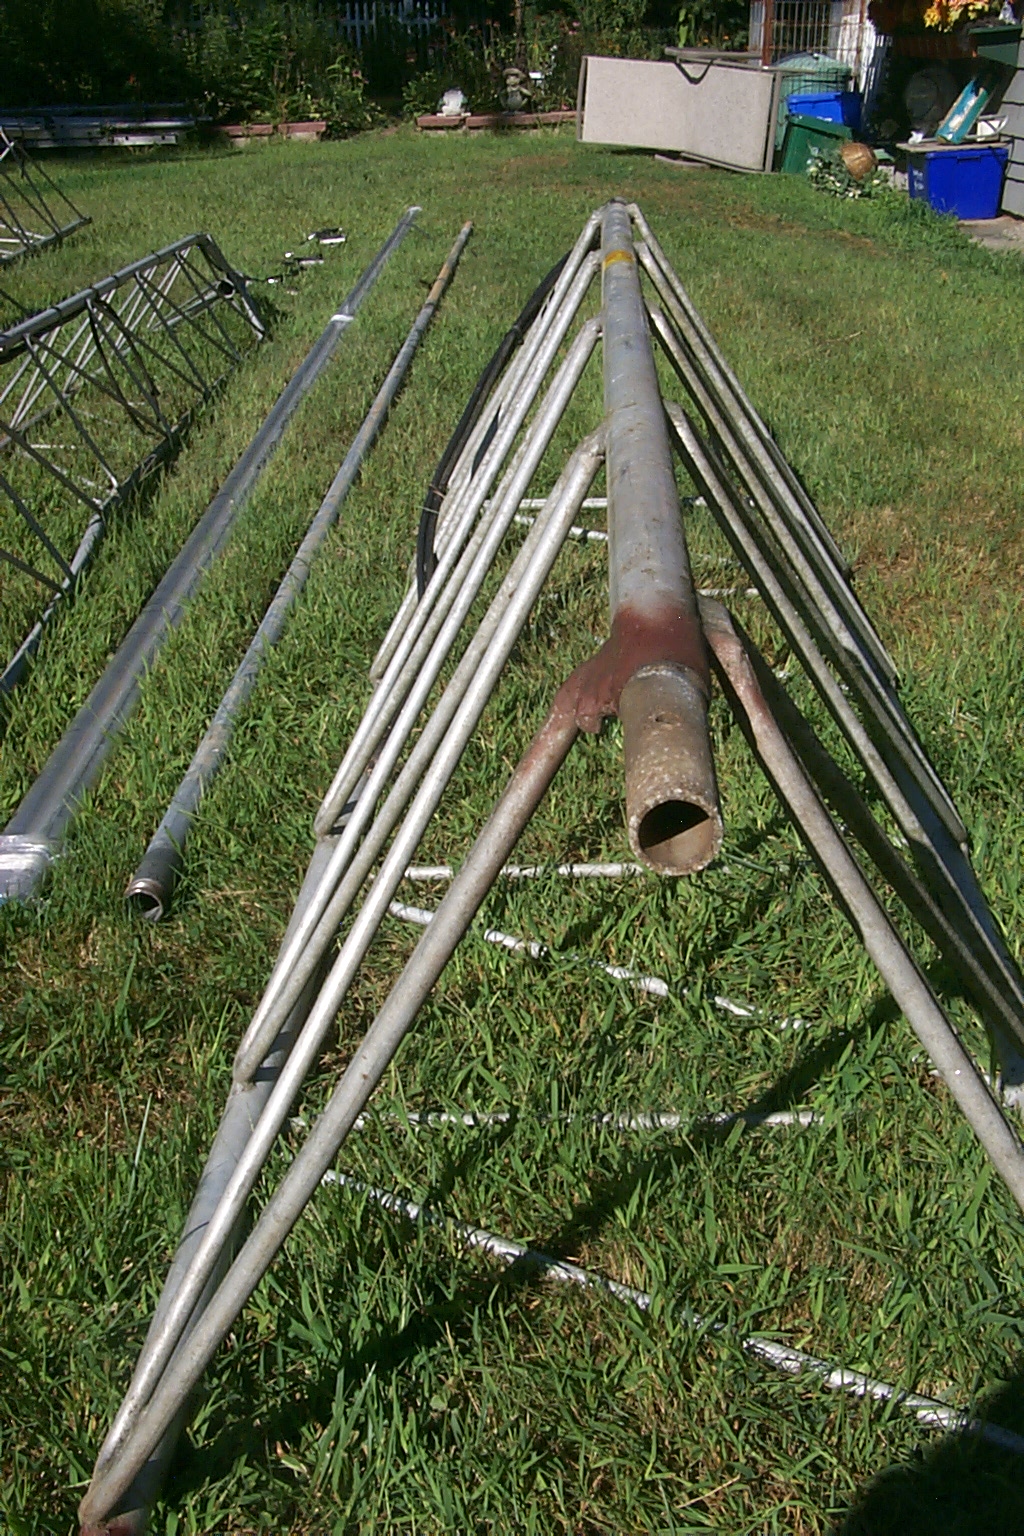
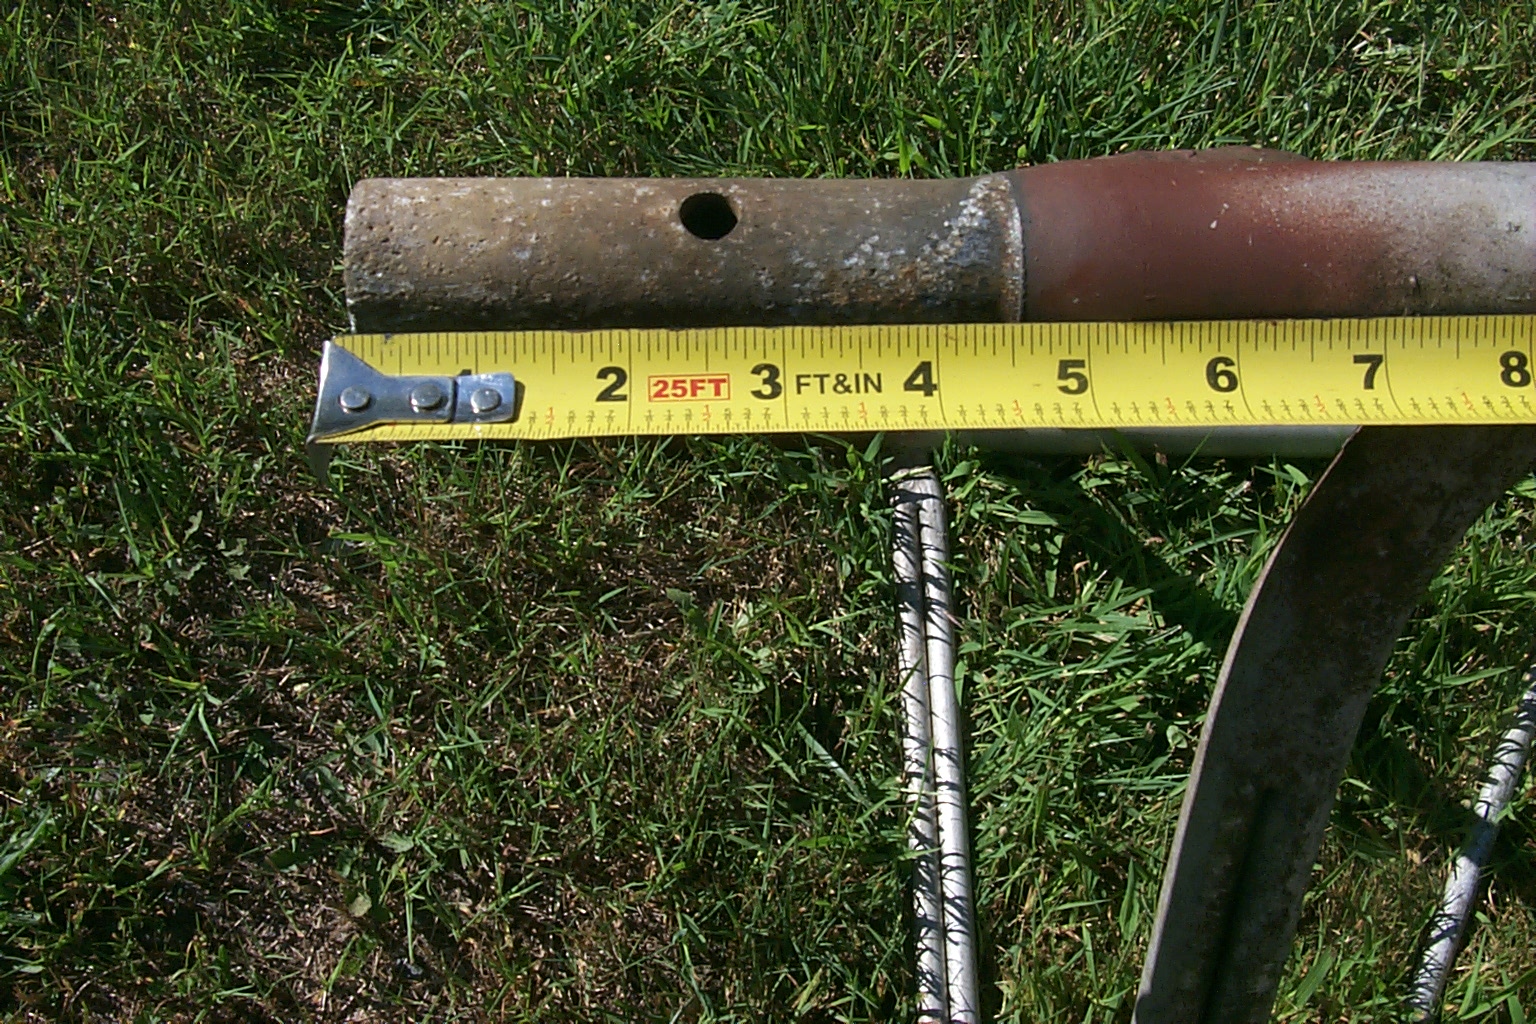
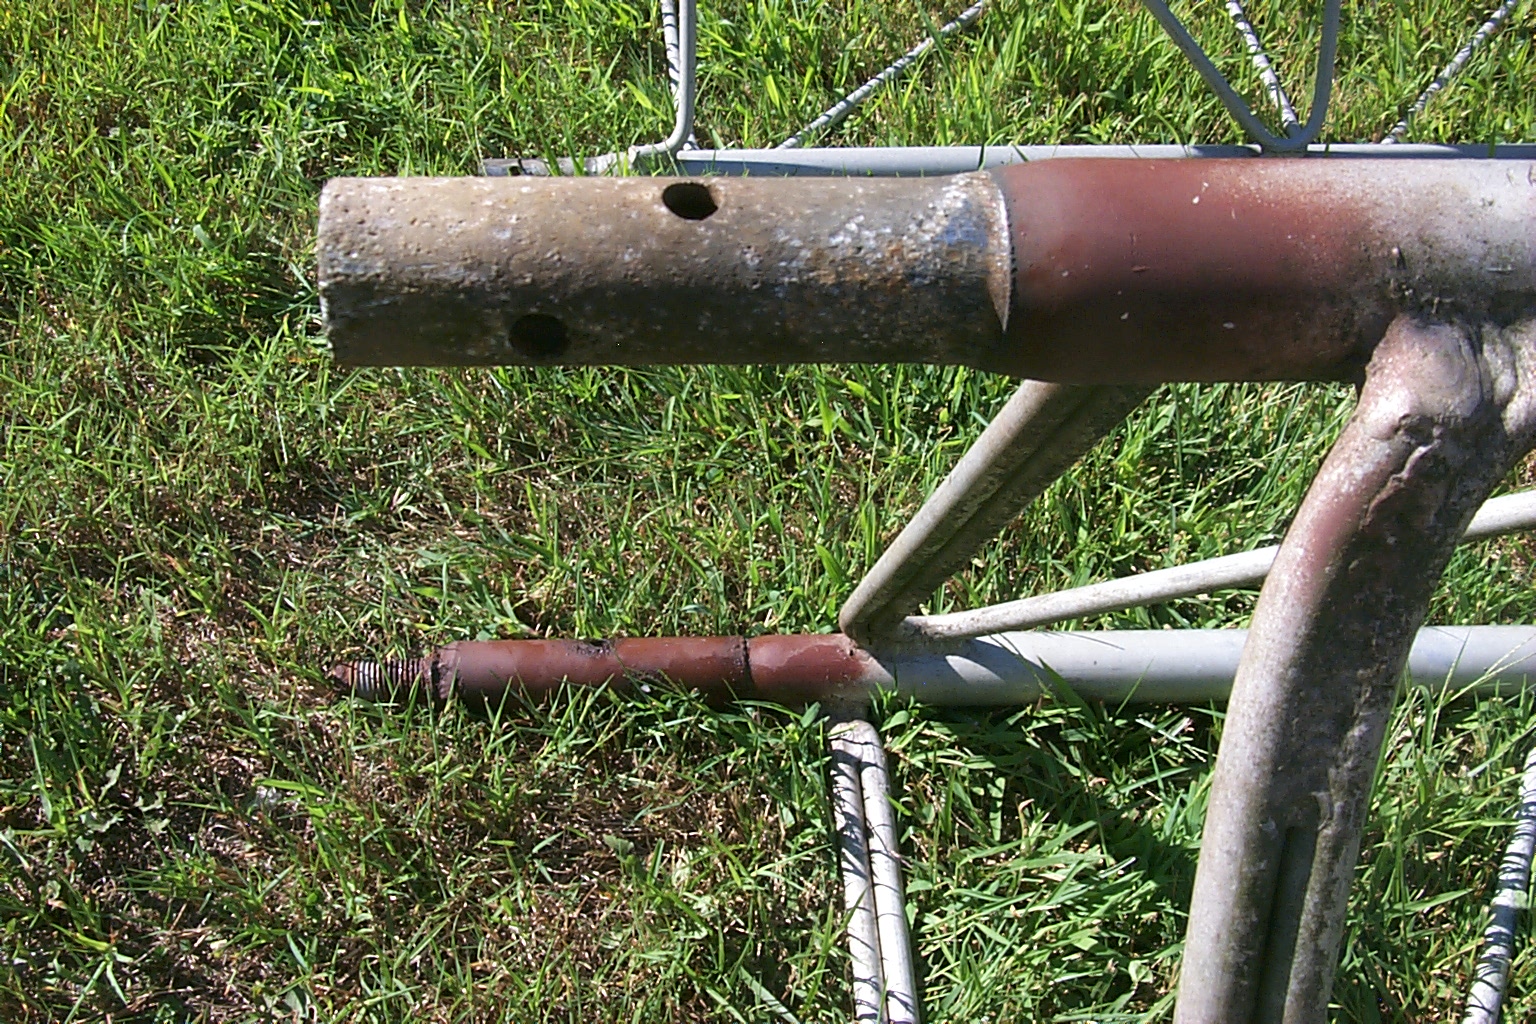
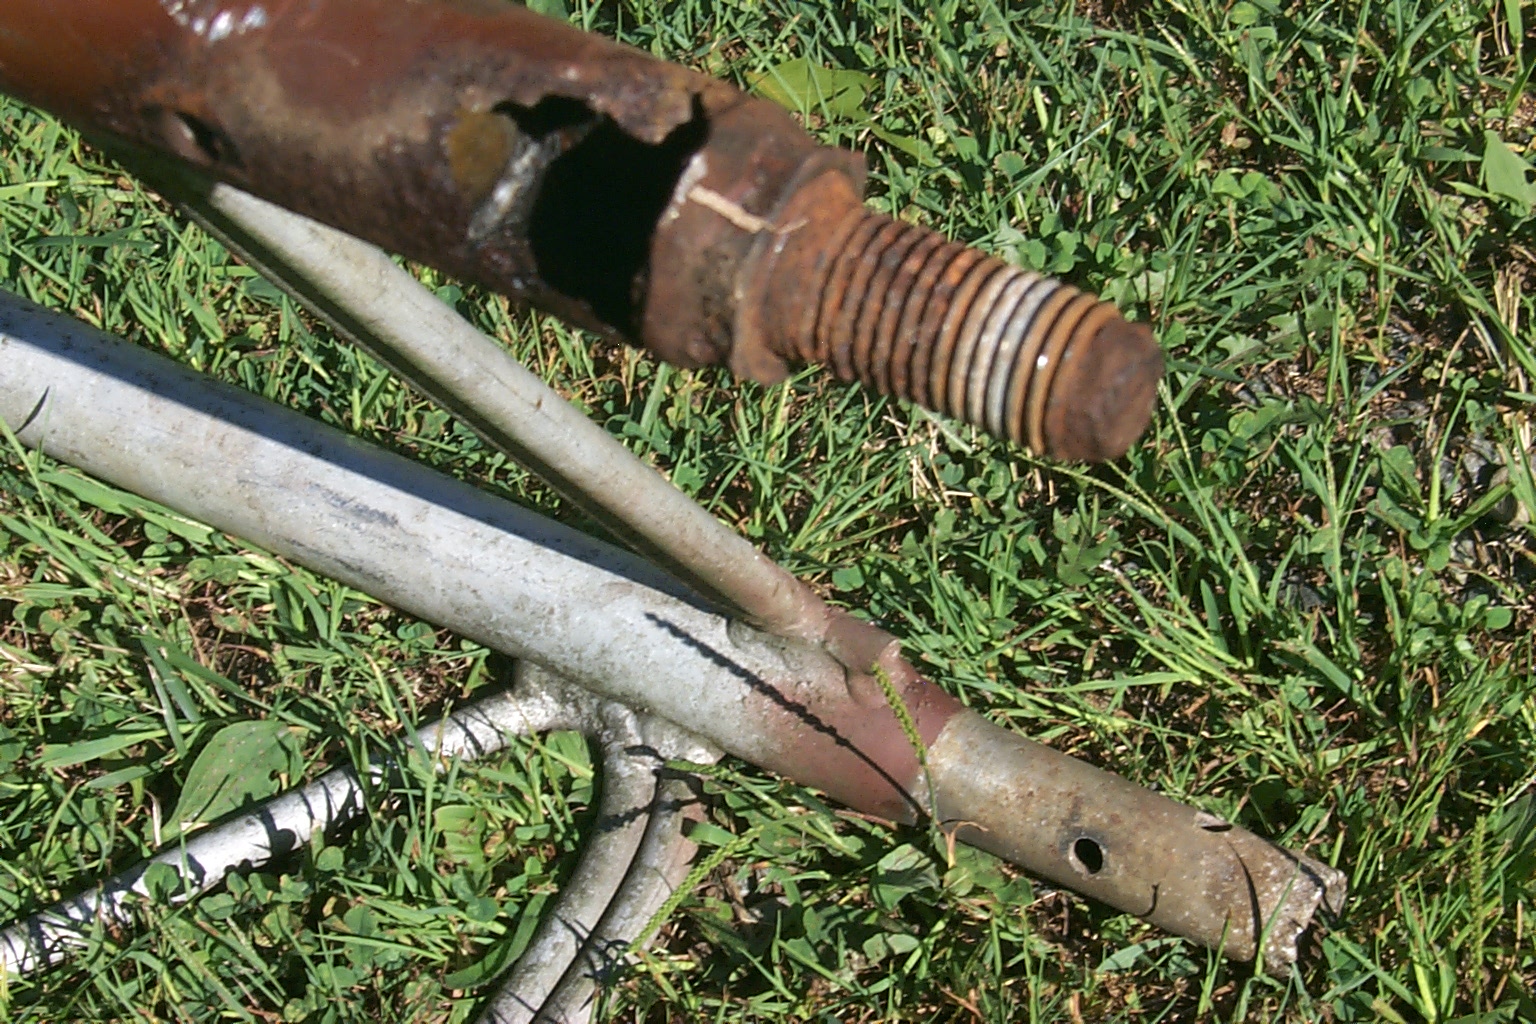
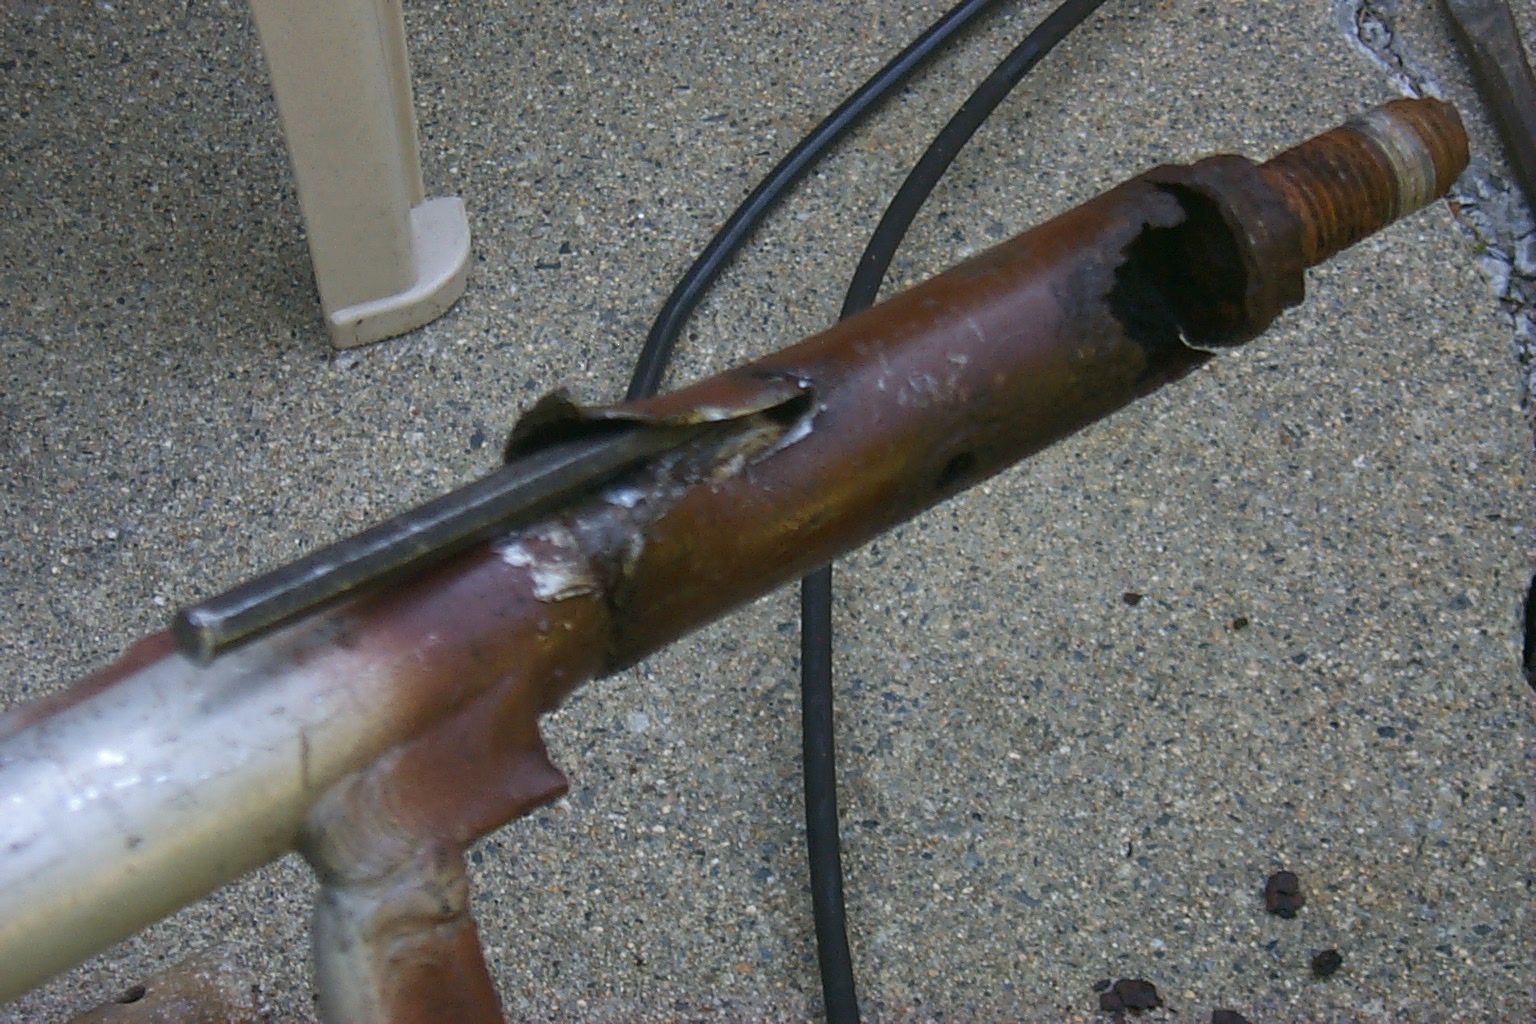
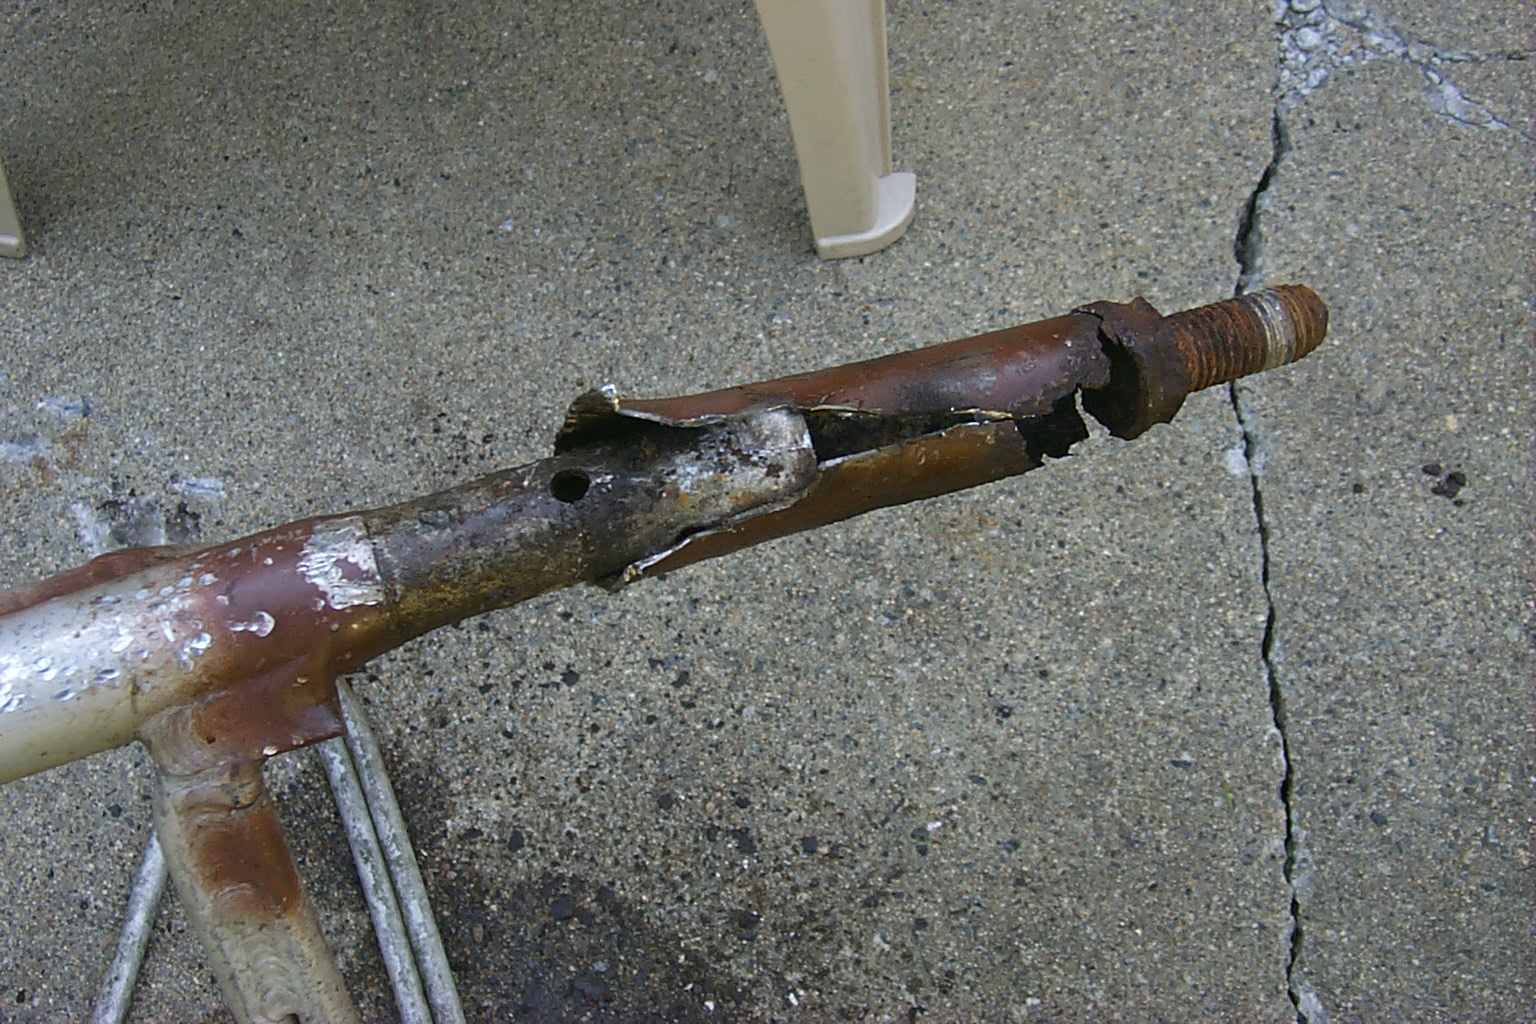
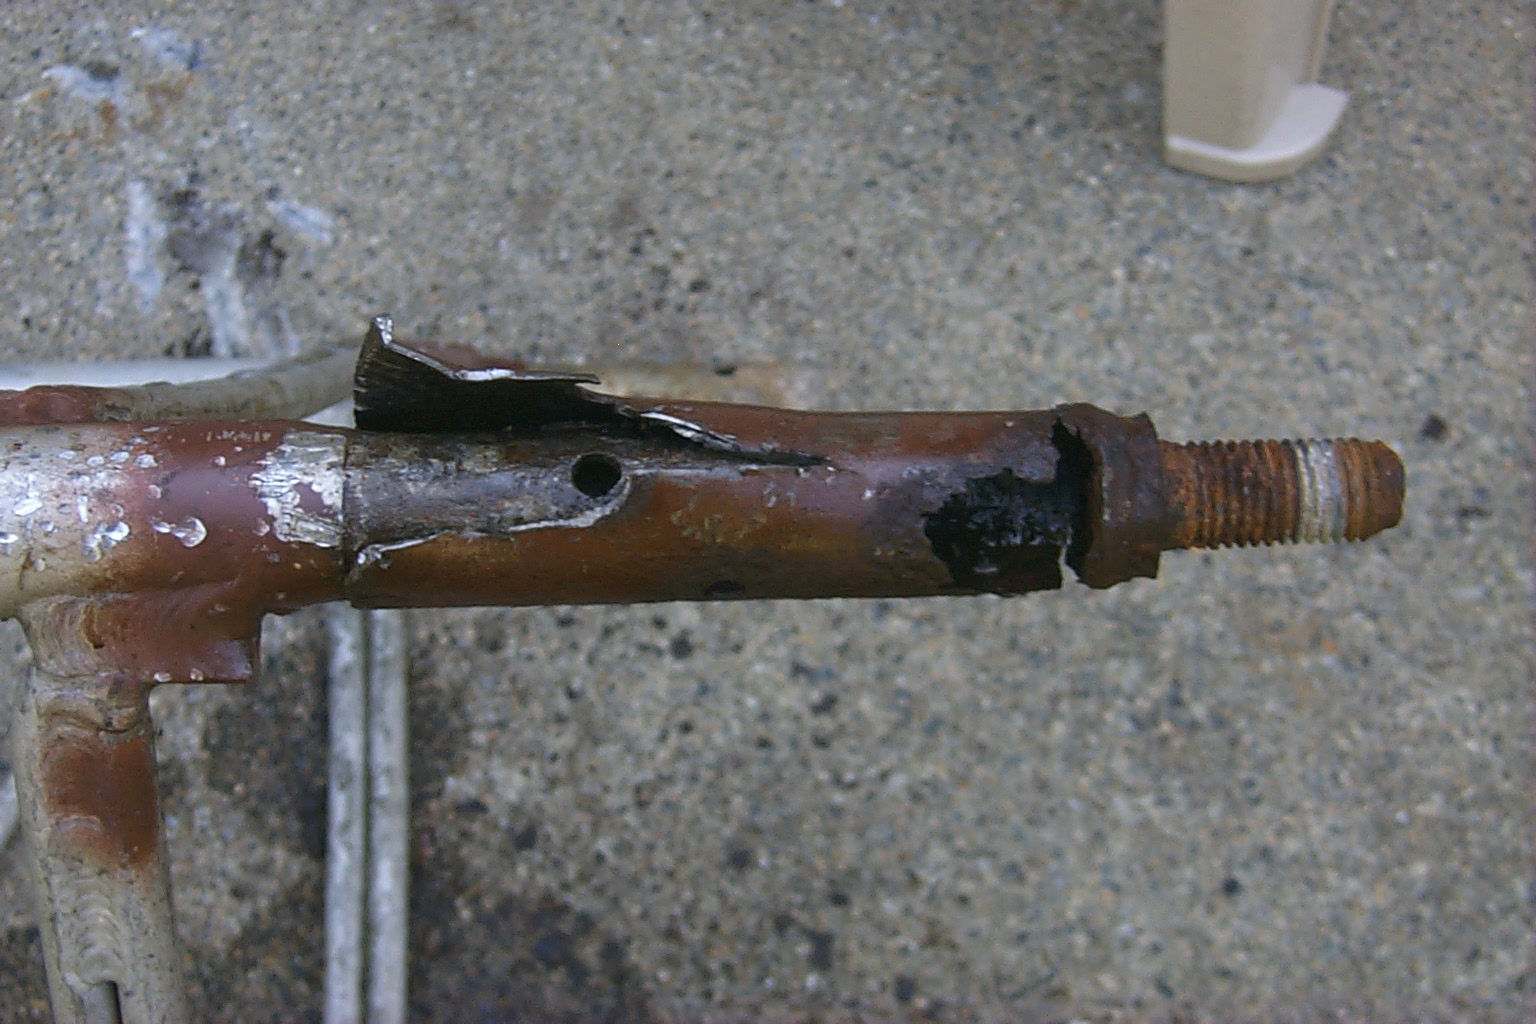
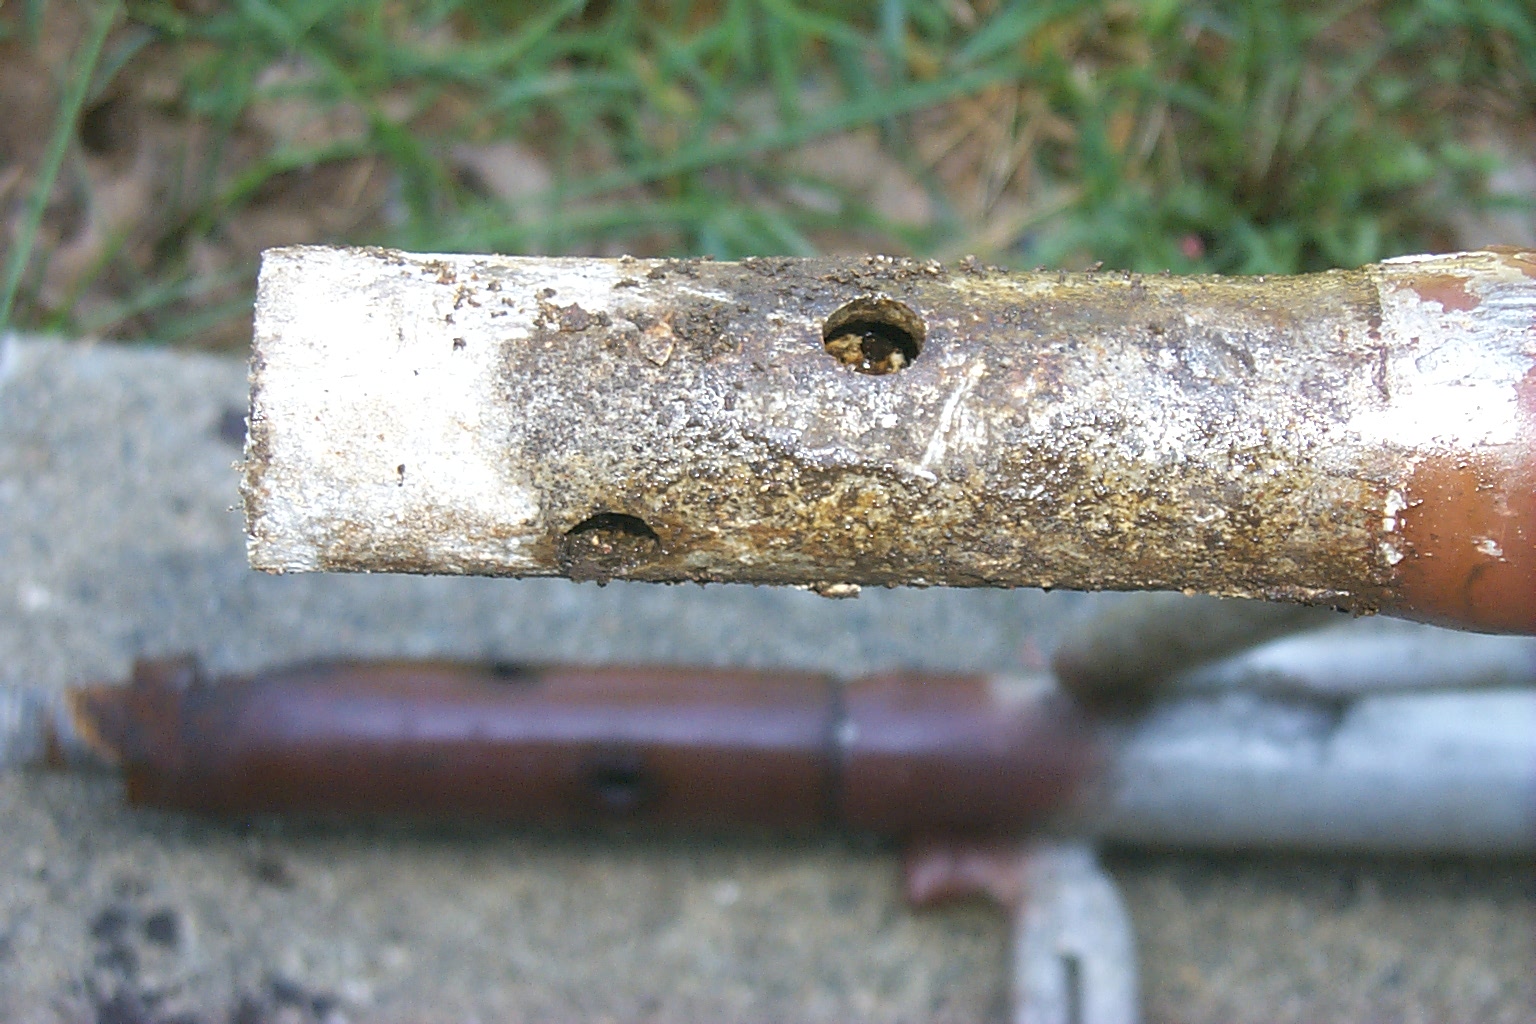
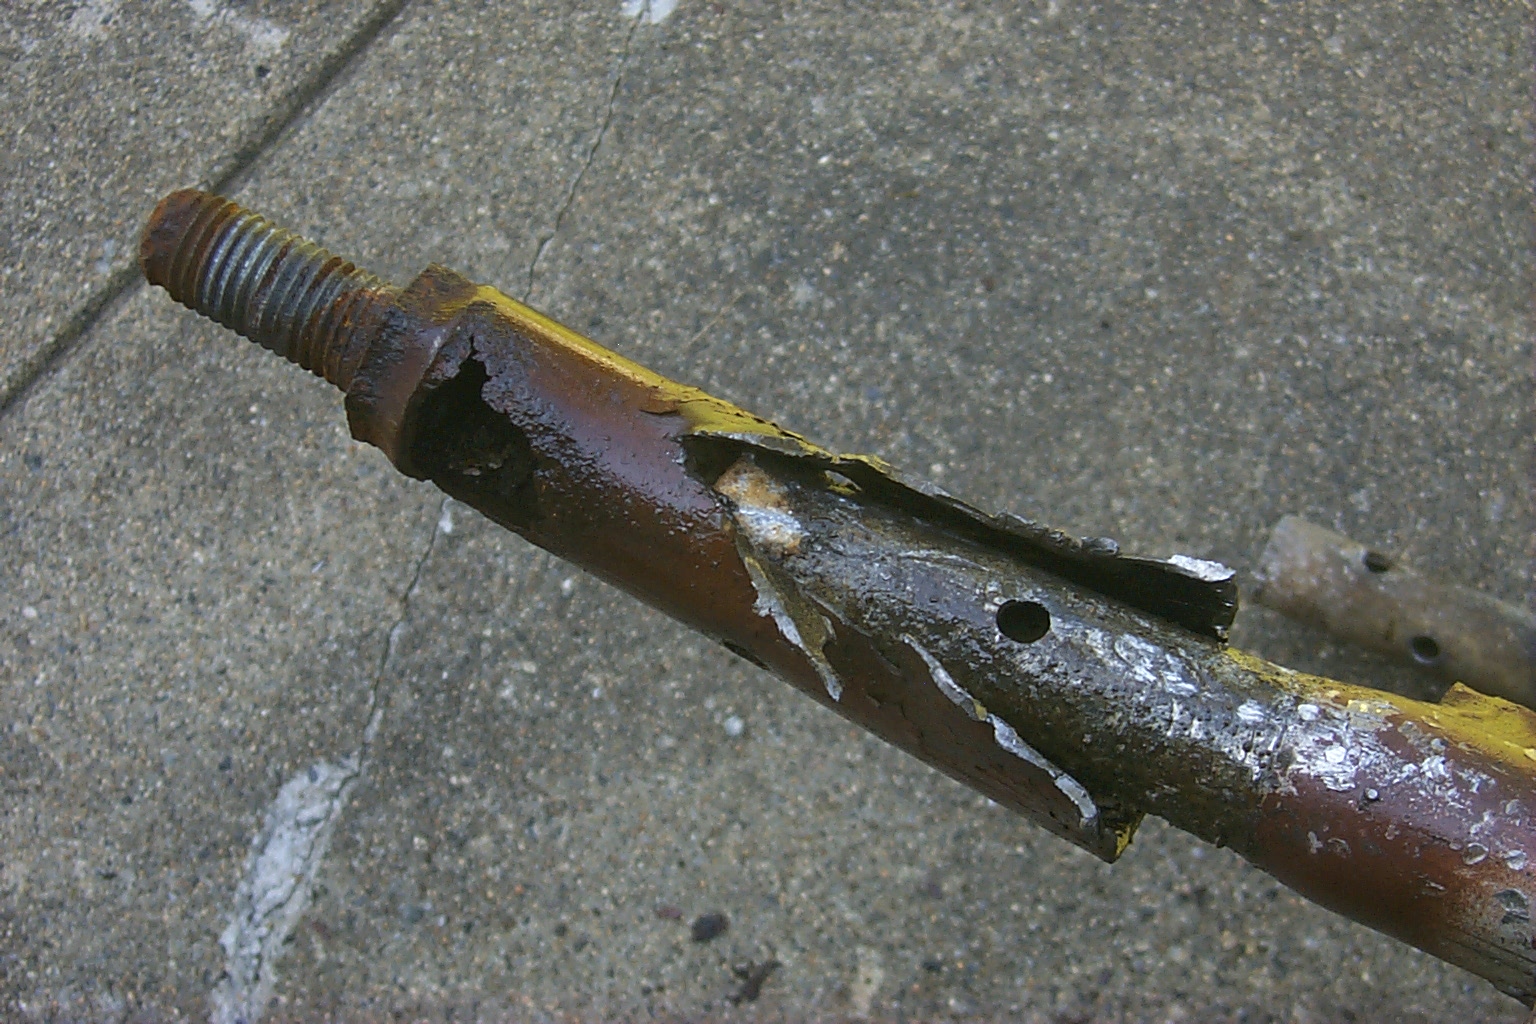
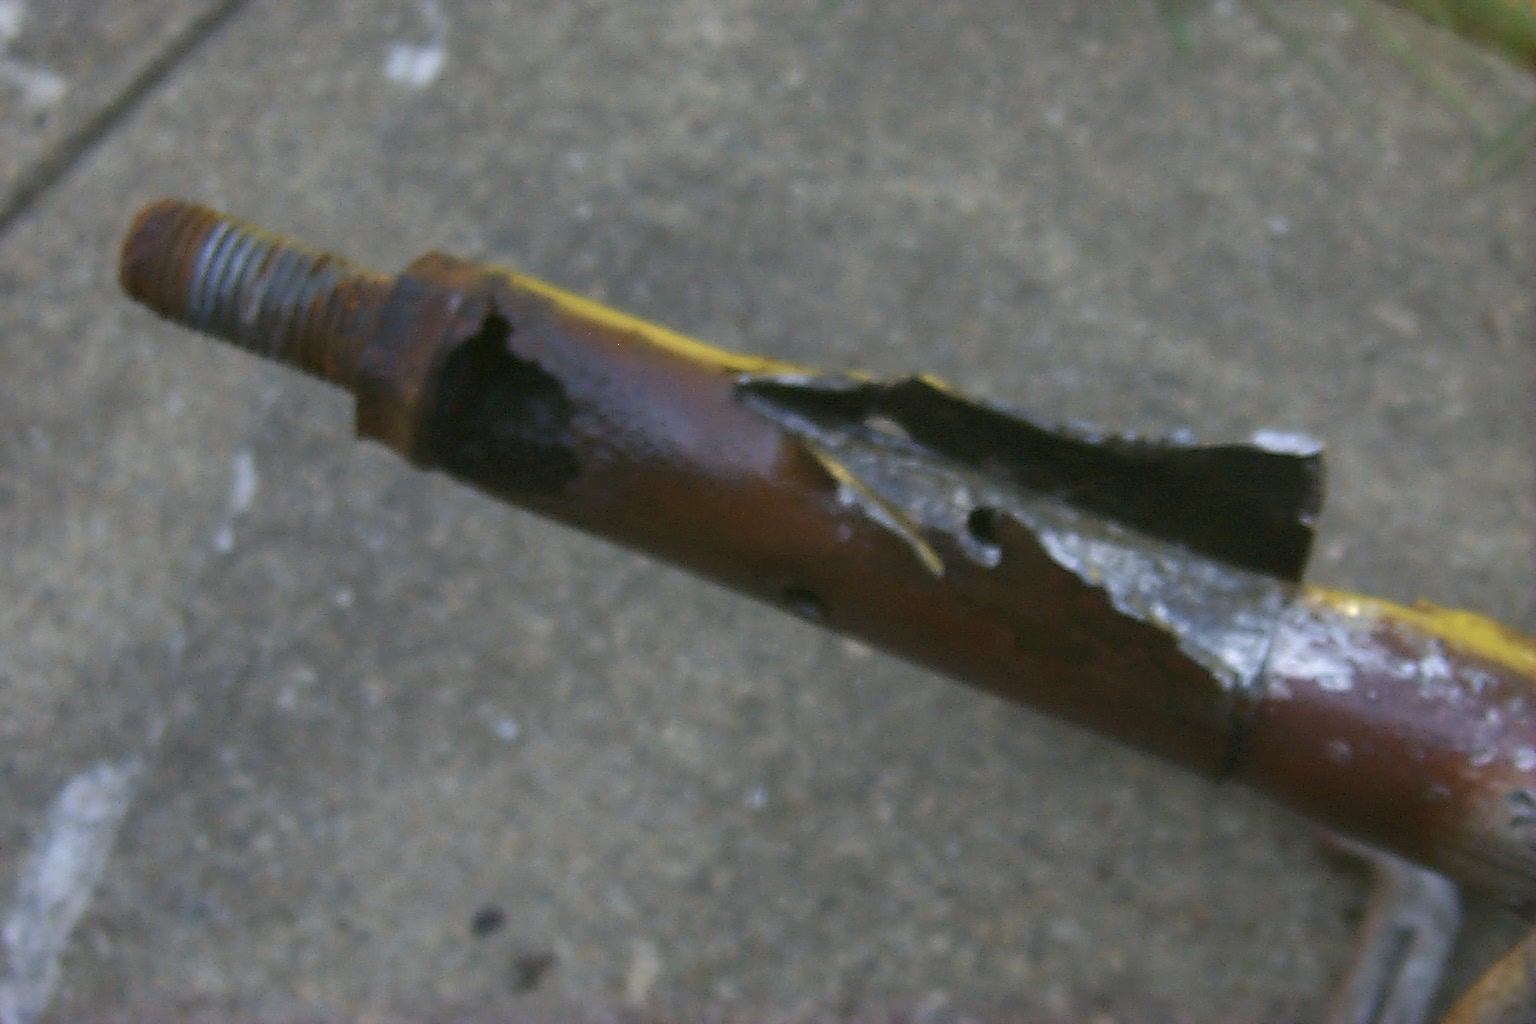
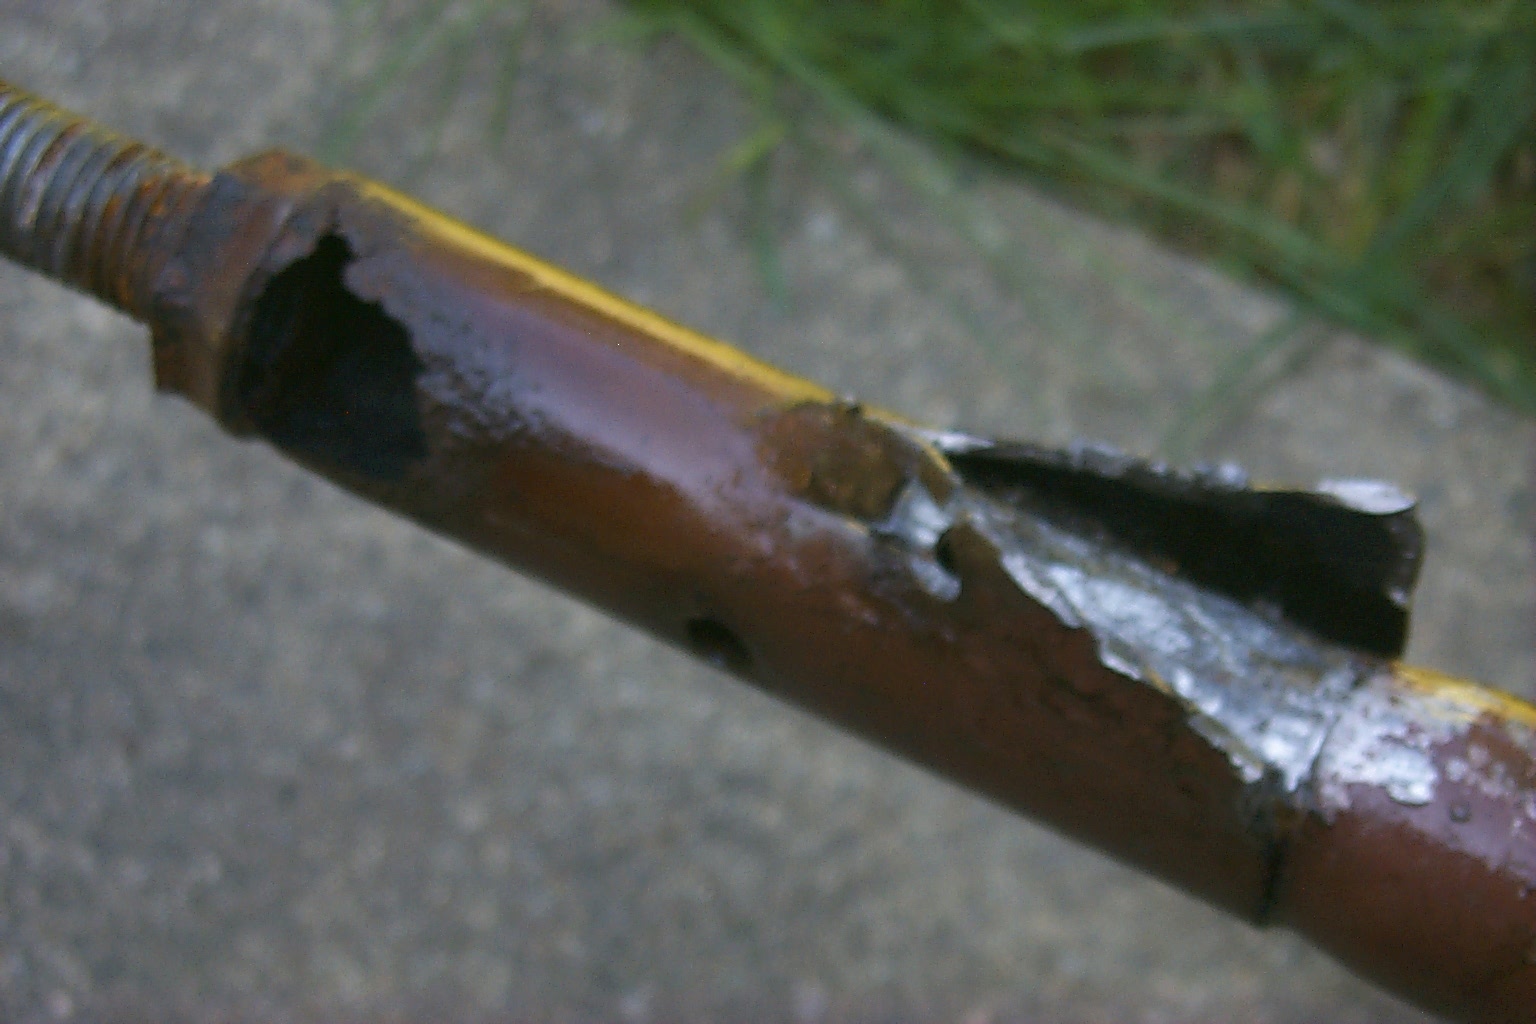
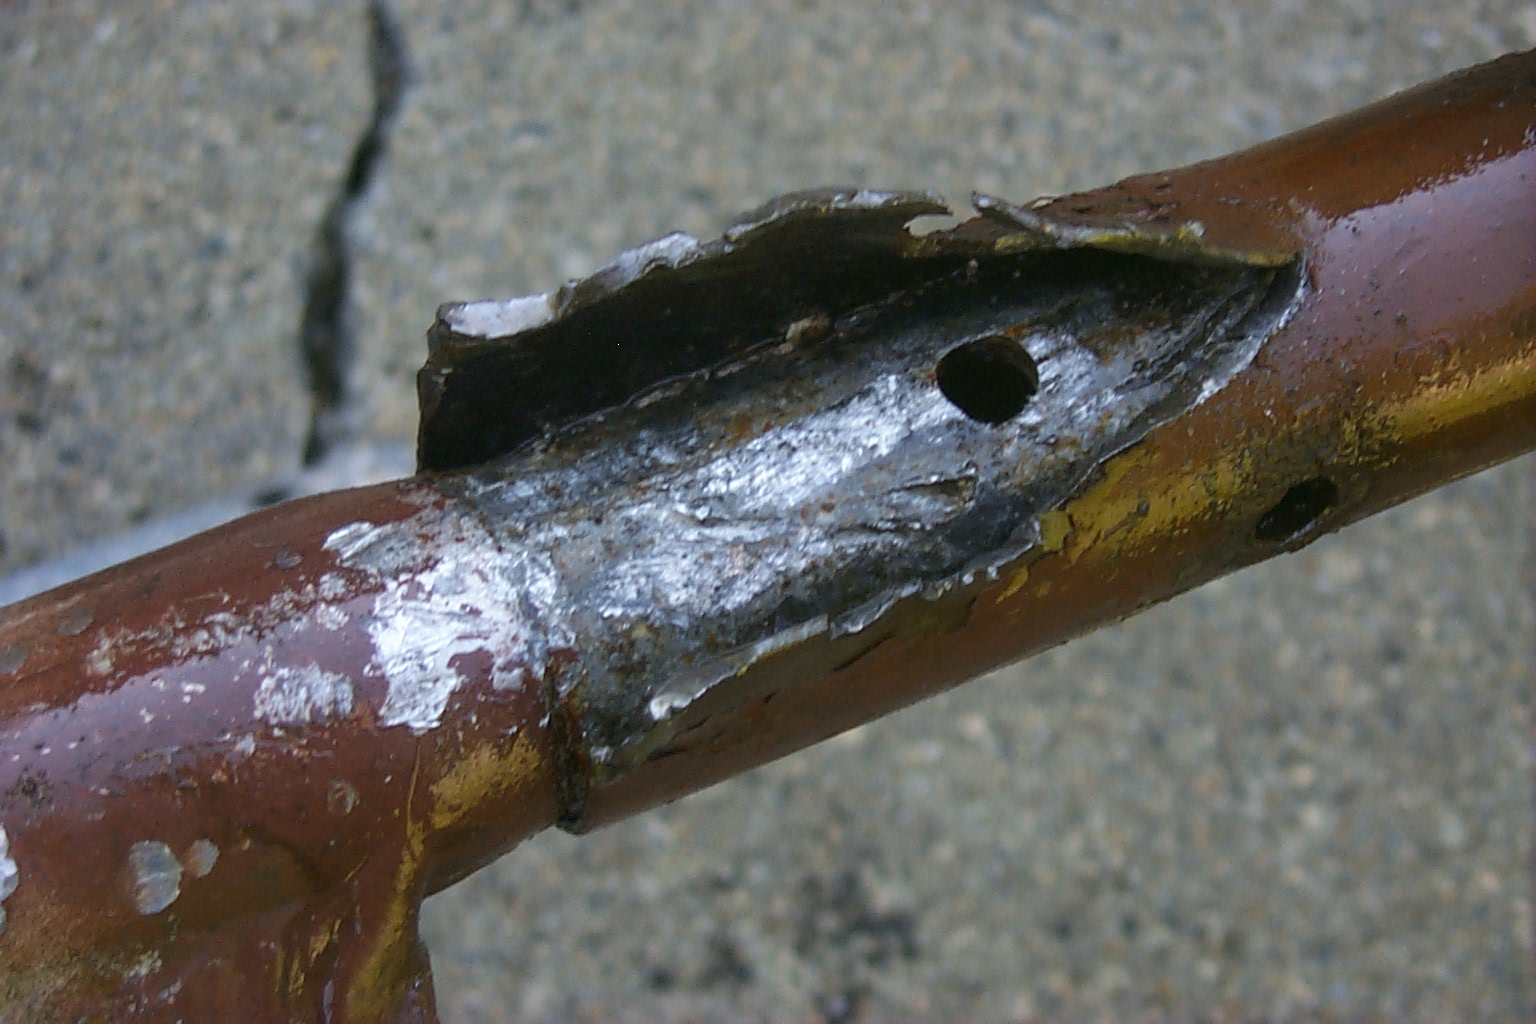
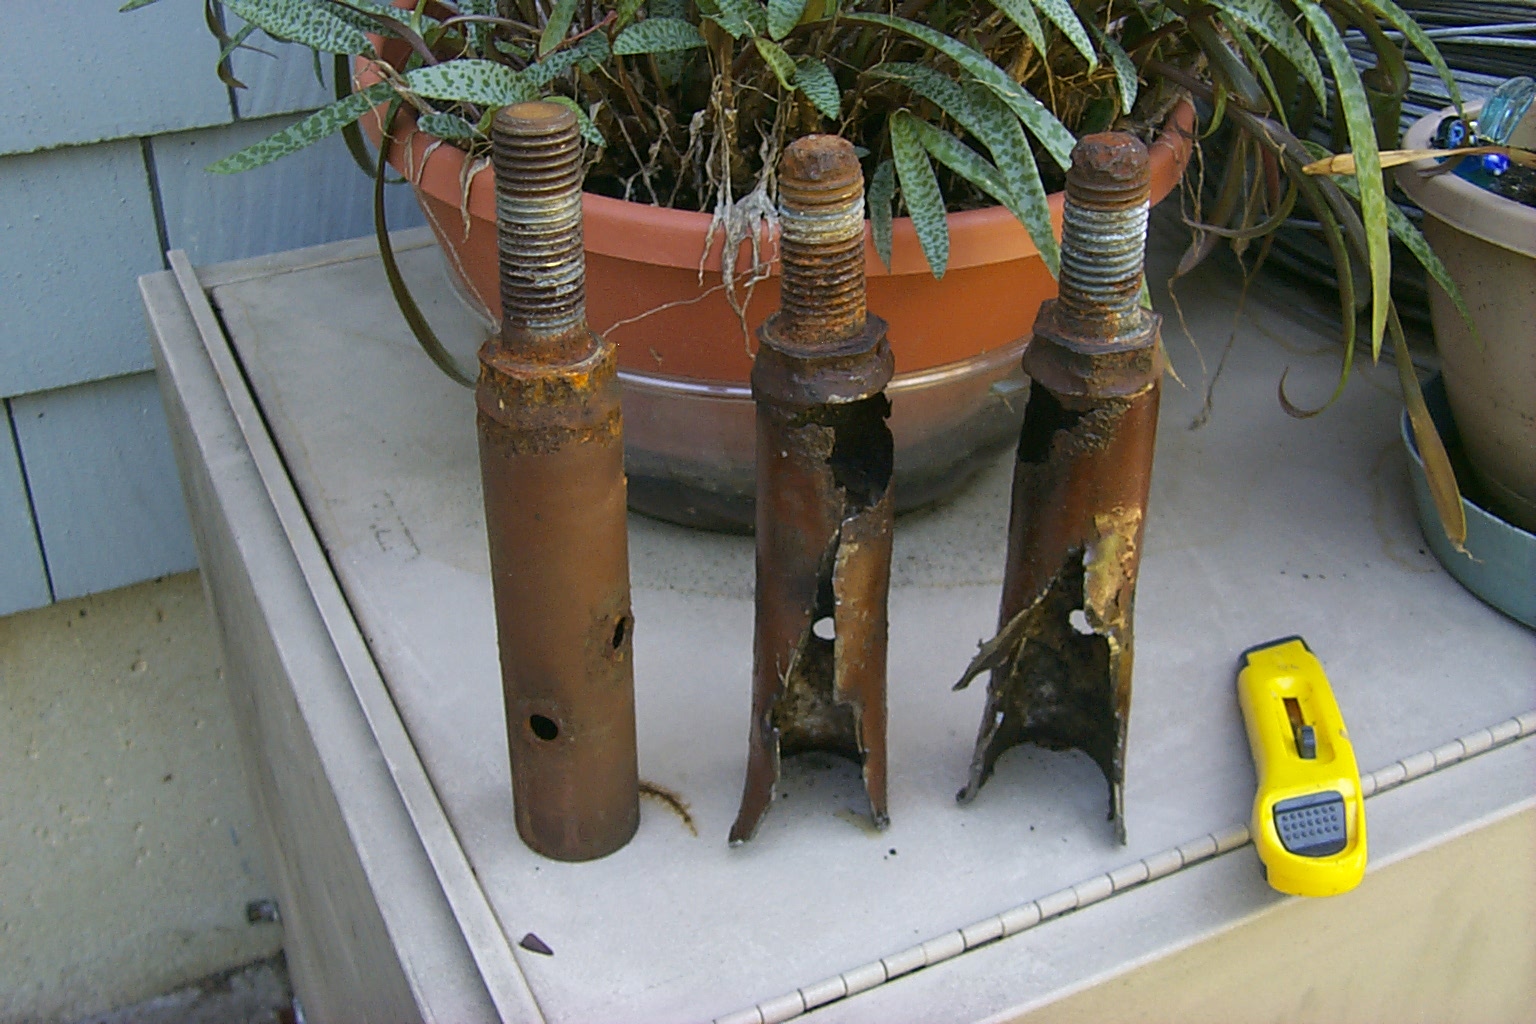
Wow am I ever lucky...
When Dad and I finally got down to taking the bottom section of tower off the hinged base plate I was shocked to see how badly those homemade mounting stubs had rusted out. We are so lucky that this tower did not fall down before we could gracefully tilt it down for these repairs.
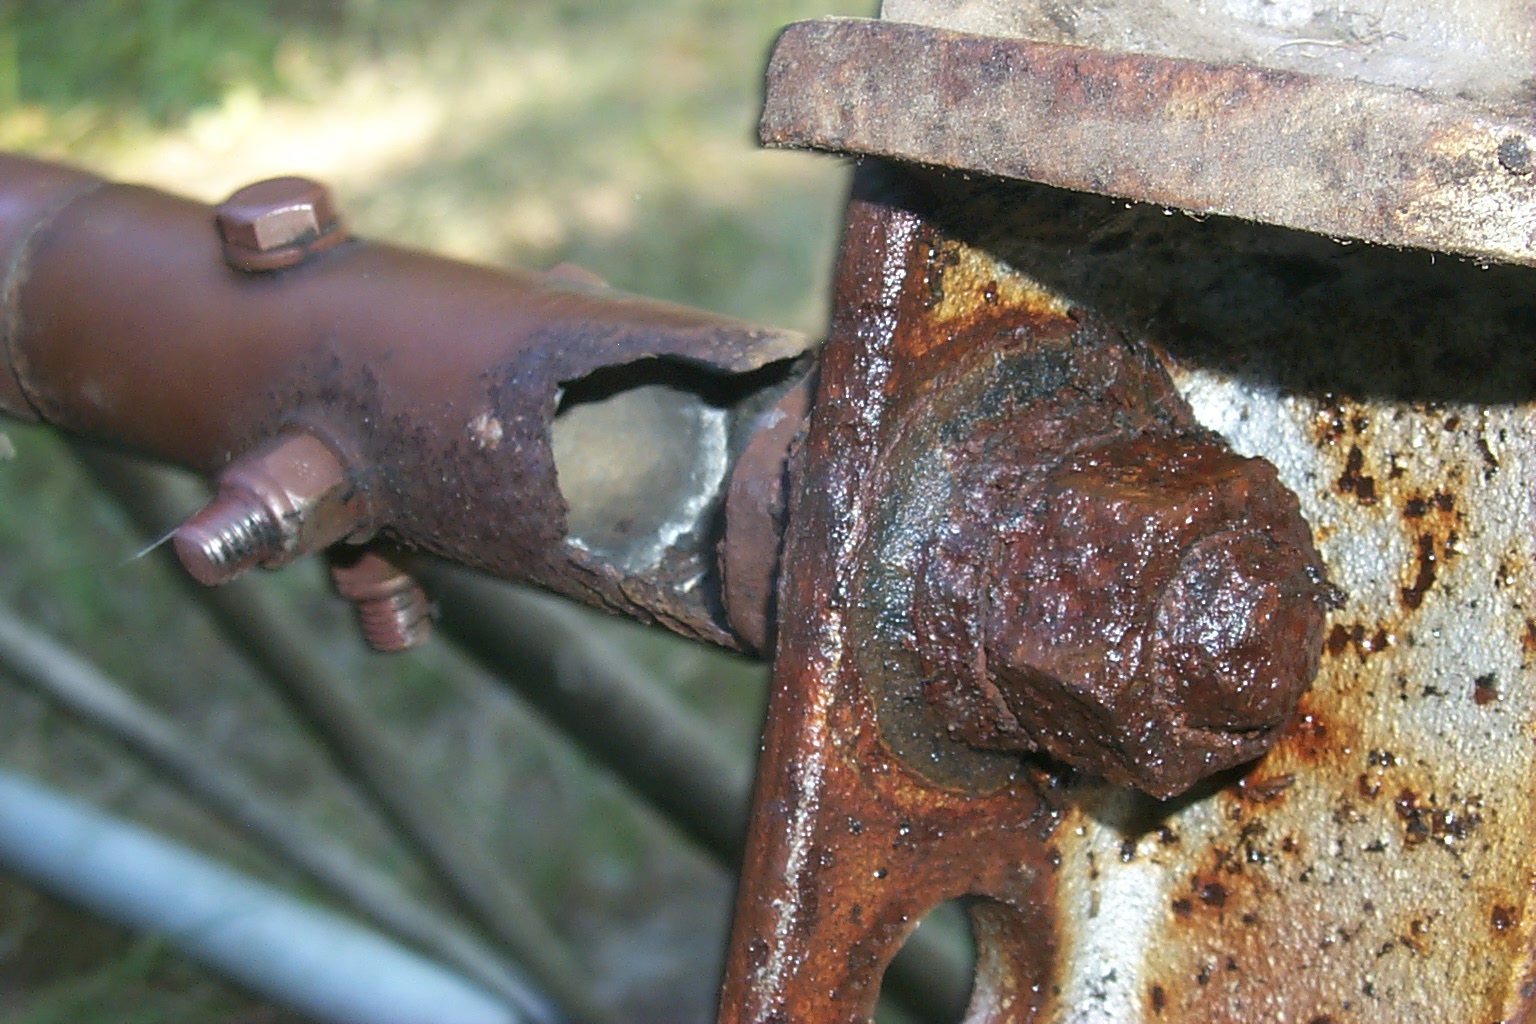

(click on images to enlarge)


(click on images to enlarge)
I will remove the 18 inch rotor plate and bring it over to my brother-in-law so he can weld together a new mount that will secure the 24 foot mast in the tower. I have ordered a short section of larger 6061-T6 pipe and some 6061-T6 plate stock to make the new mount... The design plans are in my head!
1 piece Aluminum 6061-T6
1 piece Aluminum 6061-T6 Bare

|
Aluminum 6061-T6 Bare Plate 0.25" |
 |
Aluminum 6061-T6 Extruded Tube 2" x 0.25" x 1.5" |
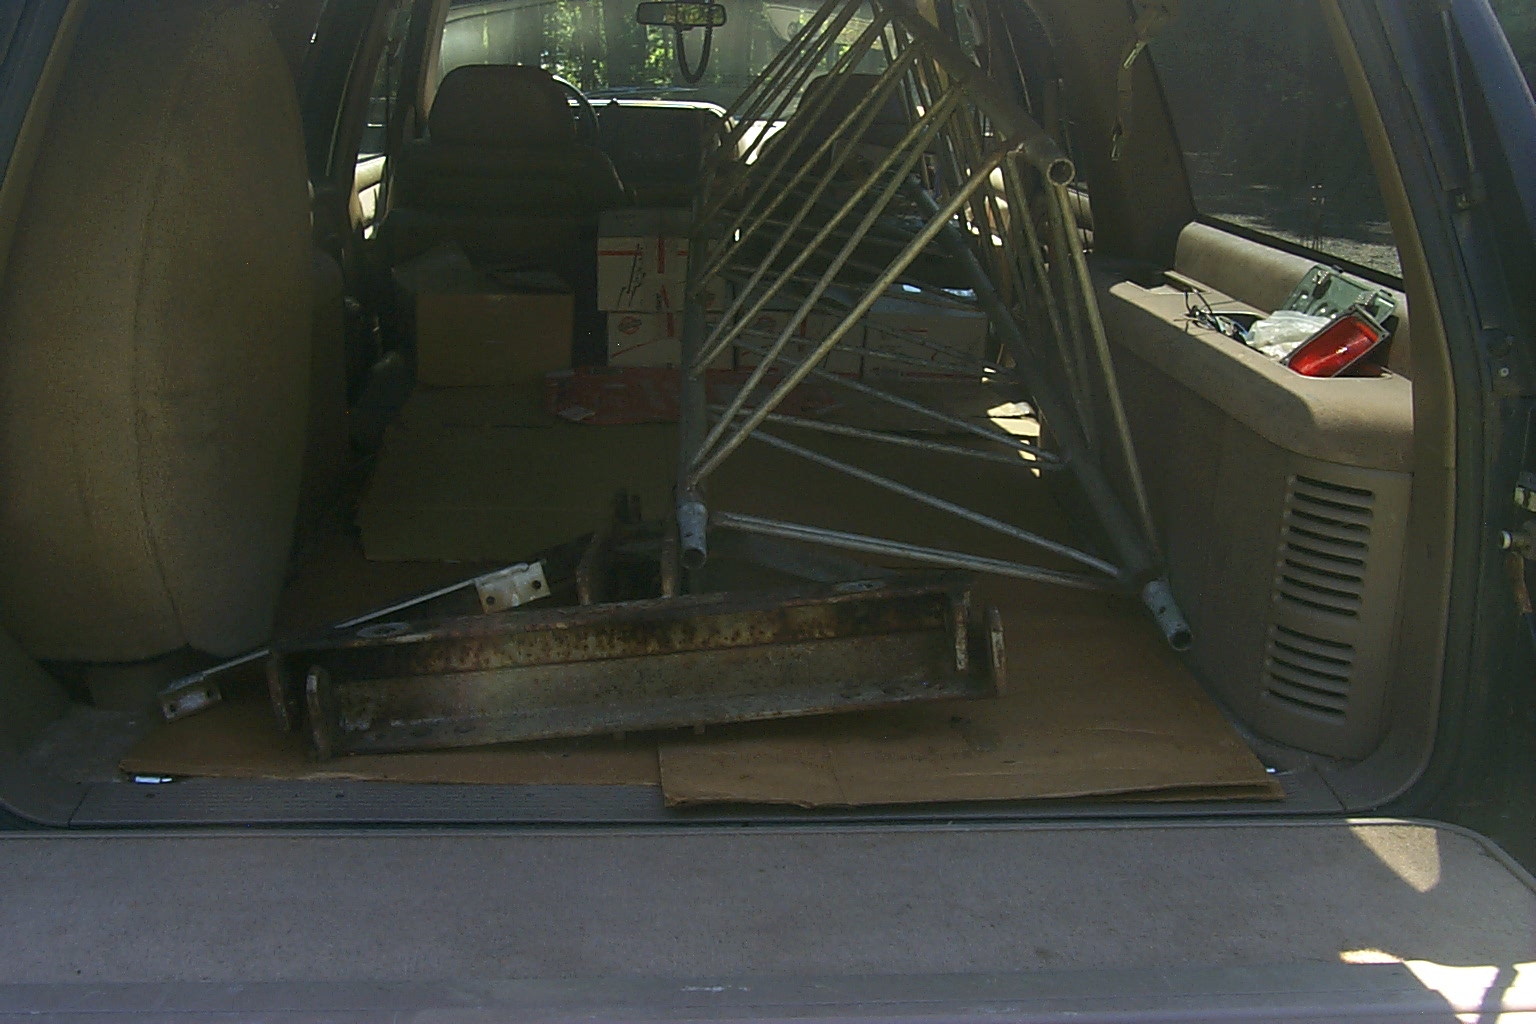
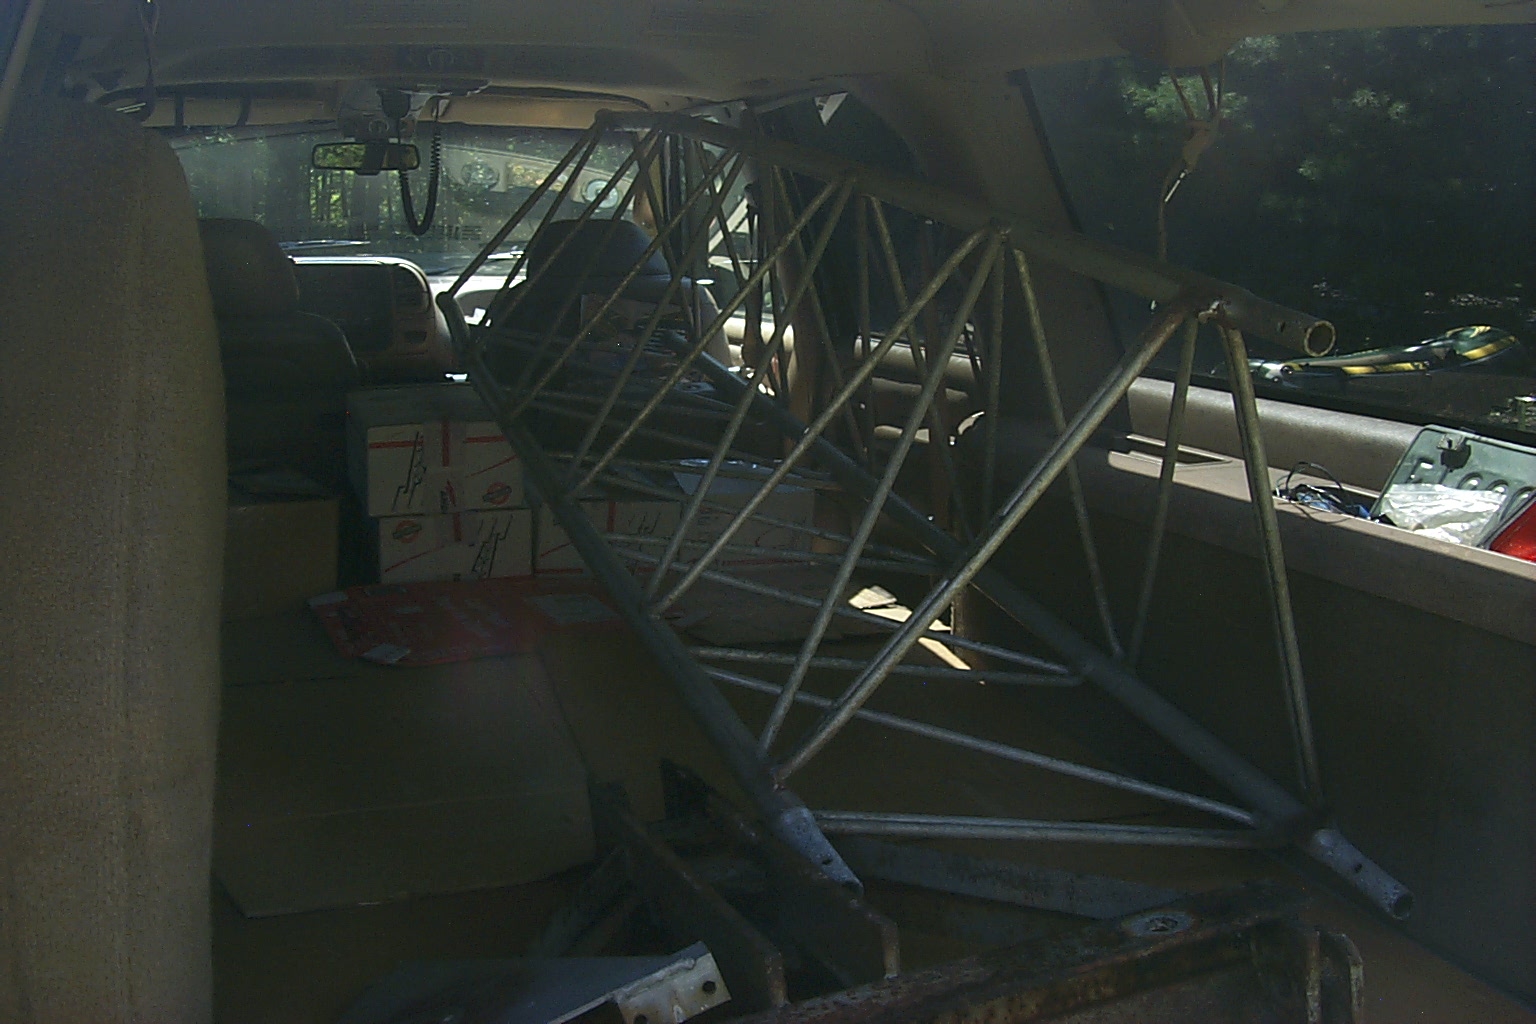
Ok... we took it down safely, and then took it all apart. Now it is time to clean everything and put it back together!
With all the tower sections moved back down to the house I can start working on stripping off all the old feed-line, cleaning off 17 years of grime and mold, and then start fabricating the new mounting plate for the 24 foot mast.


(click on images to enlarge)
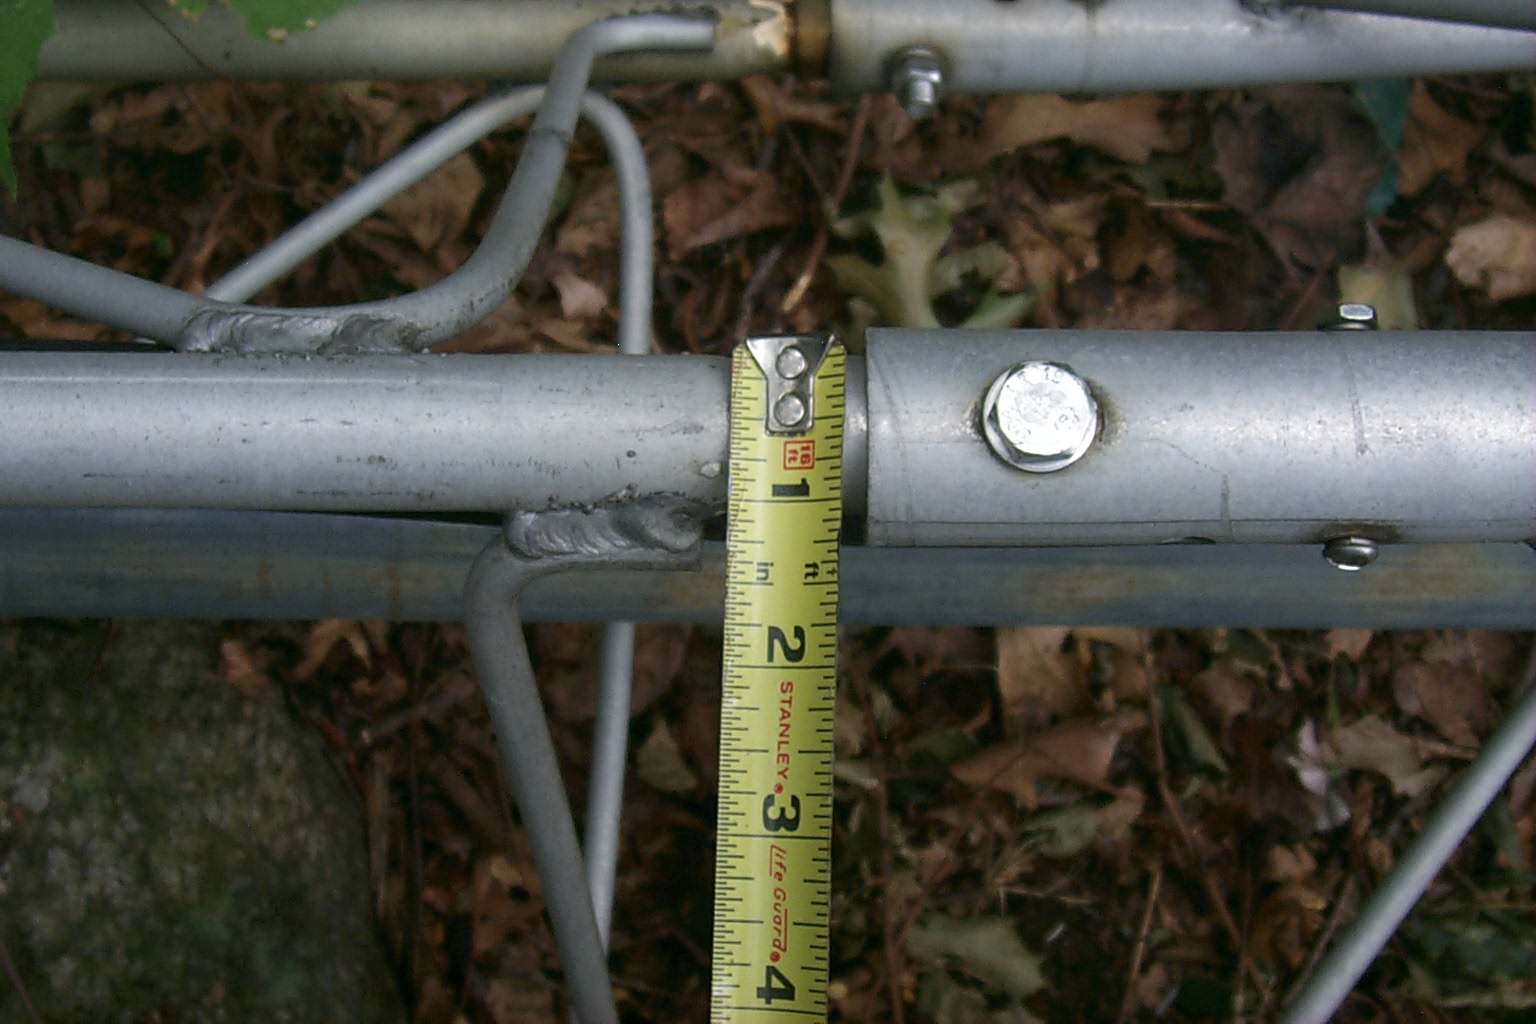
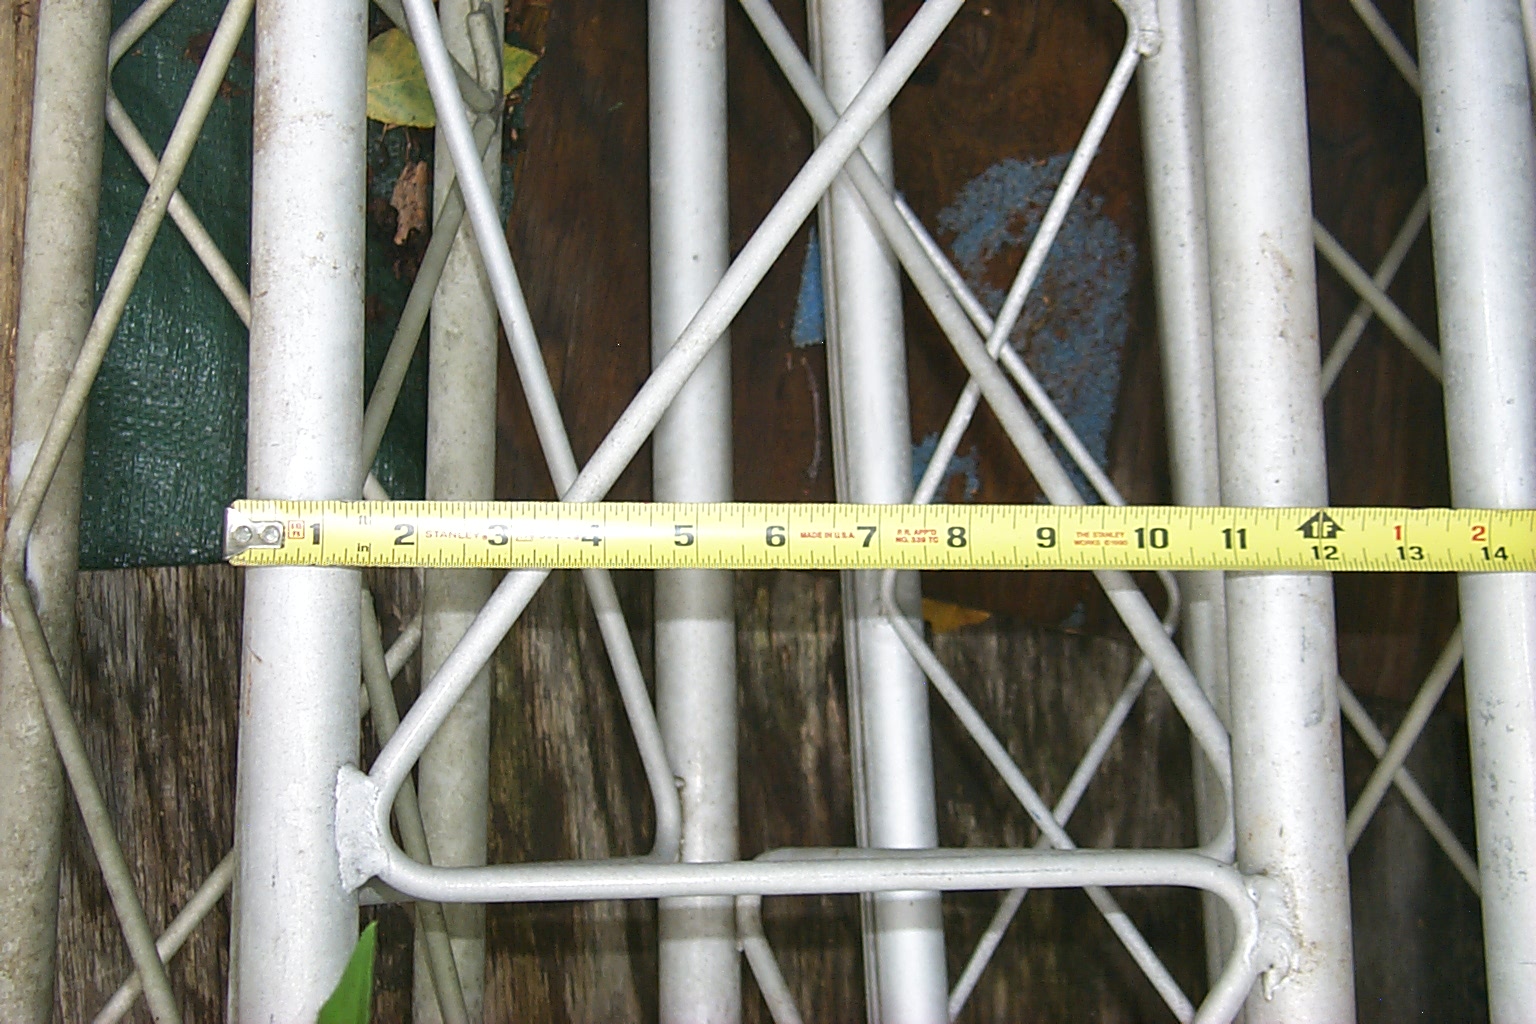
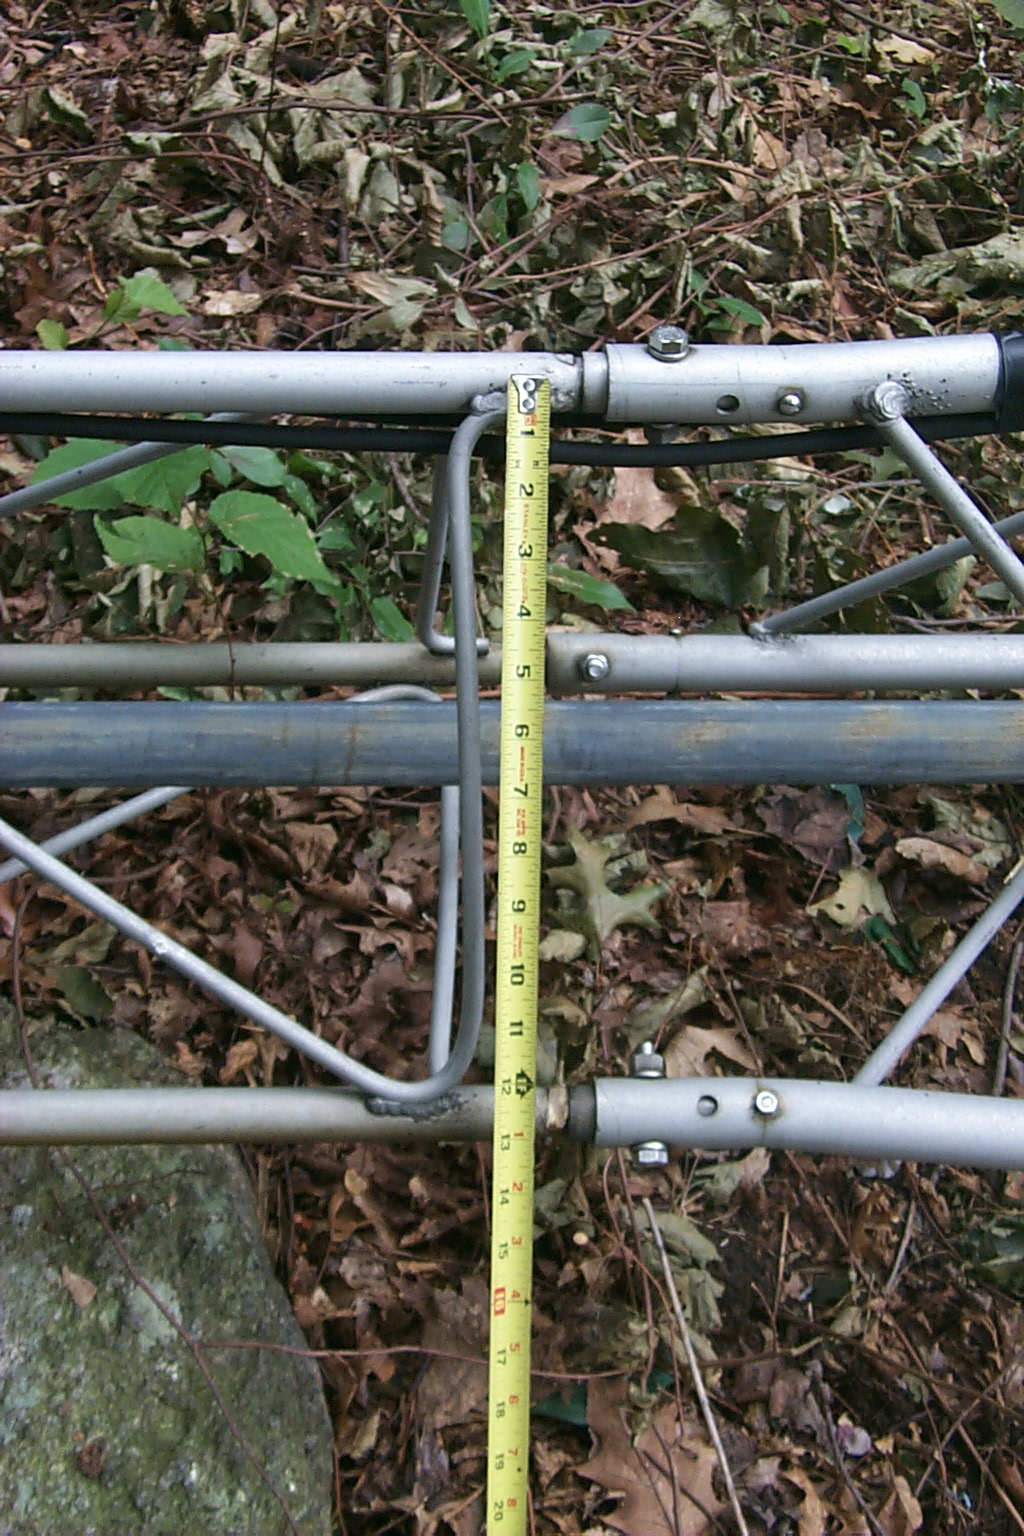
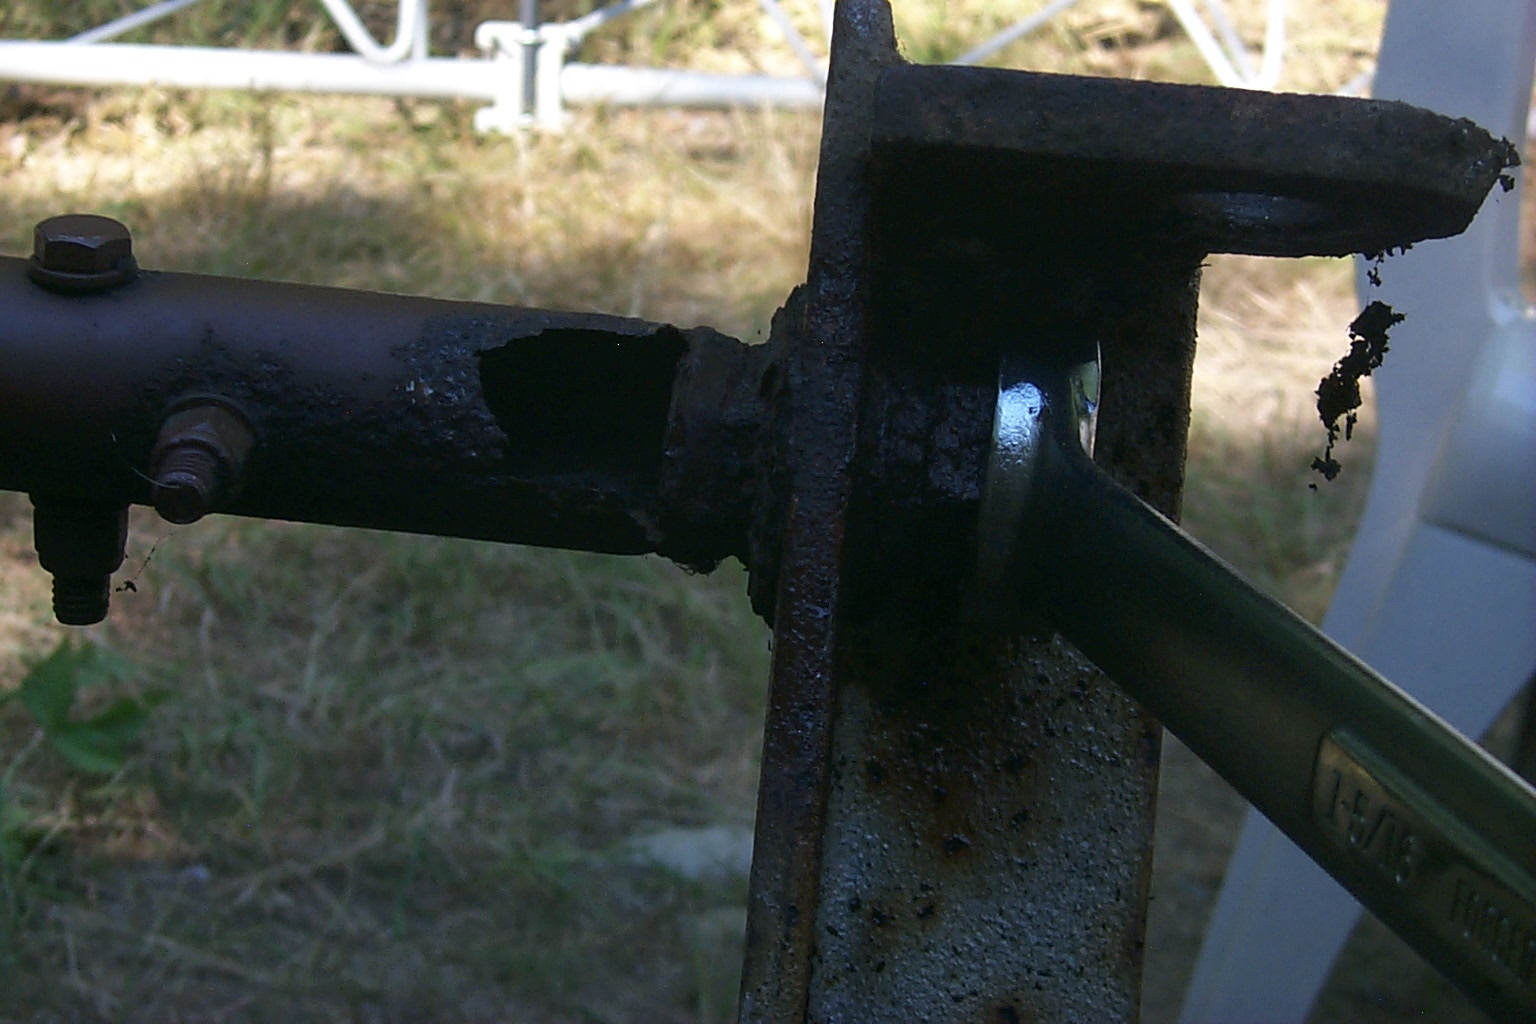
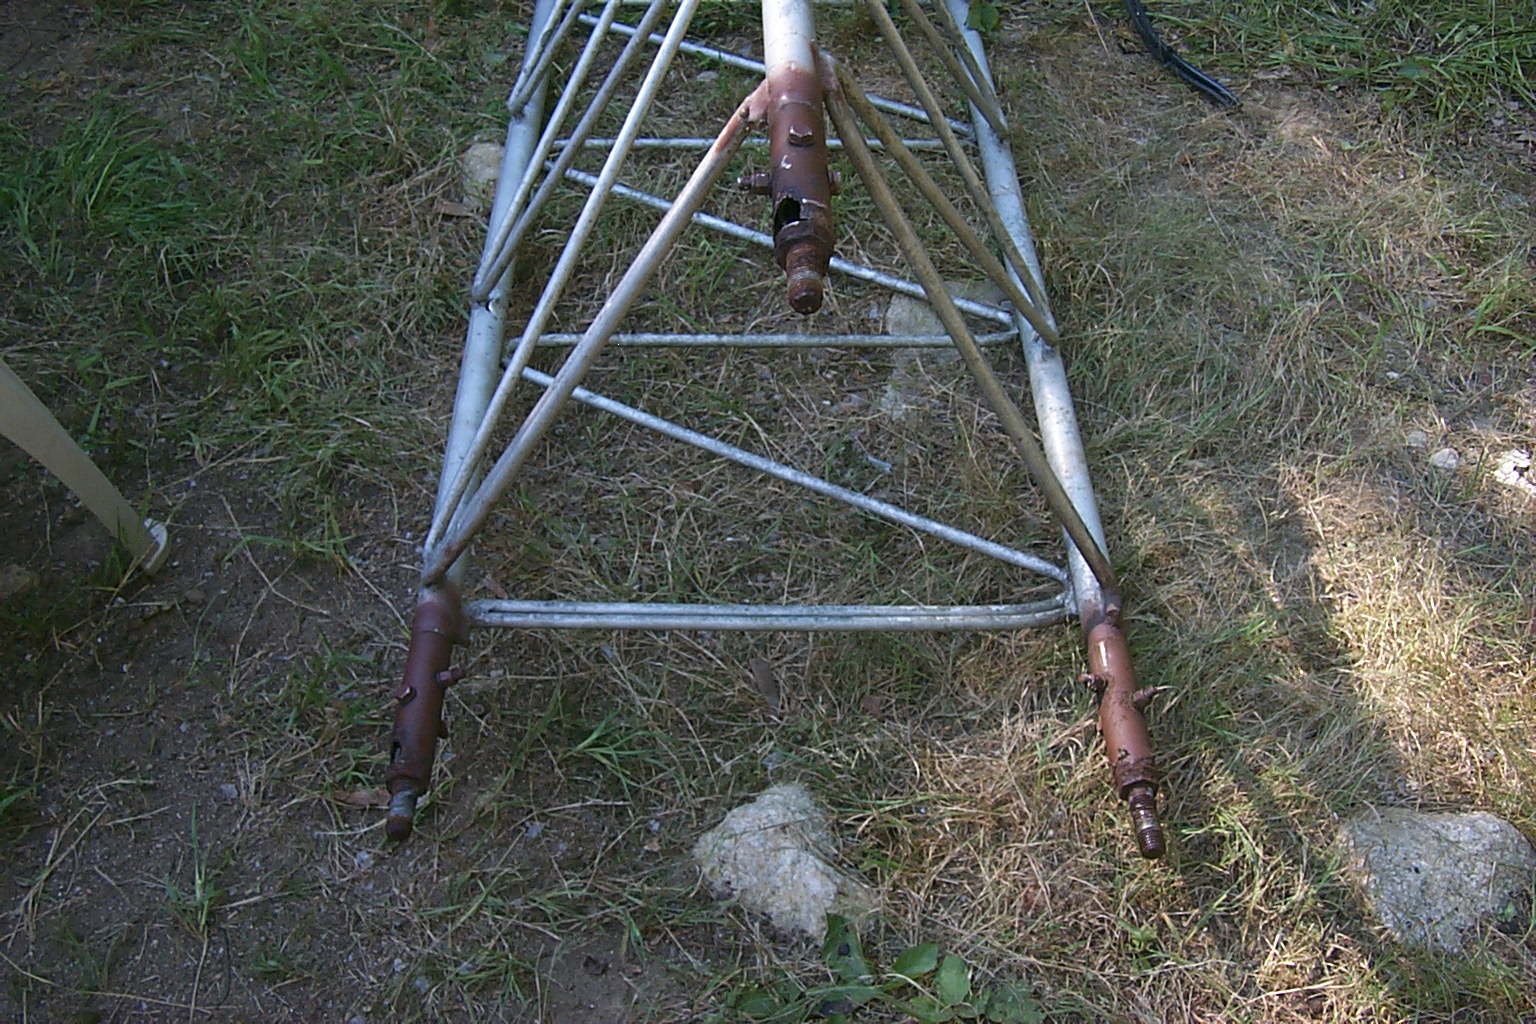
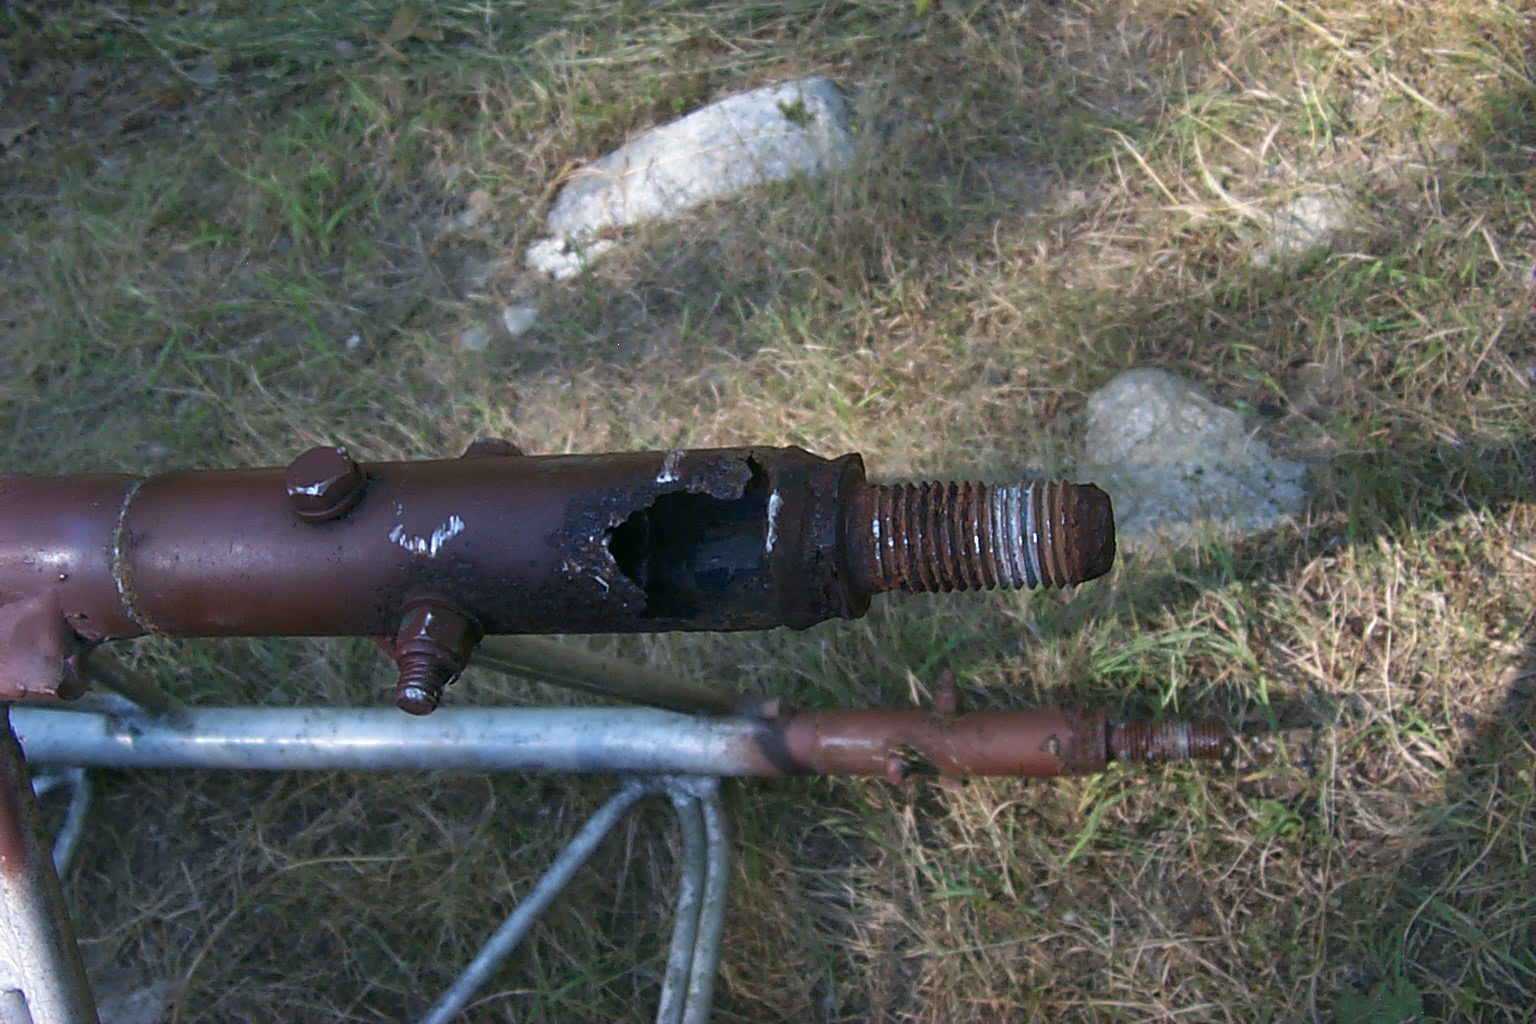
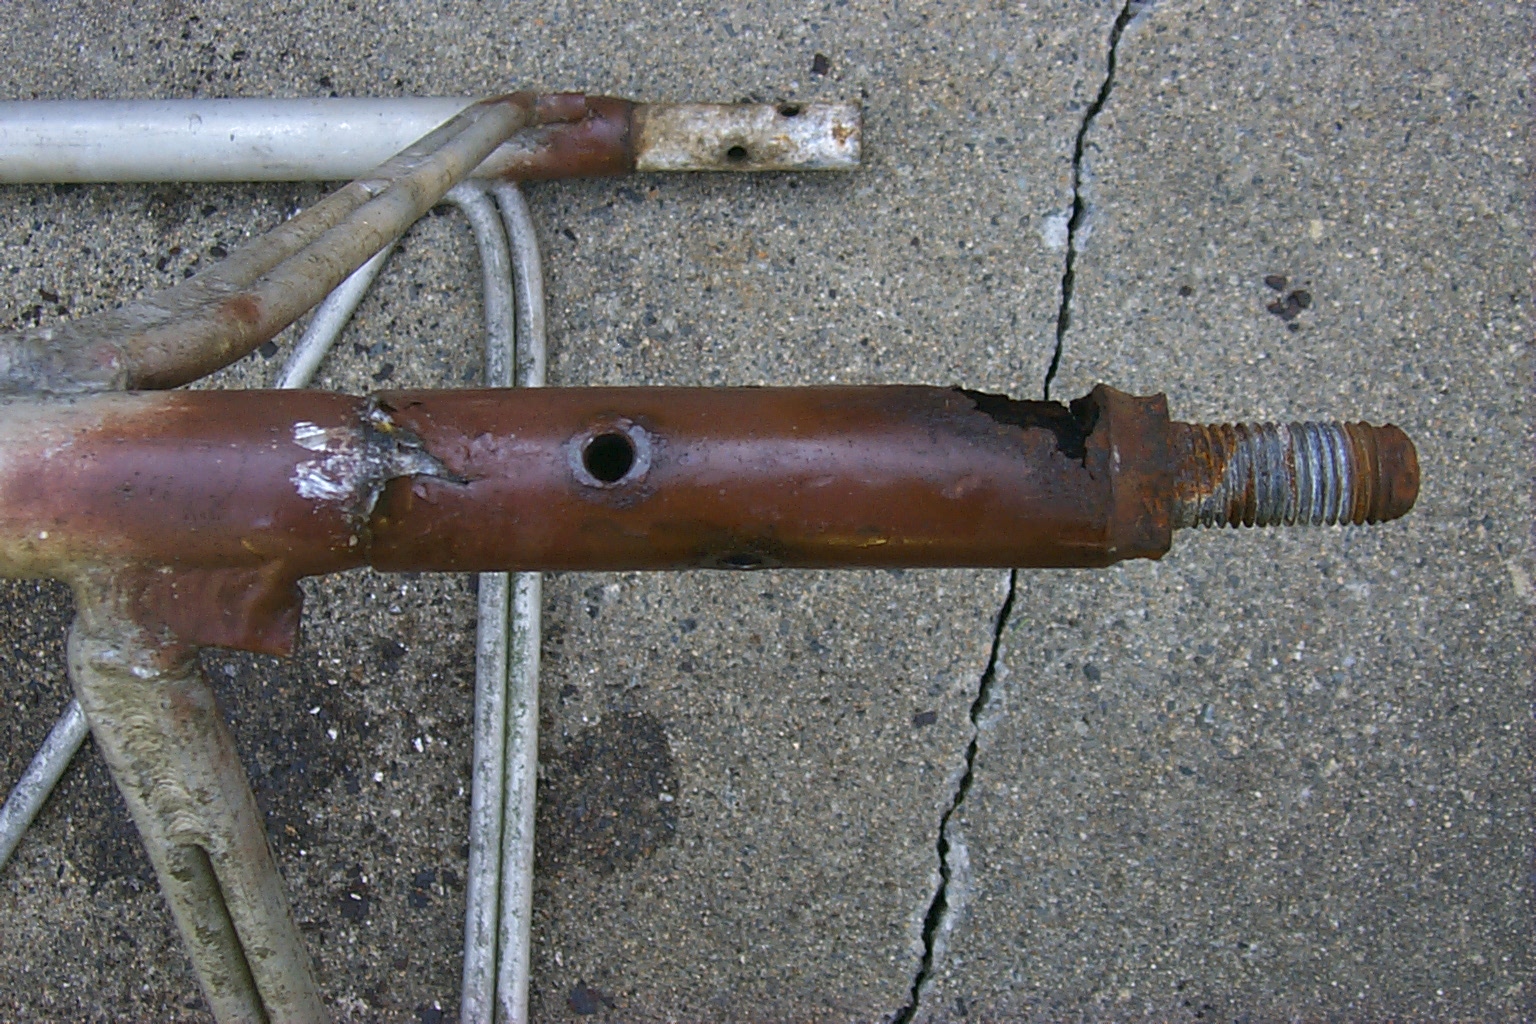
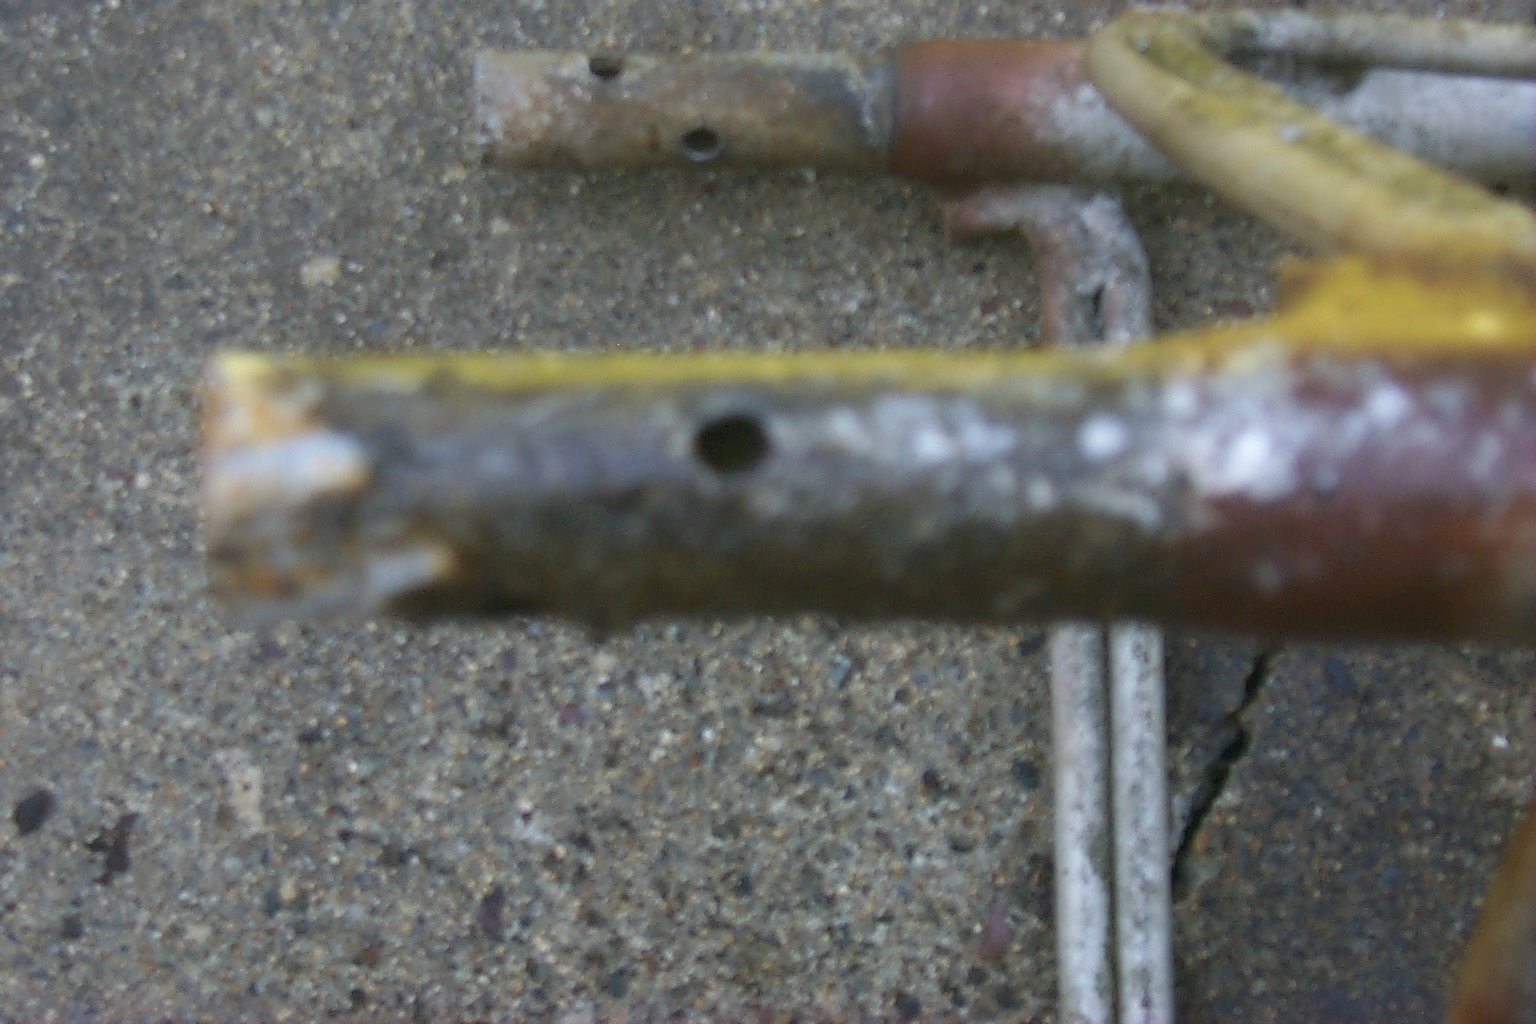
In this group of photos shows the bottom section of tower where the mounting stubs go. I had to take some photos and send them to the tower manufacture, I will be purchasing new mounting stubs from them instead of having Jag make new custom mounts out of stainless steel.
(click on images to enlarge)
In these photos you can start to see my vision for this project coming together. I have the new 24 foot long mast next to the top two sections of tower and the ne DB-408 UHF dipoles stretched out on the ground in the approximate position they will eventually be mounted in...
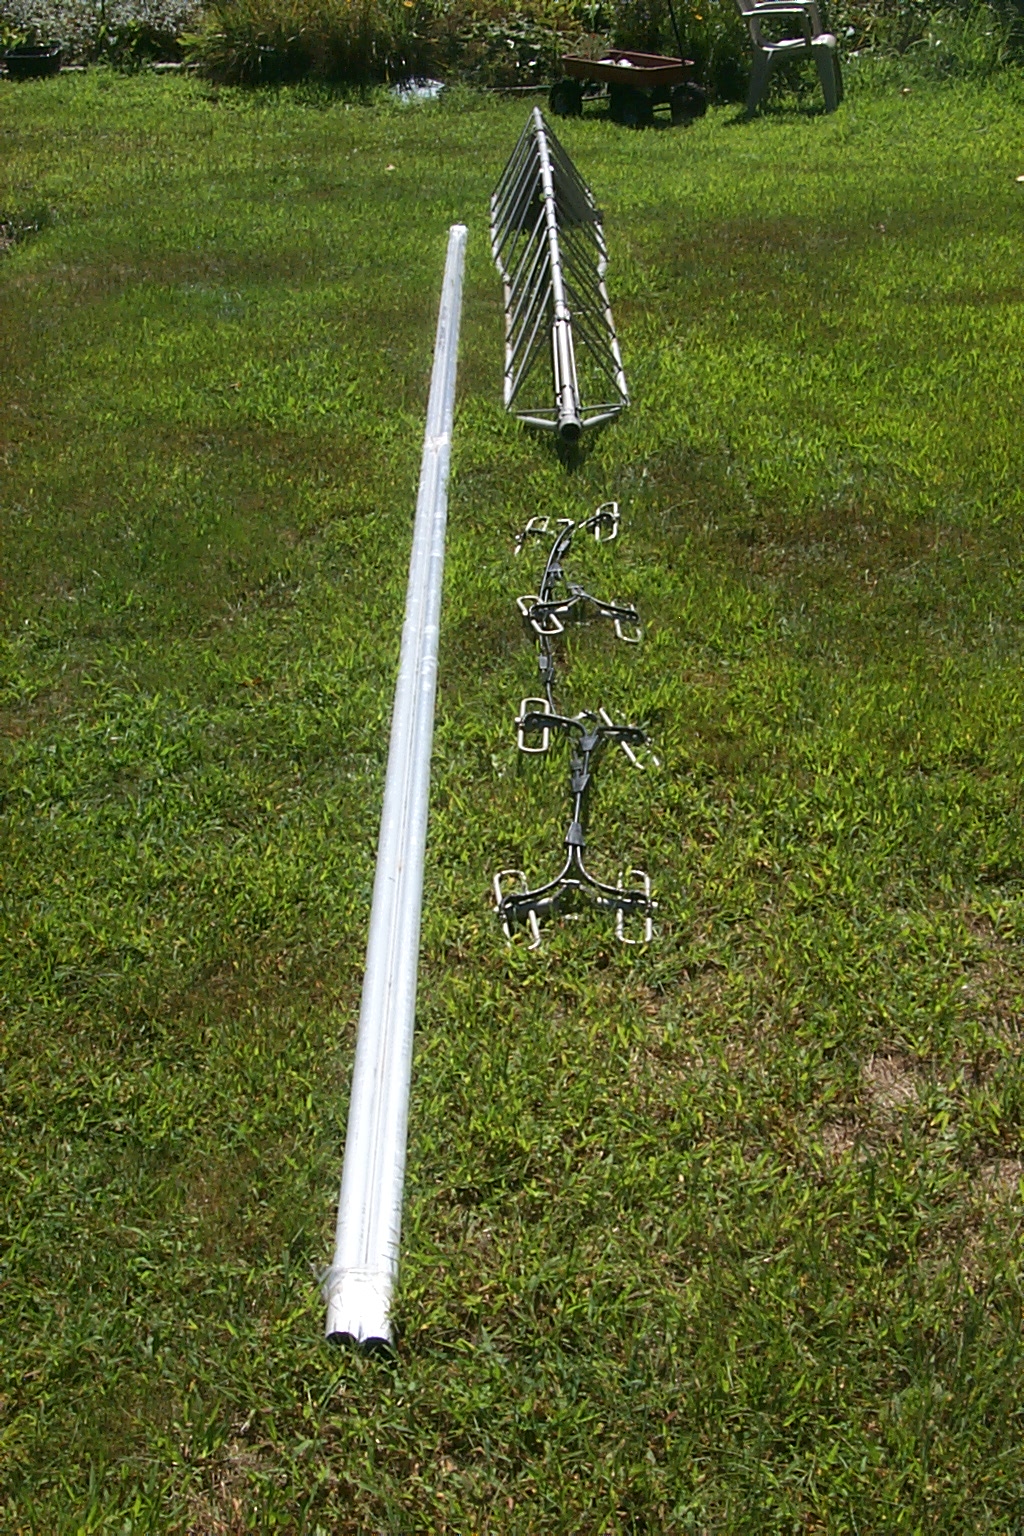

(click on images to enlarge)
Update - August 28th - 2010
Removing the Rusty Stubs & Building new stand-off mounts... Part One!
Fate threw me a curve ball the day AFTER the invoice for all the parts from Heights Tower was approved and had been paid for when I received an email telling me that part of my order had been cancelled. I would still be getting the much needed mounting stubs for the base and the stainless steel U-bolts for the rotor plate, but my order for the side mount, or stand-off mount had been cancelled.
I decided that Dad and I could make the stand-off mounts ourselves so I called up Nightingale Metals around the corner from my house and purchased a 25 foot long piece of 6061-T6 unequal angle stock that measured 1 1/2" by 2" by 1/4" thick and then ordered a bunch of saddle clamps from DX-Engineering.
Saturday morning I started early but stripping off all of the old Belden 9913 coax, wire ties, tape, etc.
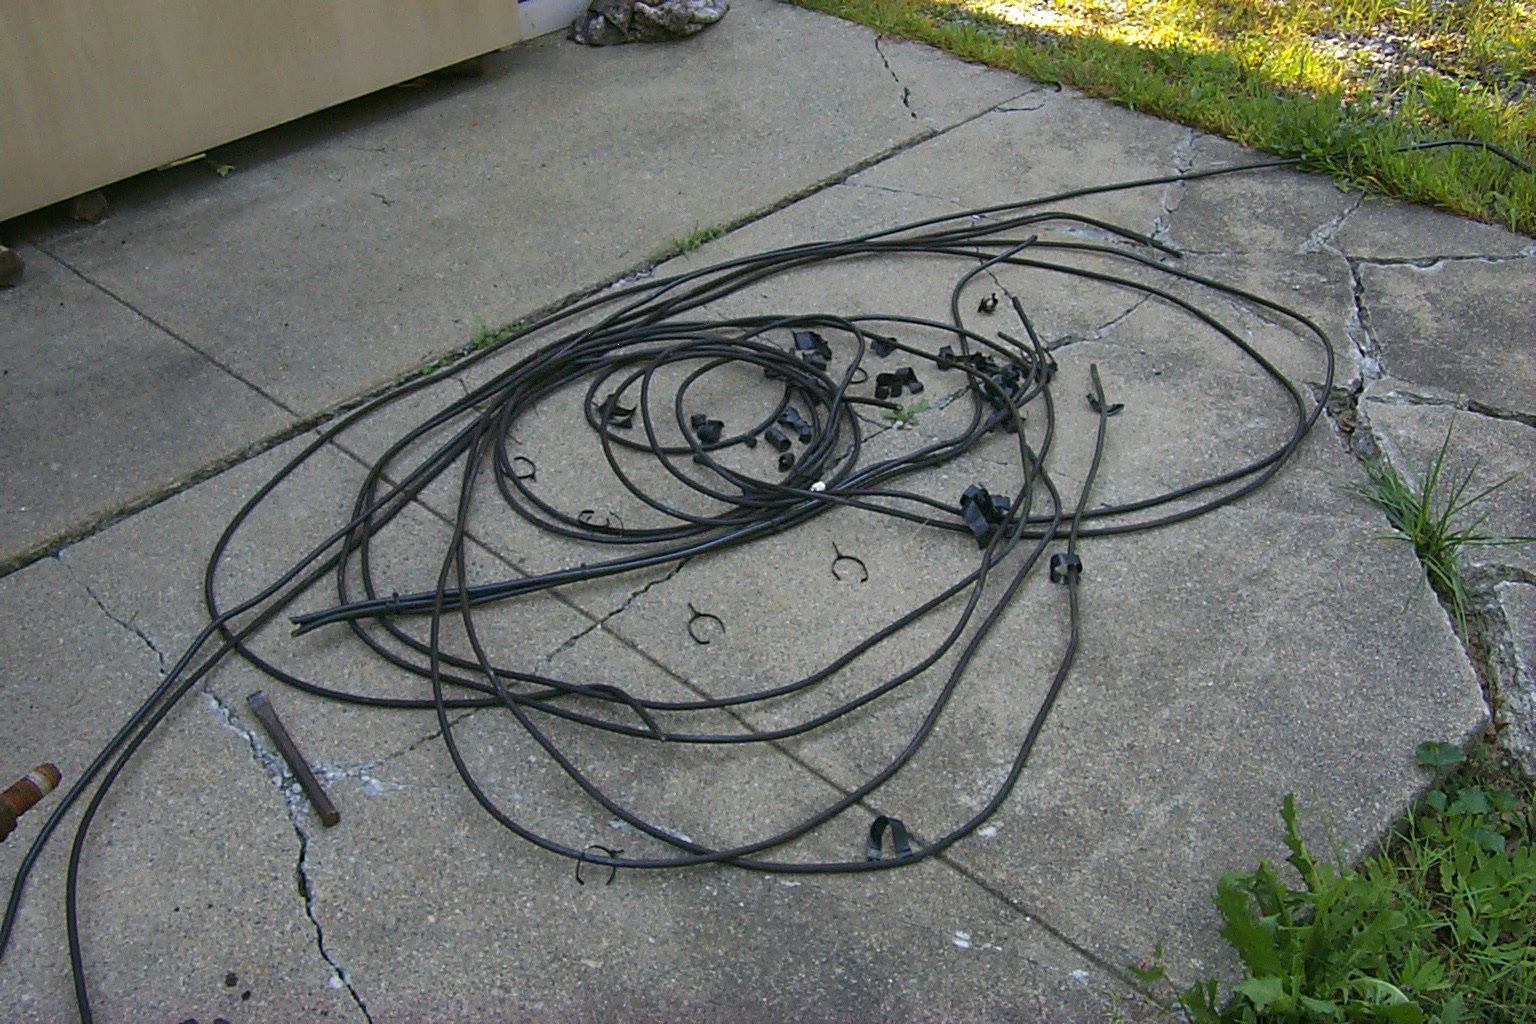
(click on images to enlarge)
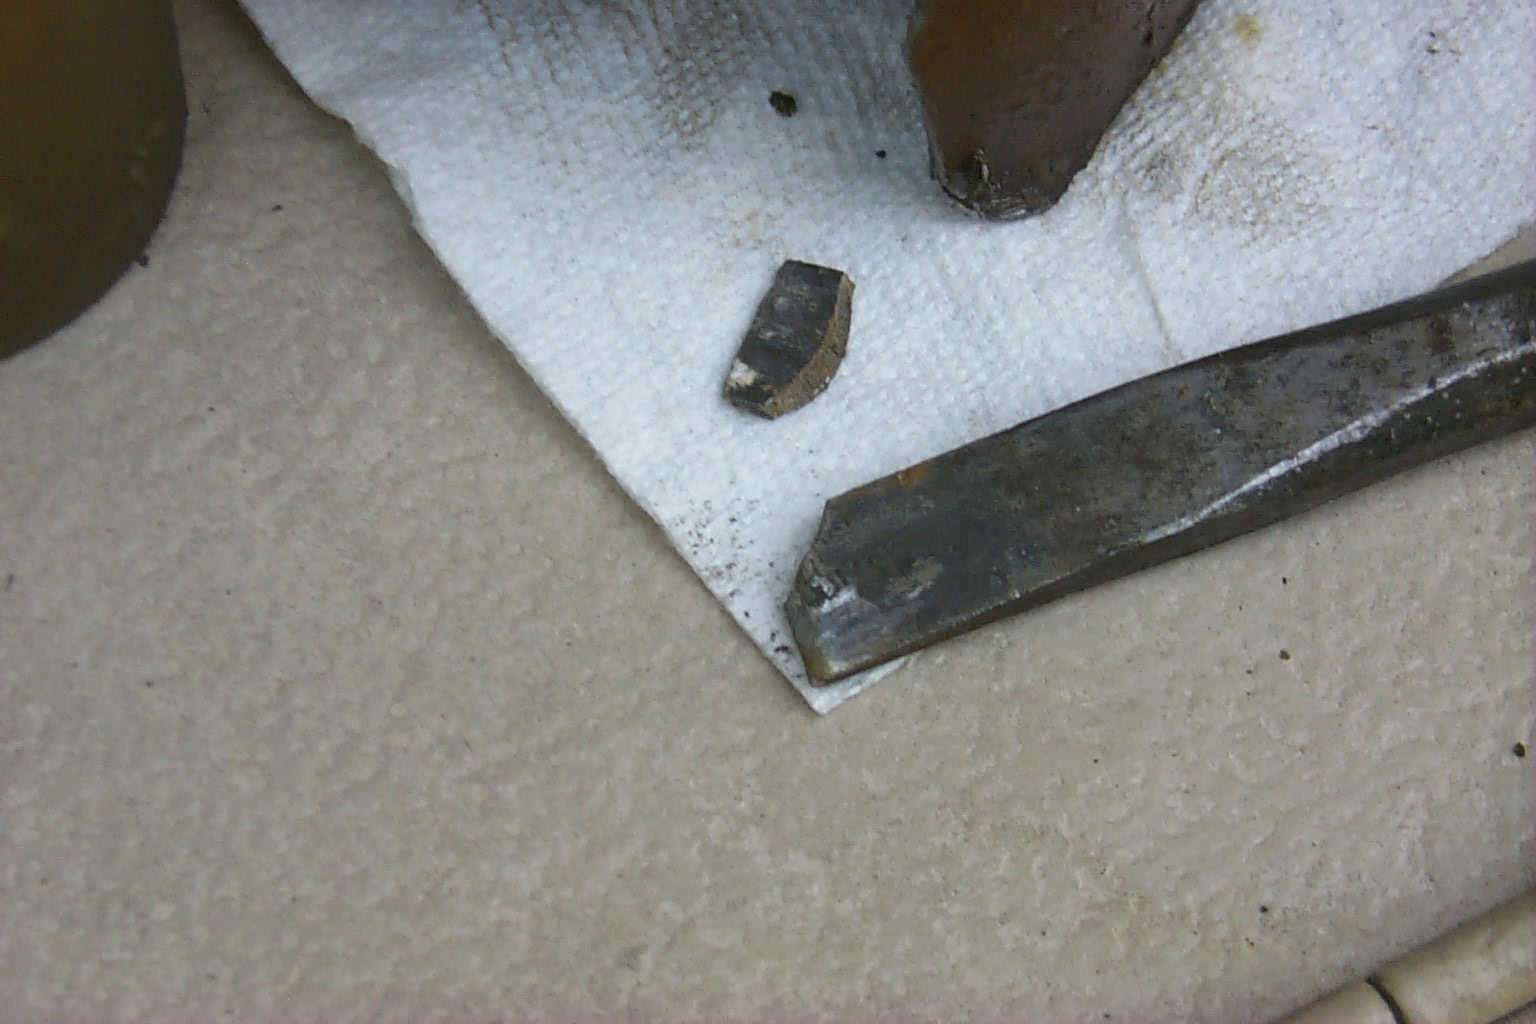
Then once that was done we started working on the rusted out mounting stubs that were still fused solidly onto the bottom section of tower. Using grandpa's chisels Dad and I carefully cut open each of the steel pipes that the old rusty mounting stubs were made from. Ironically even thought the bottom of the stubs had rusted away to almost nothing and the steel was spongy the steel near the top of the mounts was surprisingly strong and difficult to cut through. We even ended up breaking grandpa's 60+ year old chisel.


(click on images to enlarge)
It took us four hours to chisel, pry, and twist these old mount off.


(click on images to enlarge)
Once the mounts had been removed I spent some time cleaning the tower legs It took us four hours to chisel, pry, and twist these old mount off.
Sunday Morning August 29th
Time to break out the BIG wrench!
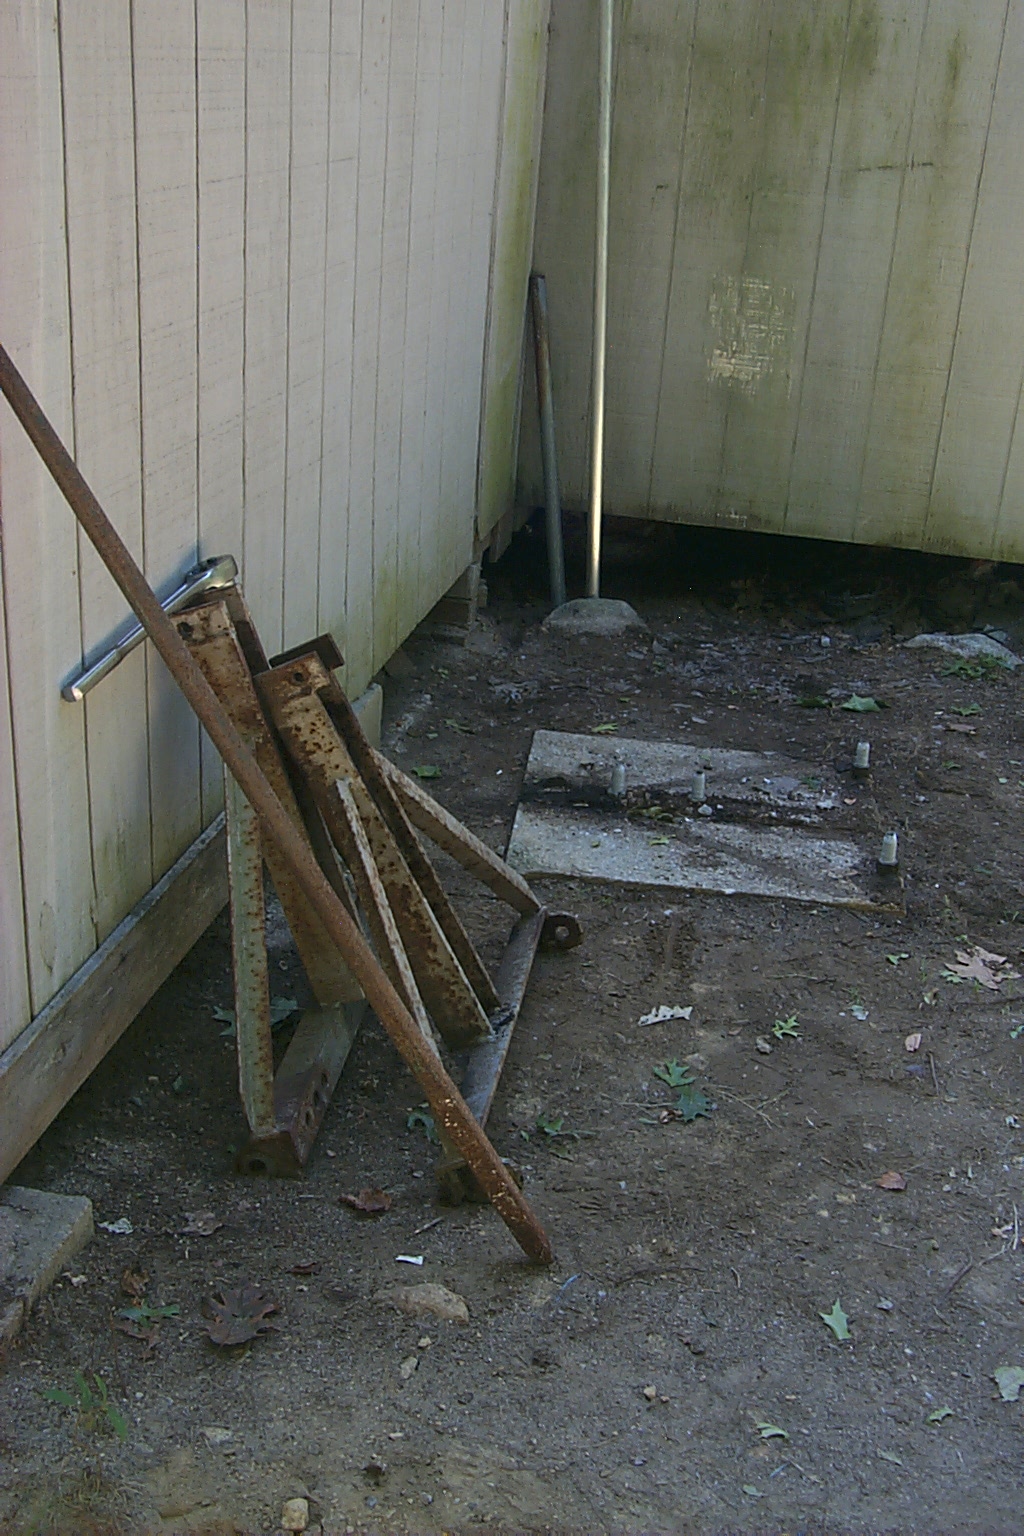
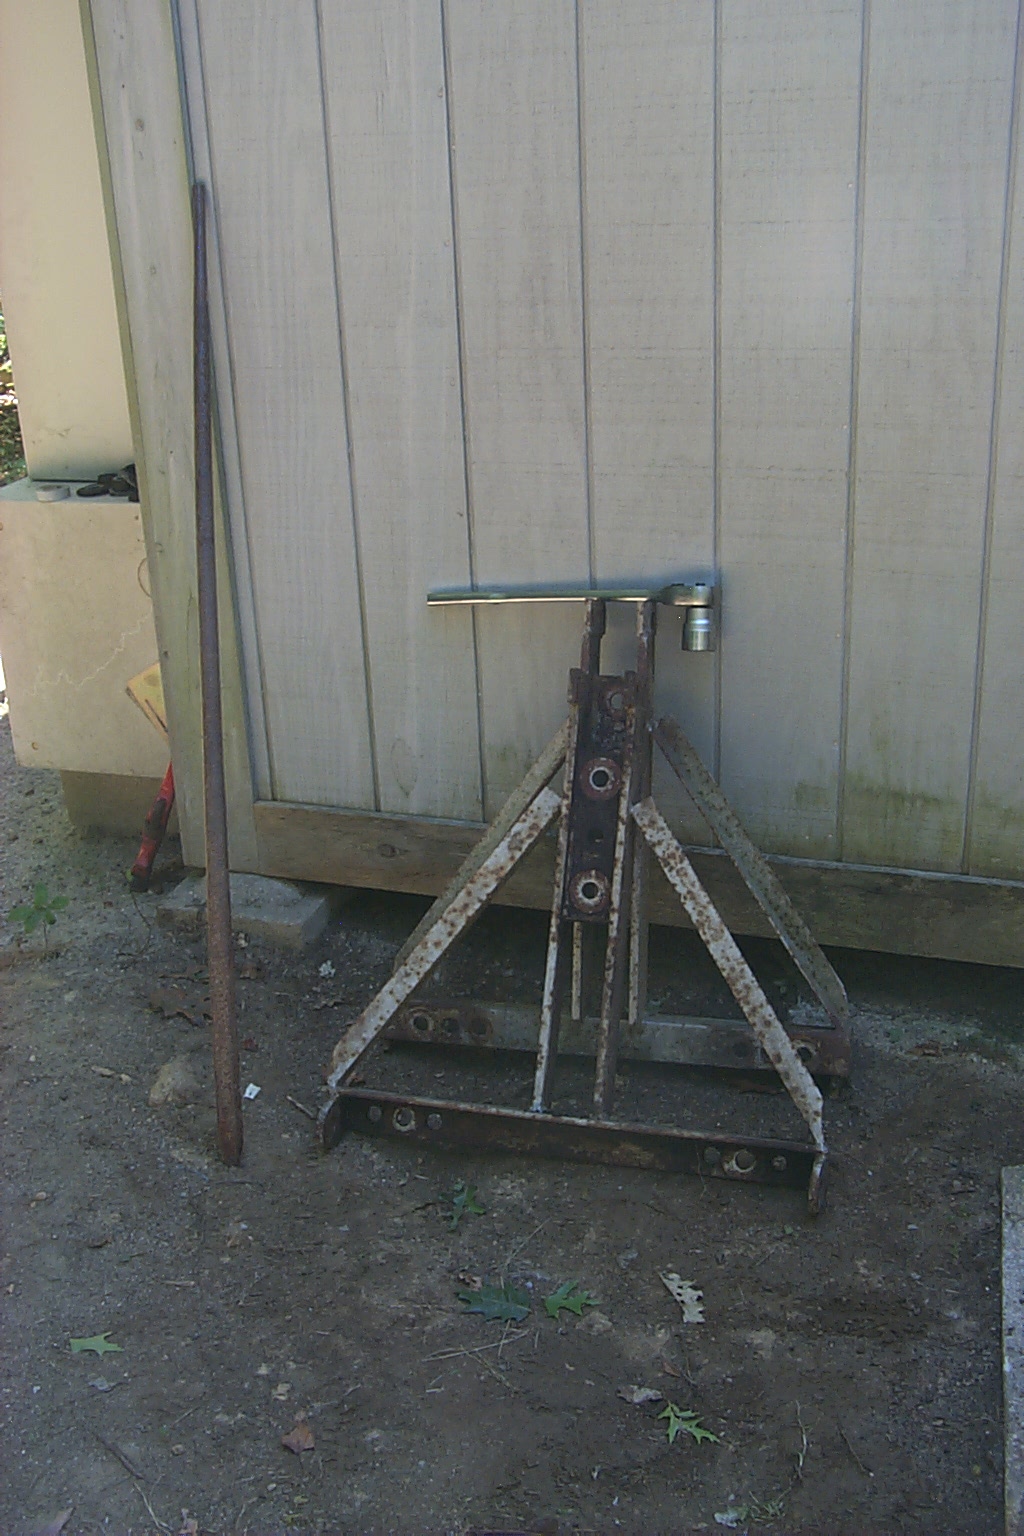
Using the new super-sized ratchet wrench that I just purchased for this project Dad and I were able to loosen up the four large 1 1/2" rusted nuts that held the bottom half of the hinged bracket to the concrete base.
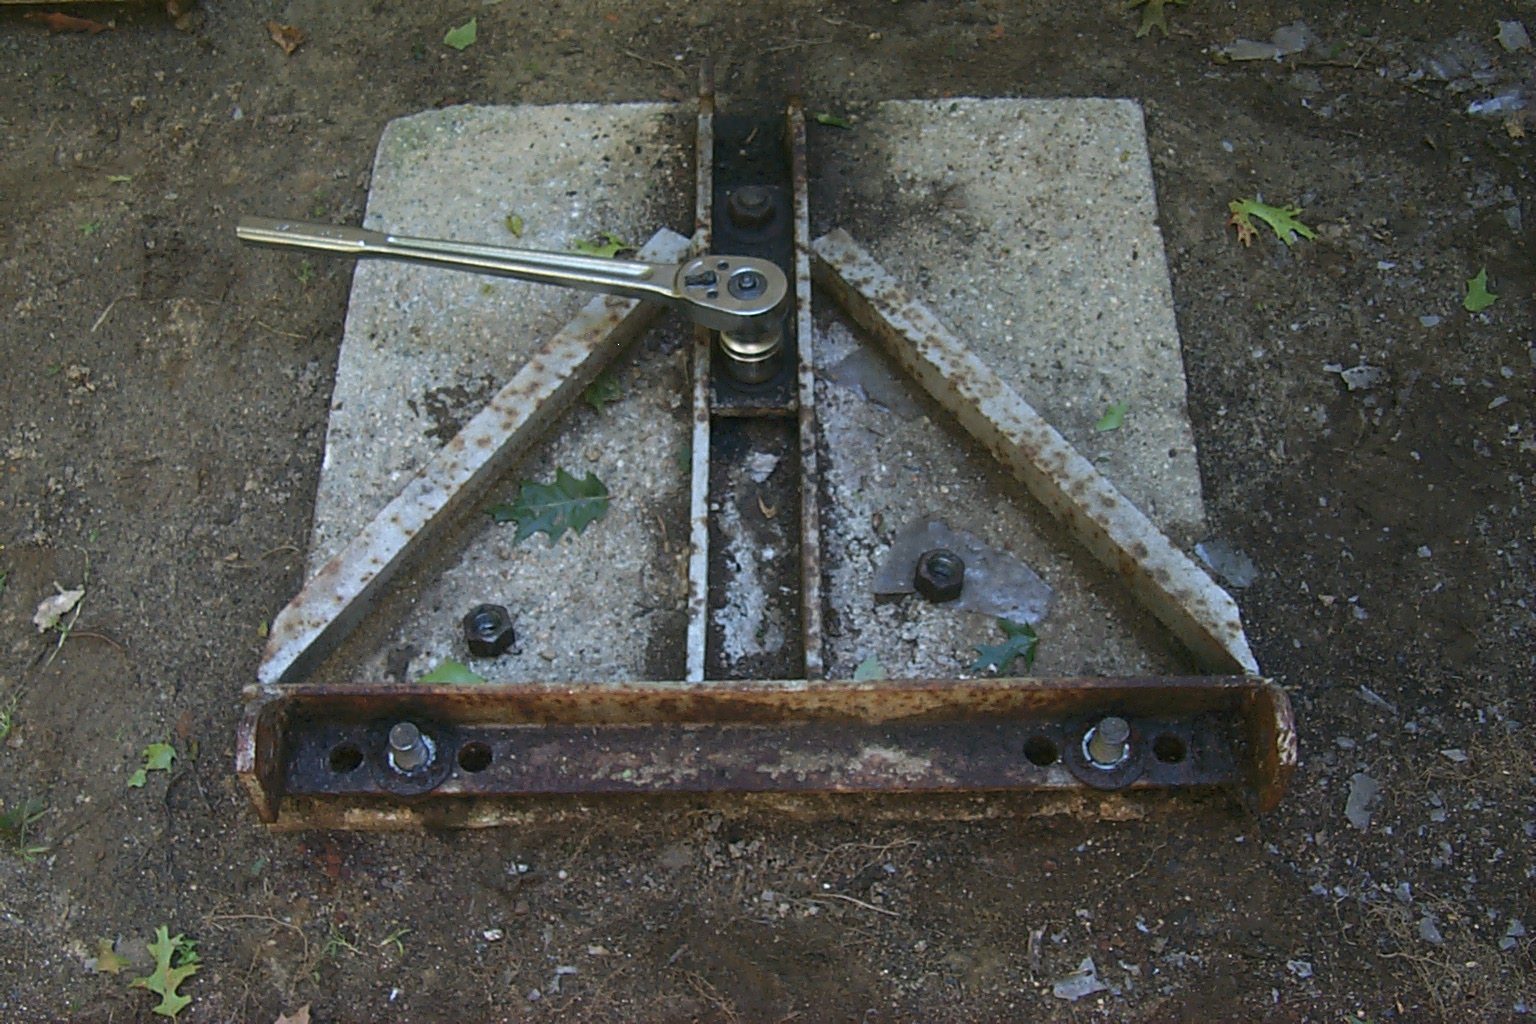


(click on images to enlarge)
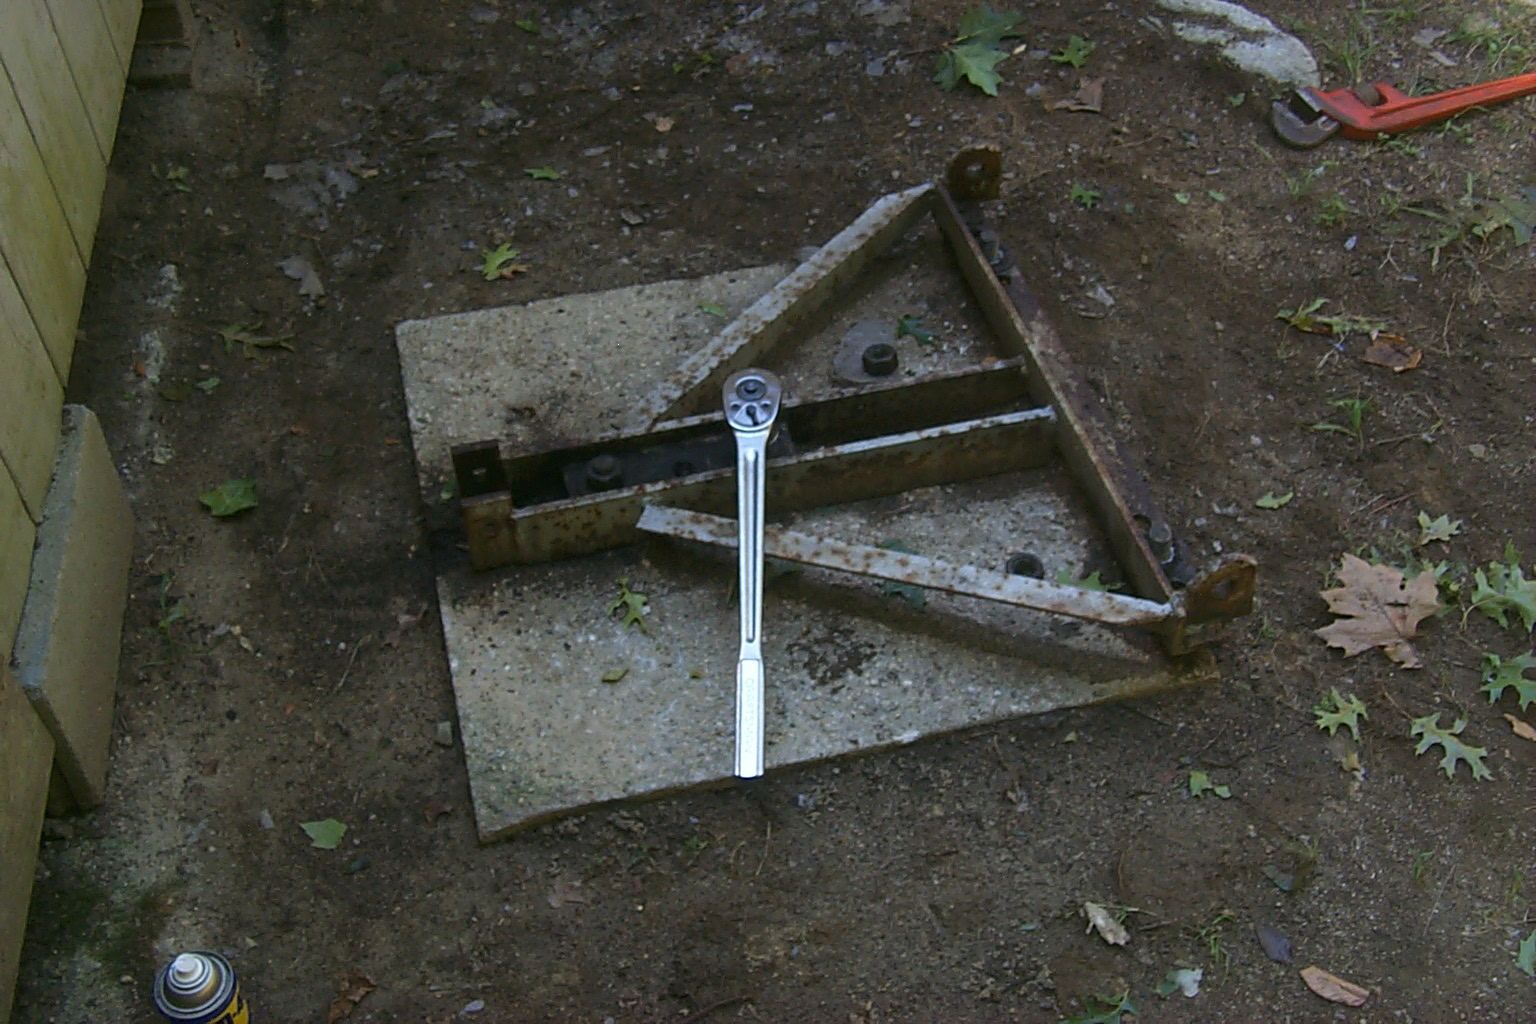
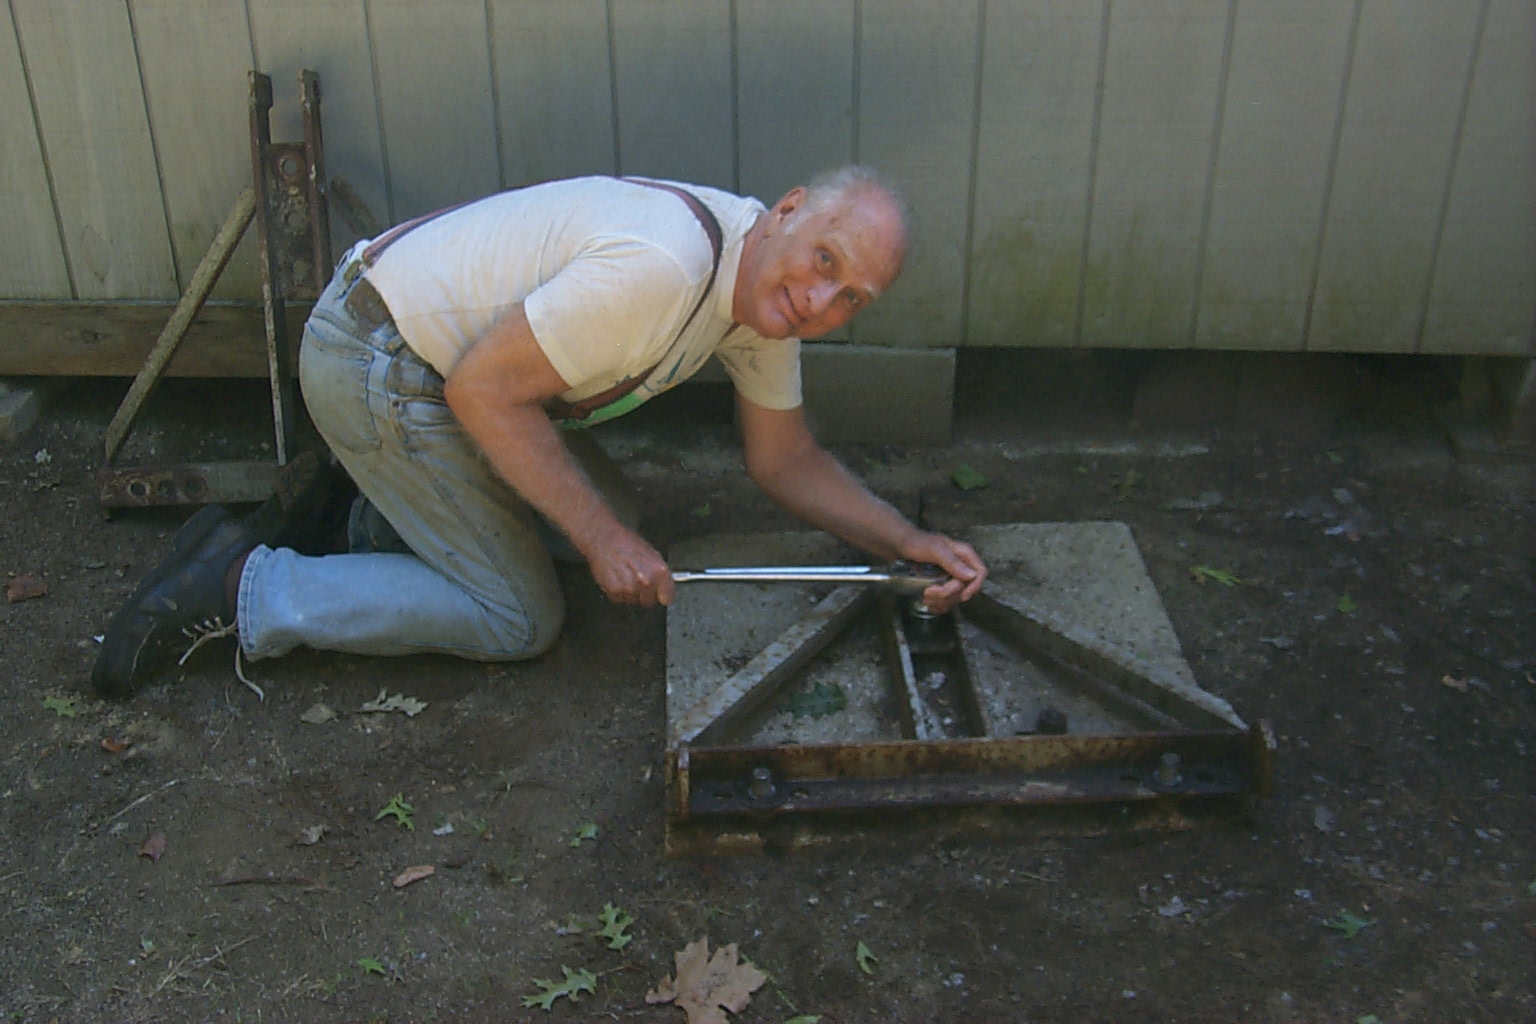
It took about 35 minutes to remove the four nuts from the large anchor bolts sunk into the concrete base. Then we used a long rail-road tie crow bar to gently pry the base up off the anchor bolts.
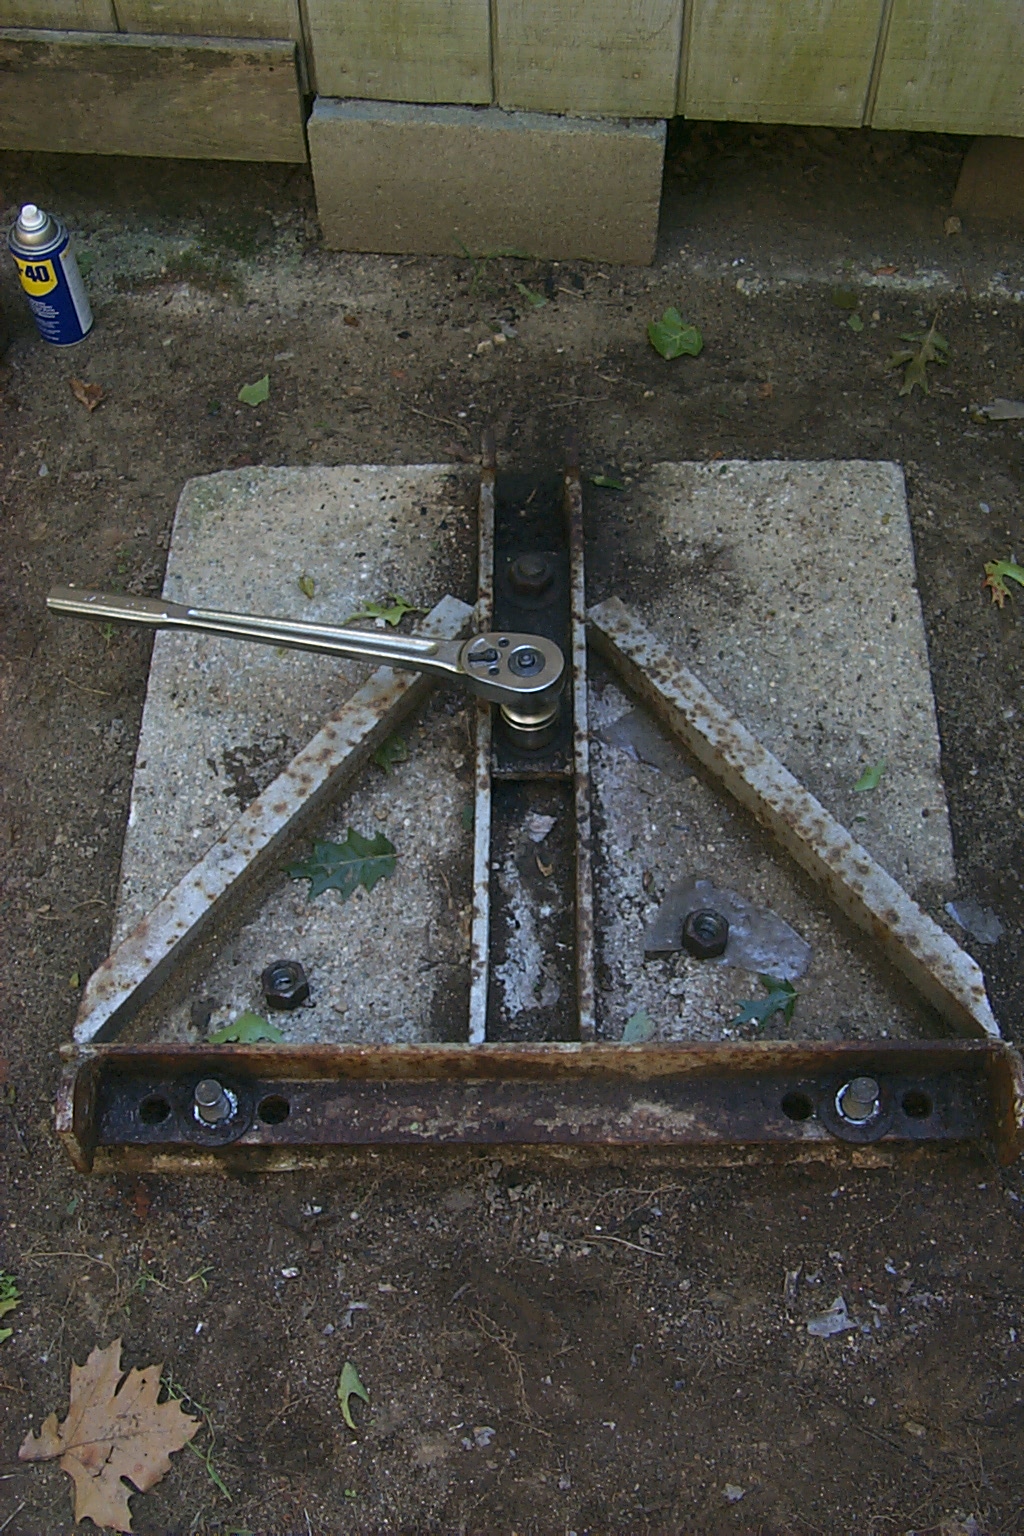
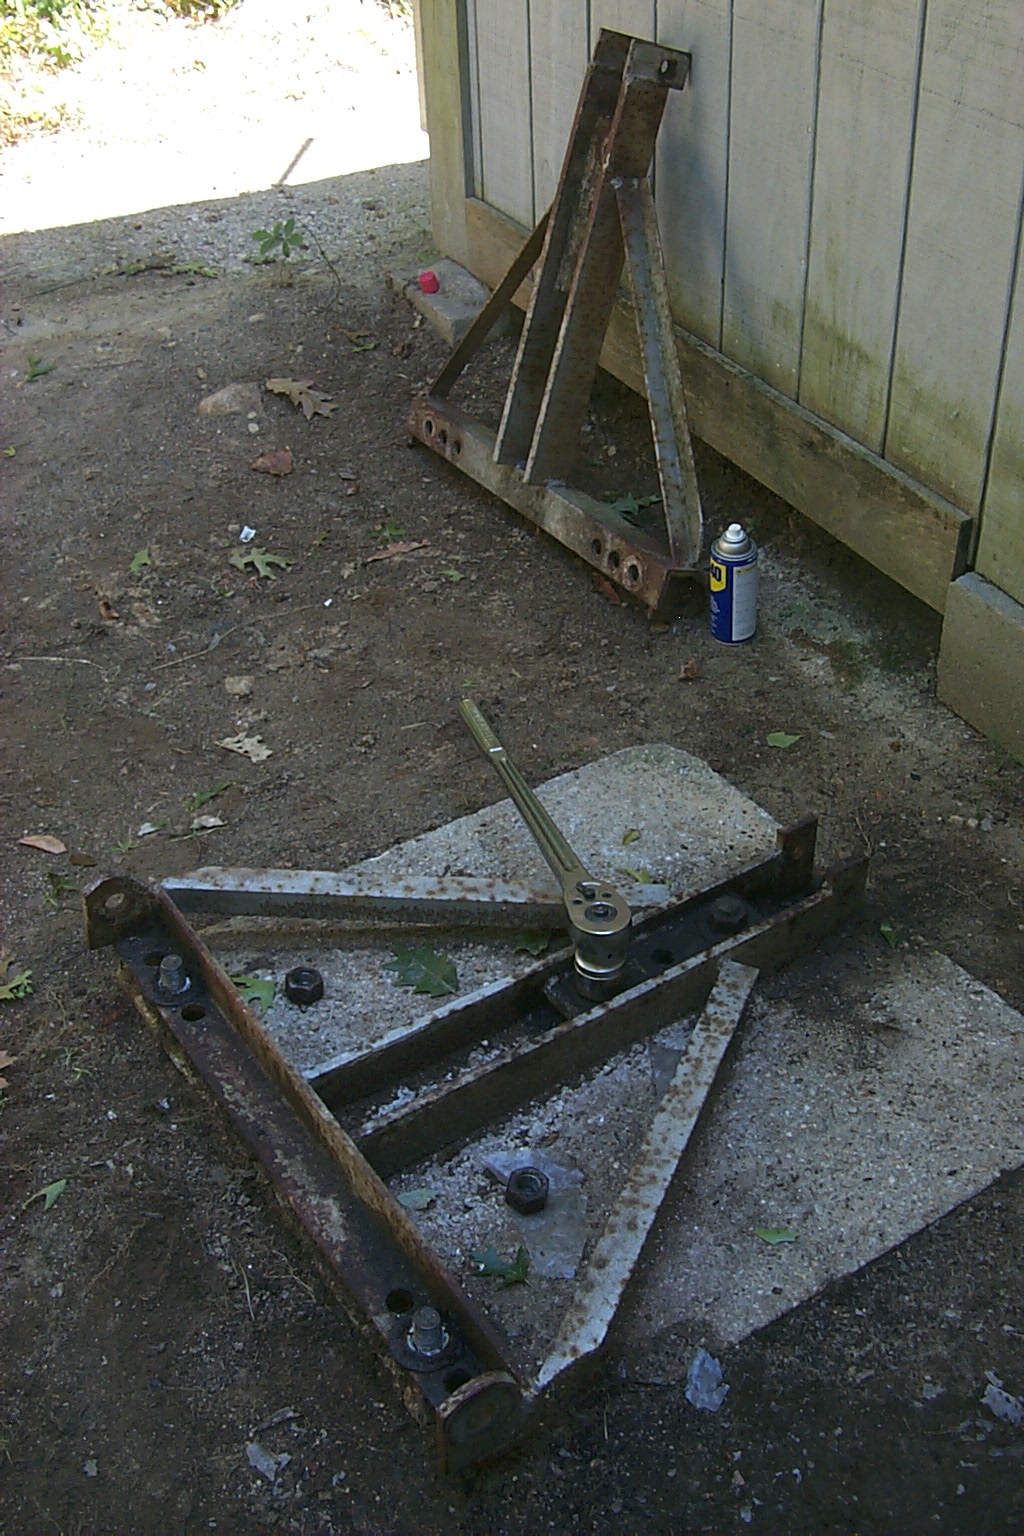
(click on images to enlarge)
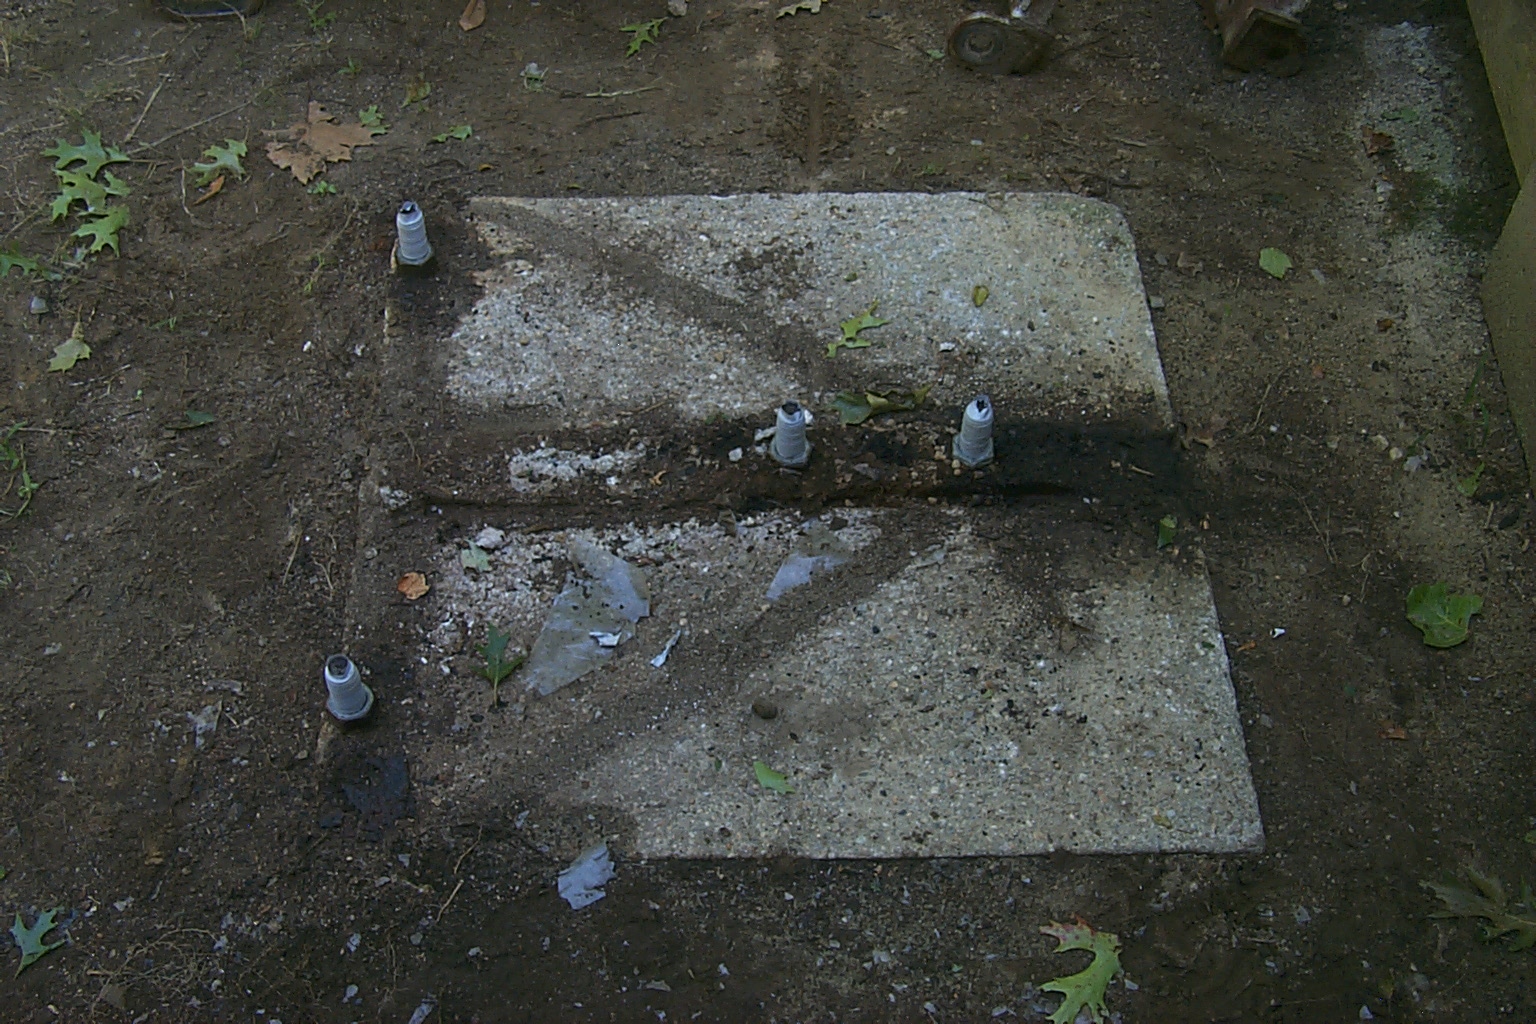
With the hinged bracket removed from the concrete base we loaded the parts into the Big Blue Beast so I could bring it over to Inter-City Contracting, Inc. and let them work their magic. Their shop is right on my street, less than a mile away, and I have been driving past for over 20 years watching the huge projects they have completed.

(click on images to enlarge)
Back to Tower History Home Page
North 80 Foot Repeater Tower Main Page
East 38 Foot Repeater Tower - West 48 Foot VHF / UHF Tower
Return to the KA1RCI Repeater Network Home Page
This page was last updated on
11/08/2010 and it has been viewed times.
Send mail to [email protected] with questions or comments about this web site.
Copyright 1995-2010 Steven M Hodell
Copyright in these pages, in the screens displaying the pages and in the information, materials and other content contained in this web site is owned by Steven M Hodell unless other wise indicated and is protected by U.S. and international copyright laws and treaties. The information, materials and other content of this web site may not be copied, displayed, distributed, downloaded, licensed, modified, published, reposted, reproduced, reused, sold, transmitted, used to create a derivative work, or otherwise used for public or commercial purposes without express written consent.